Thursday, October 29, 2015

Bundle Monster Occasions Collection - Halloween and Thanksgiving

Press Sample Affiliate Links

Bundle Monster Occasions Halloween and Thanksgiving Stamping Plates

Hello Loves!  So, turns out my salon job is whooping my tail!  I'm so exhausted by the time I get home, I just don't want to do anything.  Yeah, I wish I could tell you that I'm just so busy that it is killing me, but it's more like boredom.  lol  Things are off to a slow start, but I have faith they'll pick up soon.

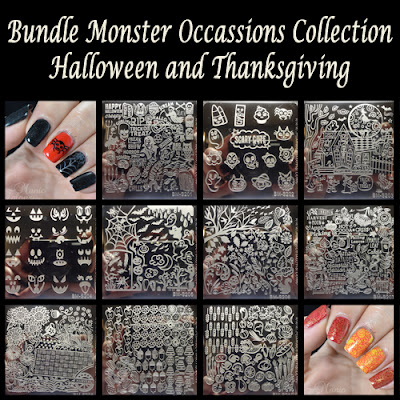
The good news is I had time the other day between clients to play with the Bundle Monster Occasions Collection Halloween and Thanksgiving stamping plates.  This collection consists of 5 Halloween themed plates and 5 Fall/Thanksgiving plates.  The images range from playful and spooky to scrumptious and inviting.

Ok, so I have another confession to make.  I'm struggling big time with stamping lately.  I think I mentioned a while back that the Two Foot Terrorist (aka my 2 year old) ran off with my favorite stamper and hid it only God knows where.  I have a few stampers that I am trying to adjust to using, but my stamping isn't as crisp as it should be.  With that said, I took pictures and a few swatches from each of the plates.  You will notice there are tons of skips in my swatches.  This is a stamper issue, not a plate issue.  I was able to get full pick up on all of the plates at one point or another, but I honestly gave up for these pictures.

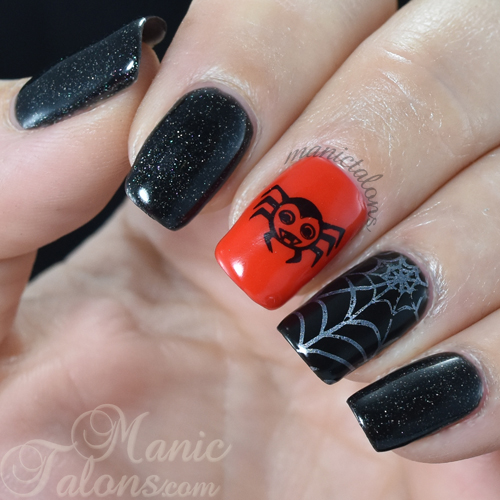
Ready to see some pictures?  Let's start with a simple Halloween manicure.  For this one, I used three Bundle Monster Speed Gels as the base: You're So Tragic, Cocktail Dress and Rouge Lipstick.  I then stamped with Bundle Monster Stamping Polish in Noir Black and Iced Silver.  The spider is from BM-S202 and the web is from BM-S205.  It is a very simple design, but I'm finding that I like simple right now.  Crazy, right?
Halloween Nails with Bundle Monster Occasions Stamping

So let's take a peek at the plates.  I'll show them in order followed by the sample stamps.  Again, the gaps in the images are me and not the plates.  :(

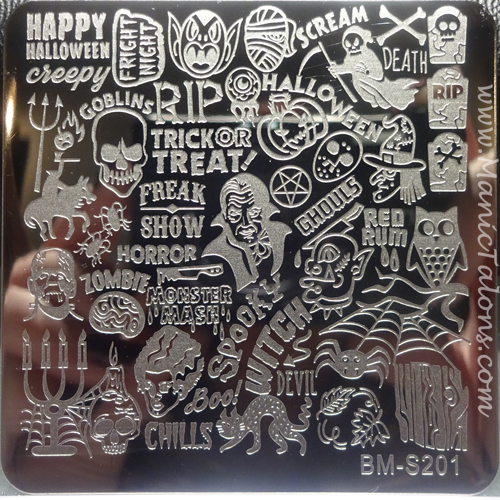
BM-S201 is a Halloween themed plate with lots of spooky words and images to choose from.  You can isolate the images or use them as a mashup.  My favorite part of this plate is the owl.  So freaking cute!
Bundle Monster BM-S201

BM-S202 is also a Halloween plate.  This one is made up of cutsie images.  The spider in the top left is the one I used for the Halloween manicure above.
Bundle Monster BM-S202

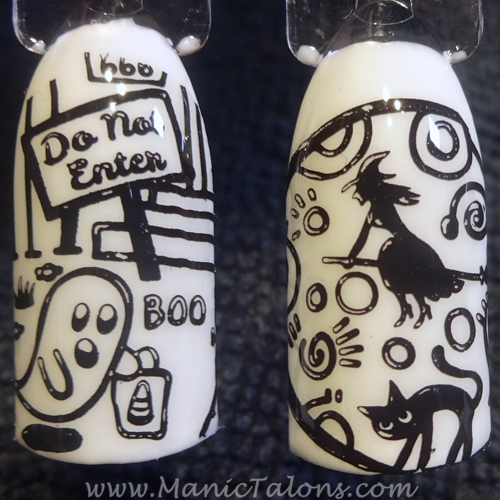
No Halloween Collection would be complete with a witch and a haunted house, right?  BM-S203 has that and more.
Bundle Monster BM-S203

Ugh...the skips...so sorry about those.  Yeah, so y'all tell me your favorite stampers in the comments!  I have the Bundle Monster Mega Stamper and I love it, but it's a bit too firm for super long nails and swatch sticks.
Bundle Monster BM-S203

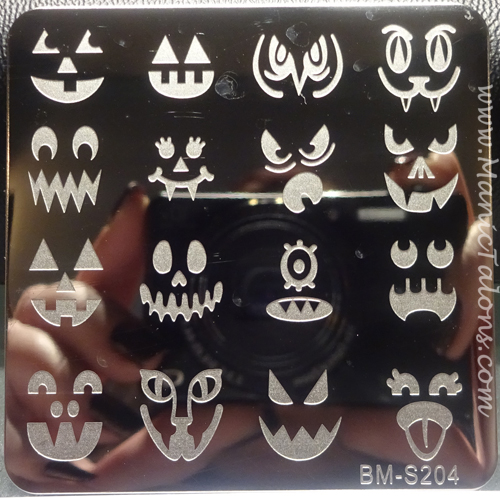
I adore the little jack-o-lantern faces on BM-S204.  They range from traditional to unique and fit nicely on the average size nail.
Bundle Monster BM-S204

Spiders and bats and creepy crawlers...BM-S205 has you covered.  Oh, and ghosts!
Bundle Monster BM-S205

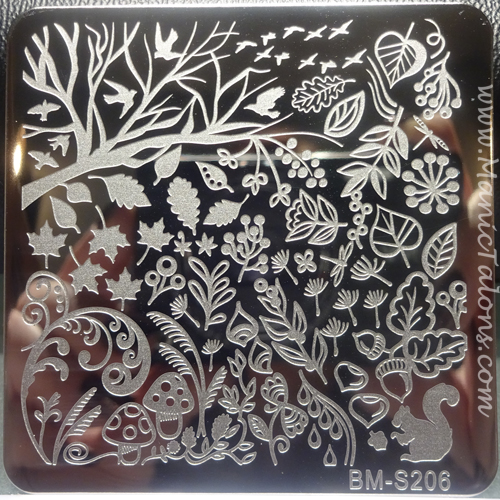
Moving on to the fall and Thanksgiving themed plates, BM-S206 is a mashup of trees, birds, leaves, and the cutest little mushrooms ever!  Oh, and a squirrel.  lol
Bundle Monster BM-S206

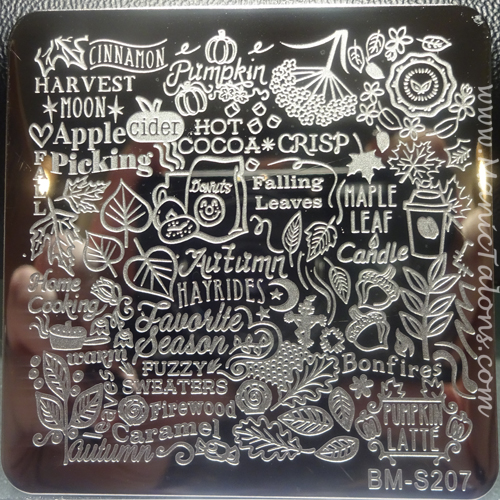
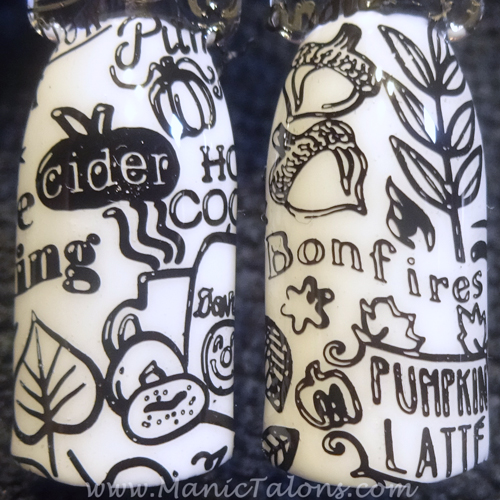
BM-S207 is another word plate, but this time with tons of fall themed words and phrases. 
Bundle Monster BM-S207

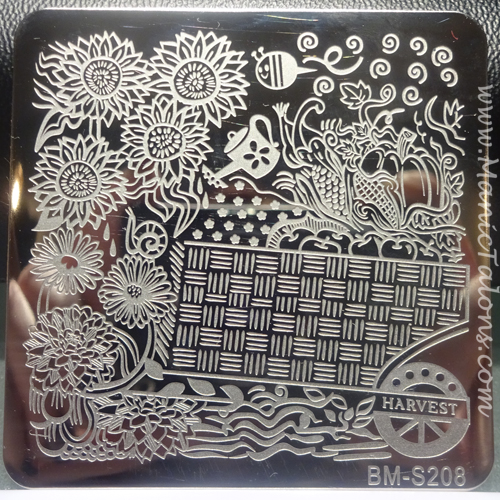
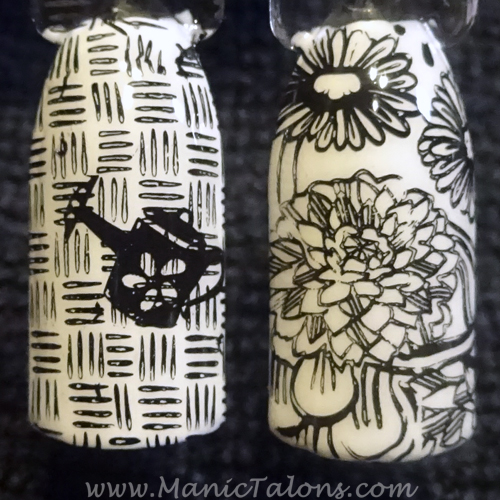
BM-S208 is a harvest themed plate with a great basket weave pattern, sunflowers and veggies.  I admit, I couldn't resist double stamping my sample with this one.  Oops.  ;)
Bundle Monster BM-S208

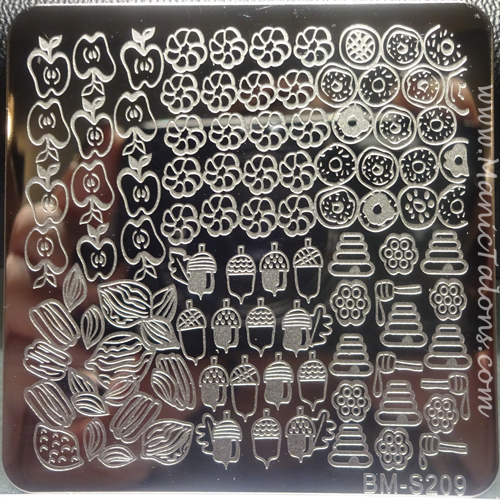
BM-S209 is a fall food plate, I think?  I see apples, donuts, acorns, honey, and I have no clue what those other two are.  Flowers and walnuts, maybe? 
Bundle Monster BM-S209

I hereby dub BM-S210 as the Vegetable Soup plate.  I mean, other than the wheat and the turkey, this plate is stocked with the ingredients for a superb veggie soup.  :)
Bundle Monster BM-S210

So there you have them - the Bundle Monster Occasions Collection - Halloween and Fall stamping plates.  My apologies to Bundle Monster for the crazy skipping images.  If you do a Google Image Search for Bundle Monster Occasions, you'll see better samples of stamping with these plates, but I wanted to show you the images since they're all so fun and adorable!

Oh, I have one more mani to show you.  For this one, I used Revel Nail Harvest and Festival as the base.  I then double stamped with Bundle Monster Stamping Polish in Liquid Gold and Crimson Red and the sunflower image from BM-S208.  I love how the nails turned out with the Red stamp over the gold.  I tried the reverse on the pinkie and ring finger and it didn't turn out quite as nice.  Oh well...can't love them all.
Double Stamped Sunflowers with Bundle Monster Occasions

If you like the looks of these plates, you can pick up the set on Bundle Monster's website here or on Amazon here.

~Michelle

*The Bundle Monster Stamping Plates and Stamping Polishes featured in this post were provided by Bundle Monster for my honest review.  This post uses Amazon Affiliate links.  Purchases through these links generate commissions that help fund this site.  All other links are courtesy links and do not benefit ManicTalons.com.


Read more ...

Wednesday, October 28, 2015

Social Claws: White Webbing


It's a great day for a...white webbing!  Today's manicure is brought to us by my dear friend Angela who has recently launched her own facebook page called Social Claws.  Her goal?  To feature pretty nails and shelter kitties!  How freaking awesome is that?  I mean, who doesn't want to see pretty nails and adorable adoptable kitties?  I'm not even a cat person (allergies) and I still love seeing her posts.


To create this mani, Angela started with Akzentz Luxio Base.  She then used a Colour Shapers silicone tool, flat chisel, medium firm, size 2 and Cuccio Colour Veneer in Verona Lace to shape the french lines.  I haven't personally tried these tools, but Angela raves about them!  Stamping is Mundo de Unas White and the lacy web image from Born Pretty L015.  She finished with Akzentz Shine On topcoat and used Akzentz Bling On to attach the adorable pearl spider charm from Born Pretty.

(Photo Property of the McPherson County Humane Society)

In true to Social Claws fashion, the kitty featured with this White Webbing mani is a beautiful male Tiger Mix named Spider.  Spider is at the McPherson County Humane Society in McPherson, KS waiting for his forever home.  For more information about Spider and his precious bent ear, check out his PetFinder Page here.

Be sure to go follow Social Claws on facebook to see more of Angela's amazing manicures and precious kitties!

~Michelle

Read more ...

Monday, October 19, 2015

My Week in Review - Artistic Expressions

Sample Nails from Artistic Expressions Hair Salon

Hello Loves!  So, I finished out my first week doing nails at Artistic Expressions Hair Salon in Braselton, GA on Saturday.  Wow...what a week!  I want to start by telling you a little about how I ended up in this salon.  Then I'll show you some of my work for the week.  :)

I was originally talking to a salon in Athens, GA but it didn't really work out.  It is a fabulous hair salon, but something just didn't feel right - like it wasn't meant to be.  So I posted on my personal facebook page that I was looking for a salon to call home and started a bath.

A few minutes after I posted, a friend from high school tagged a salon owner in the post.  Less than 30 minutes later, I was cutting my bubble bath short to call Tracy about joining Artistic Expressions Hair Salon as their new nail tech.  She told me she had been looking for a tech for a long time and felt like she needed to contact me immediately.  It was 9:30 in the evening when we connected by phone.  A few days later, I visited the salon and it just felt right.  I don't know how to describe it.  It was like an instant connection.  Instead of an interview, it felt more like old friends catching up and designing a nail room together.  Simply amazing.

As you know, it took a few weeks for me to get my inventory in order so I could get started. Of course, Tracy had a few things to order as well.  I spent a few days the week before last setting up my room and I officially started this past Tuesday.  I took a video of my room, but it was a little premature.  Tracy added some art on the wall the next day.  So I'll take a new one.  Plus, I was moving a little too fast so if you watch the one I took last week you might get drunk.  lol

So, how did my first week go?  Well...I would LOVE to tell you that I was swamped with back to back clients all week long, but that would be a lie.  Starting out is always a little slow.  People don't know I'm in town yet.  But I did do some really fun sets.  Want to see them?

Let's start with my very first client.  The salon is family owned and these hands belong to "Mama".  She never had a gel polish manicure before, so it was really fun.  She chose a simple french.  I used Cuccio Verona Lace on the tips.  Honestly, I'm not 100% happy with how these turned out.  I need a new cleanup brush.  But she loves them and that's what really matters.
Basic French Gel Polish with Cuccio Verona Lace

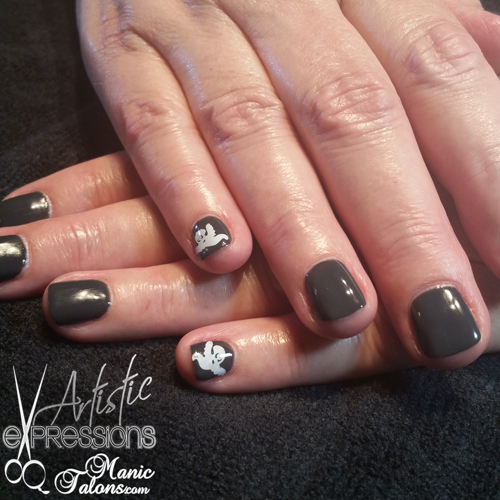
My next client is one of assistants in the salon.  She wanted dark grey with some simple nail art, so we chose Pink Gellac Smoked Grey from the Majestic Collection and these cute little ghosts from one of my Dashica plates (I think...I know I said I would tell you which products I used, but I completely forgot to write it down and my plates are at the salon).  The color is off in this picture.  I quickly learned that I need to do something different with my photo situation.  :/
Simple Ghosts with Pink Gellac Smoked Grey and Dashica

This next set is gel extensions using tips and Cuccio T3 sculpting gel.  This was my first attempt with this gel and I absolutely LOVE it.  I have the controlled formula and it was so easy to work with.  We then added Madam Glam What Color Is The Dress.  This is one of the thermal gel polishes and everyone seems excited by them. 
Gel Extensions with Madam Glam What Color Is the Dress

This next set was my first non-salon client (as in had never been to the salon before).  She found me through facebook and I was super excited to do her nails for her.  She told me that she has had a very hard time finding salons that do art in the area.  You have no idea how happy that made me.  She chose Madam Glam Sweet Lavanda and we added a few simple purple flowers on an accent nail with Wildflowers Nail Art Paints.  I couldn't have asked for a sweeter first non-salon client.  Thank you, Sabrina, for the pleasure of doing your nails!  I can't wait to see what we can come up with next time.  (Excuse the lighting.  I tried using the flash on this photo.  I'll get this lighting thing figured out, I promise!)
Madam Glam Sweet Lavenda with Simple Flowers

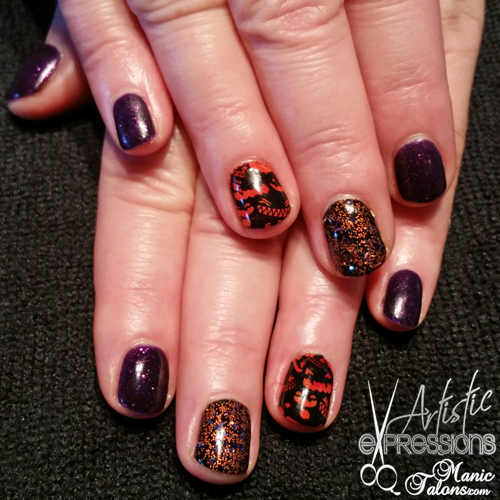
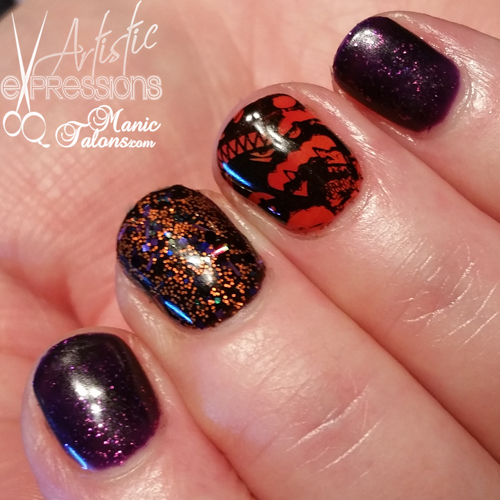
This set is one of my favorites from the week.  Tracy asked for some fun Halloween nails.  We started with Madam Glam Purple Sky for her main color.  Of course, the photo doesn't do it justice, so check out my swatch here to see the true beauty of this polish.  We then added some ArtsyFartsy Crafts glitter over a Madam Glam Perfect Black base on her middle fingers.  I can't remember the name of the glitter mix and its at the shop.  I know...blogger fail.  The ring finger nails have a base of Madam Glam Blood Orange with three of the Magpie Neon Pigments swirled over them.  You can't see it in the pictures, but the pumpkin faces really glow.  I then stamped with Konad Black and the jack-o-lantern faces from Bundle Monster BM-H06.
Halloween Nails with Madam Glam, Glitter and Stamping

In keeping with the fun manicures, I also did a full set for McKenna.  She is an assistant at the salon and these are her birthday nails.  I extended her natural nail with tips and Cuccio T3.  Then I added Madam Glam Perfect Black and randomly scrubbed the Bundle Monster Star Dust pigments into the tacky layer.  Finally, I stamped with Konad Black and the scales image from LilyAnna 09.  A few crystals and shells completed the look.  Yep, this is a variation of my Mermaid Nails from a few weeks ago.  (Now if I can just get to her wear gloves when she works with hair dye so her cuticles aren't stained, we'll be in business lol)
Gel Nail Extensions with Mermaid Design

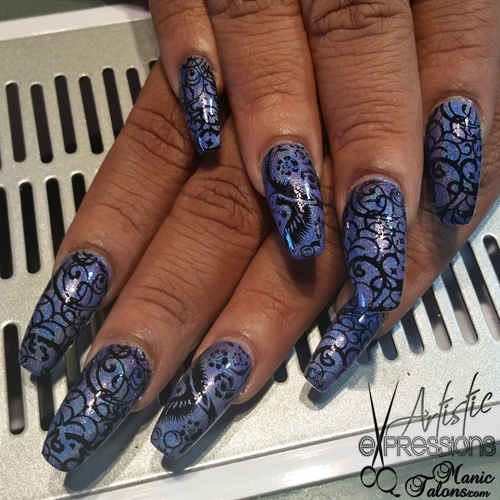
The final mani I want to show you is a polish change and nail art I did for Nikki.  Nikki was my second non-salon client.  I met her at the gas station where I stop to get my coffee in the mornings.  lol  She has also been looking for someone to do nail art, so I stayed late on Saturday to do her nails after she got off work.  I did not do her extensions - those are acrylic from another salon.  I just changed her polish.  Since she has really fun blue highlights in her hair, we decided to go with KBShimmer What Are You Wading For? stamped in Konad Black with two different images from the Pueen Encore Collection.  I absolutely LOVE how these turned out.  I have to admit, I don't usually stamp over polish so this one made me really nervous.  I used one of my firmer stampers, which made it difficult with her long nails.  Next time I'll use one of my squishy stampers.  Thankfully I only smeared one thumb a tiny bit when I applied the top coat.  Whoo Hoo.  lol  I can't wait to see what design we do on her nails next.  She loves the bling as much as I do!
KBShimmer What Are You Wading For? with Pueen Encore Stamping

I did a few other manicures and one pedicure last week as well, but I forgot to take pictures of them.

All in all, I would call it a great week.  I can't wait to see what next week has in store for me!  And I'm super excited that people are excited for nail art.  Y'all don't even know how much that makes me want to squeal.  I mean, sure, plain colors are great...but you know I love the art.  :)

That's all for today.  I promise I'll do better with product names and pictures next week.  Oh, I added a services tab to my menu at the top of the page if you're curious which services I offer.  For anyone local, please come see me!  I would LOVE to do your nails.  :)

~Michelle

Read more ...

Friday, October 16, 2015

Monster Madam Glam Swatch Post!

Press Sample

New Madam Glam Gel Polish Swatches

Hello Loves!  If you follow Madam Glam, you probably know they just added a ton of new colors to their gel polish line.  I have 11 of them to show you today.  Ready to see them?  Of course you are.
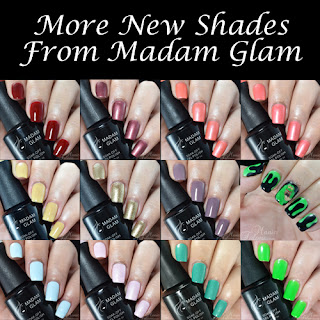
First up is this gorgeous dark red cream with brown undertones called Very Chic.  It is opaque in two coats but has an almost jelly finish that would be perfect for sandwiching.
Madam Glam Very Chic Swatch

Carmine Pink is a peachy pink with a frosty silver shimmer.  She is also opaque in two coats, though I found a very thin third coat helps even out the brush strokes in the shimmer.
Madam Glam Carmine Pink Swatch

If you like Carmine Pink but prefer a pinker tone, True Story is your color!  They are very similar in finish with True Story being just a tad frostier.  True Story is also opaque in two.
Madam Glam True Story Swatch

Clean Slate is a gorgeous blue leaning teal with an ultrafine silver shimmer.  Yep, you guessed it...another two coater.  I ended up taking these photos with my phone to get the color right, so I apologize for the lower quality images.
Madam Glam Clean Slate Swatch

Flawless is, well, flawless!  This soft baby pink has a subtle silver shimmer that adds a super romantic flare.  I did find that I needed three thin coats for full coverage with this one.
Madam Glam Flawless Swatch

Did someone say full coverage gold glitter?  It's Not you, It's Me is exactly that.  The glitter in this polish is super fine - almost a shimmer - and it offers full coverage in two to three coats.  This is an amazing accent color for fall!
Madam Glam Its Not You Its Me Swatch

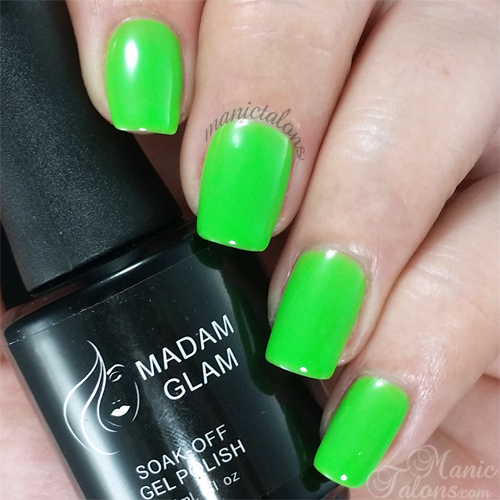
Hello bright and beautiful Neon Lime Green!  This super vibrant neon green is opaque in two to three coats and really pops.  I had to use my cell phone to capture it, and I couldn't bring myself to take it off when I swatched it!  So be sure to check out my nail art using this color at the end of the post in case you missed it on facebook or instagram. 
Madam Glam Neon Lime Green Swatch

Pure Cloud is a soft, pastel blue cream with awesome coverage in two coats.  This is the color I think of when I think baby boy. 
Madam Glam Pure Cloud Swatch

Sparkly Topaz is one of my absolute favorites in this group of swatches.  This wine toned shimmer almost has a metallic shine and is perfect for fall.  In some lighting it appears more red and in others it has a purple tone.  Gorgeous!
Madam Glam Sparkly Topaz Swatch

That Thin Line is what I would call a caramel latte shade.  It appears more yellow on my skin tone but is more beige in the bottle.  I'm not a huge fan of this one simply because it doesn't look very nice on me, but the coverage is awesome in two coats and it would be beautiful on someone with a different skin tone.
Madam Glam That Thin Line Swatch

Finally, Twilight Lilac is a dusty lilac purple cream.  Yep, she's opaque in two coats.  I didn't think I would like this one as much when I saw it in the bottle, but I find that I really love it on my nails.  Its like nude meets purple but with color.  (And yes, I know that made absolutely no sense at all...but I'm sure you get what I mean.  lol)
Madam Glam Twilight Lilac Swatch

Ok, so as I mentioned above, I just couldn't get past Neon Lime Green.  You see, we watched the Ghost Busters movies the other night and Slimer apparently decided to haunt me.  And you have to admit that this green is perfect for slime!  So I broke out my Wildflowers Nail Art Paints and added the black to create slime drips.  I thin thinned my white and added a few accents to the resulting slime areas.  Slimer is freehand with acrylic paints and I then added Neon Lime Green accents to bring him back up to the brightness of the other nails.  Finally, I used my Akzentz Lights Out to add some glow in the dark action over Slimer and the Neon Lime Green Drips.  The glow made Slimer look a little fuzzy, but I still adore how he turned out!
Ghostbusters Slimer Nail Art with Madam Glam Neon Lime Green

Here's a glow shot.  Pretty fun, right?  Sadly, I didn't get to wear it for long.  The glow action freaked out the Two Foot Terrorist (aka my 2 year old son) in the middle of the night.  Such a shame.  But at least I have pictures!  lol
Glow in the dark Ghostbusters Slimer Nail Art with Akzentz Lights Out

That wraps up my new Madam Glam swatches!  I also learned the Madam Glam has polish matches for several of their gel polish colors.  I have a few of the polishes to play with and will show you those soon.  :)  As always, you can pick up these colors and many more at www.MadamGlam.com.

~Michelle

*The Madam Glam Gel Polishes featured in this post were provided by Madam Glam for my honest review.  All links within this post are courtesy links and do not benefit ManicTalons.com.
 

Read more ...