Wednesday, July 30, 2014

Glam Polish Swatches and Review

Press Sample

Glam Polish Swatches and Review

Hello loves!  I have some exciting swatches to show you today from Glam Polish.  Glam polish is an Australian based Indie company that is known for their amazing holographic polishes and unique finishes.  Needless to say, when Rachel emailed that she was coming to the US and offered to send me a press kit,  I accepted without a second thought!  Finishes like these simply aren't available in gel polish and are just too gorgeous!

Ok, ok, enough babble.  Are you ready for some swatches?  The first polish I have to show you is That Old Black Magic from the Diamonds Are a Girl's Best Friend Collection.  That Old Black Magic is a black base (I almost want to call it a charcoal grey) with gorgeous holographic shimmer.  The particles are a bit larger than your traditional linear holo, resulting in a chunkier rainbow.  This is the first Glam Polish that has ever been on my nails, and I adore how easily it applies!  The first coat is a little thin, but the second builds beautifully.  I ended up using three coats out of habit, but two offered great coverage.
Glam Polish That Old Black Magic Swatch

I had a hard time capturing the rainbow with my standard bottle shot.  The samples I received are in mini bottles, which really jack with my standard pose.  So I took a few shots without the bottle as well.  You can see the rainbow much better in this next picture.  :)
Glam Polish That Old Black Magic Swatch

The next polish I have to show you is Bye Bye Baby, also from the Diamonds Are A Girl's Best Friend Collection.  This stunning aqua blue is packed with shimmer.  The holo effect on this one is subtle compared to the others, but it's blue!  You know me and my blues.  I did find this one a bit more sheer than the others, so it required three coats for full coverage for me.  But application was nice and even despite the mini sample bottles, which says a lot!  I usually struggle with the smaller brushes in mini bottles.
Glam Polish Bye Bye Baby Swatch

My camera really didn't want to pick up the subtle holographic effect from Bye Bye Baby, but it did light up the shimmer!  You can see the holo a little on the pinkie nail in this picture.
Glam Polish Bye Bye Baby Swatch

Witching Hour from the Exotic Illusions Series is a polish after my own heart.  This incredible, royal purple base has a strong holographic effect.  The rainbow is just amazing in person.  Sadly, my light box killed it and I didn't have much sunlight to work with since I swatch in the evening when the boys are in bed.  But believe me, if you're a fan of holos, you need this polish!  Application is dreamy.  It practically applied itself and is opaque in two coats.  Again, I swatched three out of habit.
Glam Polish Witching Hour Swatch

See, perfection!  If a polish lights up like this in my light box, you can imagine what it looks like in full sun.  :)
Glam Polish Witching Hour Swatch

The final polish I have to show you is Twilight Echoes, also from the Exotic Illusions Series.  Twilight Echoes is a deep magenta base with a strong holographic effect.  Like Witching Hour, application is quite nice and it is opaque in two.  This one is a bit different in that it is not only a holo but also has this amazing purple shimmer, so it looks incredible in any light.
Glam Polish Twilight Echoes Swatch

You can see the rainbow from the holo much better in this shot.  And the purple shimmer shows a bit here too.
Glam Polish Twilight Echoes Swatch

I couldn't resist including this shot too.  I repositioned my lights for this one to set the purple shimmer on fire.  It's simply beautiful.
Glam Polish Twilight Echoes Swatch

I did manage to catch a few minutes of sunlight.  It was more like a second or two, honestly.  I walked outside in full sun, snapped this shot of my swatch sticks, and the sun ducked behind the only freaking cloud in the sky and insisted on staying there.  That's just how my luck goes, I guess.
Glam Polish Swatches

What do you think?  Do you need some Glam Polish in your stash?  All shades are available from www.glampolish.com.au with shipping to Australia and the USA.  USA Shipping rates are $7.95 for the first polish and an extra $1.00 for each additional polish.  If you're outside of Australia or the US, no worries.  There are several international distributors to choose from.  Check them out here to find a distributor near you.  Oh, and don't forget to follow Glam Polish on Facebook, Instagram and Pinterest to see swatches and announcements about new collections.

~Michelle

*The Polishes featured in this blog post were provided by Glam Polish for my honest review.

Read more ...

Monday, July 28, 2014

Guest Post by Pamela from A Rose Among Thorns

Hello Loves.  My bestie, Pamela, has finally decided to get her butt in gear and dedicate more time to her blog.  She's a gel polish fanatic too, and I may have been pestering her about it for a while now.  ;)  To celebrate, she offered to share one of her adorable manicures with you here.  Since I'm still playing the "Its my birthday weekend and I'm feeling lazy card", I eagerly accepted her offer.  Be sure to check out her blog!  Now I'll turn it over to Pamela.  I'll see you Wednesday with some gorgeous Glam Polish swatches.  :)

~~~~~~~~~~~~~~~~~~~~~~~~~~~~~

Hello everyone!

I'm Pamela from over at A Rose Among Thorns. I'm not only lucky enough to 'know' Michelle online, but she's also my best girl friend in real life. I've offered to give her a post break and write one for her :)

I have recently started a challenge for myself pairing manicures with inspirational items. My current kick is items in my wardrobe. I found this amazing outfit on Hopes.com. Not only is it super cute it plays into Michelle's love of dots.
Couture Gel Polish
The colors used in the mani are Couture Million $ Tweet, Couture Little Black Dress, and Couture Ooh La La French.

Super cute and a little funky. Next time I'll add a little bow to throw it over the top!
Couture Gel Polish, Doticure

Thank you to Michelle and thank you all for reading! I hope to be invited back soon :)

~Pamela
Read more ...

Friday, July 25, 2014

These Are a Few of My Favorite Things (Pic Heavy)

Affiliate Links

Hello Loves.  Tomorrow is my birthday and I’m treating myself by not doing my nails.  Hilarious, right?  Instead, I’ve decided to dust off my pen and try my hand at writing music.  Oh how I crack myself up!  But seriously, today’s post is about a few of my favorite things.  ;)

(To the tune of “My Favorite Things” by Richard Rodgers and Oscar Hammerstein, II)

My Favorite Things by Manic Talons


Ok, so now that my cheesy song writing is out of the way, ready to break it down verse by verse (with photos, of course!)? 


~~~~~~~~~~~~~~~~~~~~~~~~~~~~~~
Couture Gel Polish and Espree Salon Lamp
Great glitter toppers and holos and multis
Messy Mansion Stamping that makes my heart sing
These are a few of my favorite things!
~~~~~~~~~~~~~~~~~~~~~~~~~~~~~~

Couture Gel Nail Polish

I’m often asked which gel polish brand is my favorite.  I actually have a top 5 that rotates around quite a bit.  Beyond #1, I can’t put them in order no matter how hard I try.  But my absolute favorite gel polish brand is Couture Gel Nail Polish (no surprise there, right?).  The polishes are highly pigmented, 99% of them apply easily, and they soak off super fast.  Not to mention of the 105 colors in the line, there are only a few that I don’t really like.  As I’m sure you’ve noticed, this is the brand I reach for as a base for my art more often than any other brand.

Couture Espree Salon Lamp

Another question I get asked frequently is which lamp I use.  I have several lamps in my arsenal, but my go-to lamp is the Couture Espree LED.  It has yet to fail me, cures perfectly every time, and is compact so it doesn’t take up a ton of room on my desk.  The only down side to the Couture lamp is that it isn’t 5 finger cure for me.  5 fingers will easily fit, but if you have man hands like mine, it can be difficult to position your thumbs correctly.  If you have smaller hands, 5 finger cure won’t be a problem.  :)

Ok, so I mentioned glitter toppers, holos and multichromes.  Want to see my favorites?

Favorite Gel Glitter Topper:  Revel Nail Gel Polish in Disco.  Disco is like Gelaze Fairy Dust or Gelish Vegas Nights on Steroids.  So pretty and blingy! 
Revel Nail Gel Polish Disco Swatch

If you missed it before, check out my full Revel Nail review here.  Also, Revel has recently increased their prices just a tad (they're still super affordable), but they have extended a discount on the full collection to you!  Use code "manic" to purchase the base line of 24 colors plus top and base for just $150.  Here's a shot of Disco over Mai Tai.  I just love this topper!
Revel Nail Disco Over Mai Tai

Favorite RNP Glitter Topper (for the moment lol):  KBShimmer Happily Ever Aster.  I mean, seriously…purple and aqua?  Yes please!
KBShimmer Happily Ever Aster Swatch

Favorite Holo:  This is a toss-up between Girly Bits Bachelor’s Button and KBShimmer Stark Raven Mad.  Both are absolutely gorgeous with strong linear holographic effects.  I adore the blue of Bachelor’s ButtonYou know me and my blues.
Girly Bits Bachelor's Button Swatch

And KBShimmer Stark Raven Mad is the perfect black holo.  Just look at the rainbow!
KBShimmer Stark Raven Mad

Favorite Multichrome:  Girly Bits Wave the Sails.  Hands down, absolute fave!  The shift in this polish is so strong I don’t think I could take a photo without capturing it, and that’s saying something!
Girly Bits Wave the Sails Swatch

And Messy Mansion!  Oh my beloved Messy Mansion stamping plates.  I have a lot of plates from a lot of different companies (I stopped counting at 300 – oh the shame of being a hoarder!), but I tend to reach for my Messy Mansion plates the most.  I love the complexity of the larger images.  They fit my longer nails with ease and stamp perfectly every time.  The quality makes all the difference in the world, and the unique designs don’t hurt either.  ;)  Her direct shop is down due to technical difficulties at the moment, but several of the Messy Mansion plates are available on Amazon too.  MM44 pictured below is my current favorite from my Messy Mansion collection.
Messy Mansion MM44


~~~~~~~~~~~~~~~~~~~~~~~~~~~~~~
Girly Bits, KBShimmer and Bliss Kiss Nail Oil Pens
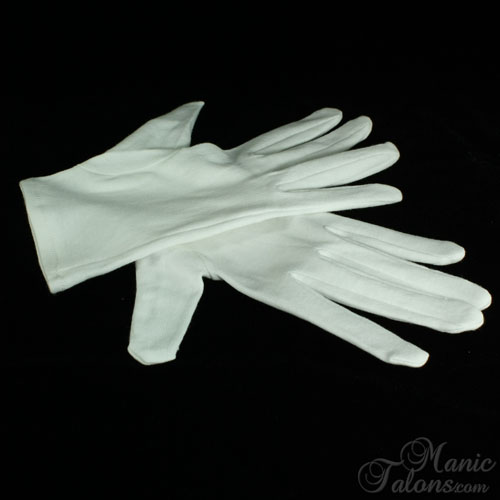
Palmers Cocoa Butter and soft gloves to sleep in
Nail Tek Crystal Nail Files that smooth out the dings
These are a few of my favorite things!
~~~~~~~~~~~~~~~~~~~~~~~~~~~~~~

Ok, so I guess we’re moving on to my hand and nail care favorites.  To be completely honest, my absolute go-to for cuticles is Adobe Photoshop Elements.  Just kidding!  But not really.  Thing is, I’m human.  And I’m a klutz.  My cuticles are not perfect by any stretch of the imagination.  I do follow a rigorous hand and nail care routine, but there’s no magic potion out there that will fix my constant paper cuts and hang nails from my job.  But I have also gotten funny about my photos, so I do use photoshop to erase cuts and hang nails that would distract from the polish and nail art.  With that said, photoshop can only do so much without creating alien hands, so I rely on my oils and creams to keep my hands mostly photo ready.

Manic Talons Favorite Cuticle Oils

I rotate three different cuticle oils on a regular basis.  I don’t know that one is better than the other, but they all have their great points and all seem to really help keep my cuticles in line. 
  • Bliss Kiss Nail Oil is my go-to for getting my hands back in shape when I have neglected them or had a particularly rough week.  A few days of constant application tames the madness.  Bliss Kiss is a little pricey, but it’s worth it in my opinion! 
  • For photos, I use KBShimmer’s Lemongrass Cuticle oil.  I don’t know how she managed to create an oil that isn’t oily, but this stuff is like magic for fixing dry spots without creating major sheen in photos!  And it smells wonderful.
  • Finally, for regular maintenance, I’m loving Girly Bits Frazzle Fixer cuticle oil.  I have the sangria fragrance, and it is simply divine.  It reminds me of sweet tarts.  I like this one because it soaks in nicely but seems to stick around longer so I don’t have to constantly reapply.

Palmer's Cocoa Butter Formula

For a hand cream, I’m a bit old fashioned.  I’ve tried a lot of different creams, but nothing seems to work quite as well as Palmers Cocoa Butter Formula for deep moisturizing.  Plus it really helps smooth out my skin tone.  Bonus: It keeps my skin plumped up and wrinkles less noticeable (I’m no spring chicken, you know).  I apply it a few times during the day, but my biggest tip is to use it at night with moisturizing gloves!  I apply my cuticle oil, then slather on the palmers and slip my hands into my gloves before bed every night.  When I wake up, my hands are smooth as silk and as close to photo ready as they will ever get!

Moisturizing Gloves

Speaking of gloves, if you've never tried moisturizing gloves, you HAVE to try them.  The light weight cotton makes them easy to sleep in without being irritating or hot, and the results are just fabulous.  These from Spa Sister are the ones I use.  I have several pair.

Nail Tek Crystal File

Finally, my new found love is my Nail Tek Crystal Nail File.  I have no clue why I waited so long to try a crystal file.  I guess I just didn’t believe the hype and the price was a bit of a downer.  But I finally broke down and bought one a few months back, and I swear I will never use a regular file again.  This thing rocks!  Not to mention it makes quick work of filing down my length when these talons get out of control.  I hate filing my nails, so any file that works quickly without causing spits is an A+ in my book.  Best $10 I ever spent.  There may be other files out there that are even better than this one, but the Nail Tek file is the one I use.  :)


~~~~~~~~~~~~~~~~~~~~~~~~~~~~~~
A Monstrous light box and black velvet backdrops
An Old Canon Rebel - fast shutter low f-stops
Craig Gum for tips and for tweaking my lighting
These are a few of my favorite things!
~~~~~~~~~~~~~~~~~~~~~~~~~~~~~~

Ah, and here we are at my favorite part of my favorite things.  I get a lot of questions about my photos too.  Photography is a hobby for me in itself.  I am constantly tweaking my setup and improving my photos.  I enjoy this part of blogging as much as I enjoy swatching and creating the nail art itself.  I take all of my photos in a comically large light box from Cowboy Studio with a custom black velvet backdrop.  This box is way bigger than anyone would ever need for hand photography (30x30 cube), but I do product photography on the side as well and need the larger box for that.  Plus I love that I can climb inside the box to get the perfect angle for my shots if needed.  It can also double as a play tent for children.  lol

I use four (yes, four…remember, huge box) light sources for my photos.  One from the top, one from each side, and one shining directly into the box from the front to highlight shimmers and the gloss of the top coat.  The lamps all hold compact florescent bulbs in the 6000 kelvin range (in other words, they mimic natural daylight in the shade). I picked these up at a local specialty lighting store, so I don't have a link to share.  Here's a shot of my setup (taken with my iphone).

That covers my setup, but I’m often asked which camera I use.  My camera is a Canon Rebel XS.  It has served me well in the 4 years that I have owned it and has all of the features I really need, but I’m looking to upgrade soon.  Why?  Because new toys are fun!  My little Rebel is a great camera and I love the photos I take with it.  As a starter DSLR, I can’t fault it at all and highly recommend it.  I’m simply ready to move on to bigger and better things.  ;)
Canon Rebel XS
Excuse the weird color cast.  My iphone takes strange pictures.  Oh, and excuse the nail polish on the shutter button!  But I guess that proves that this is a picture of my actual camera.  ;)

Finally, my absolute favorite blog/photography “thing” is this guy:
Seld Portrait by Craig Gum
(Photo Credit: Craig Gum Photography)

No, that’s not my husband (though he does deserve an honorable mention for putting up with my blogging shenanigans).  The gentleman pictured above is Craig Gum of Craig Gum Photography.  To call Craig a photographer is like calling the Eiffel Tower a building.  He’s so much more!  He’s an artist, a visionary, and a master of light.  Seriously amazing talent.  Check out his website and I’m sure you’ll agree (warning: his website contains nudity and may not be appropriate for work – so you might want to check out his facebook page instead.  His images on facebook show a bit of skin, but have been edited to meet facebook's requirements.) 

So, why do I list Craig as one of my favorite things?  Well, aside from being an inspiration, he’s also a hell of a nice guy.  How many established, internationally published artists do you know that you could walk up to and say “Hi.  I take photos of nail polish and post them on the internet.  Will you help me improve my photography?” and not get laughed out of the room?  I met Craig through my brother’s former business of mixed martial arts promotions.  I knew his name and had said hello in passing, but that was about it.  When I was struggling with a few photos, I took a chance and fired off a message to him on Facebook.  I didn’t really expect him to answer, but he did!  He walked me through the tweaks I need to conquer my nemesis - Couture Spa Day.  I later attended a photography class he offered at his studio and learned even more tricks.  I still pick Craig’s brain from time to time, and I always learn so much more than I ever imagined.  Seriously, y’all, Craig’s kindness and willingness to help a crazy hobby photographer took my photos from this:
Old Swatch Photos

To this. 
New Swatch Photos

I am eternally grateful to Craig for all of his advice and patience with me over the past year!  And I fully credit my success as a hobby photographer and blogger to his instruction.  :)  But I’m not finished yet.  I’m planning to book at least one one-on-one session with Craig in the near future, so expect my photos to get better still!


~~~~~~~~~~~~~~~~~~~~~~~~~~~~~~
When a nail breaks, when my art fails,
When I just end up mad
I simply remember my favorite things
And then I don’t feel so bad!
~~~~~~~~~~~~~~~~~~~~~~~~~~~~~~ 

So there you have it – my favorite things.  :)  I hope you’ve enjoyed this post and my silly attempt at song writing!

~Michelle

*This post uses Amazon Affiliate Links.  Purchases through these links generate commissions that help fund this site.

Read more ...

Wednesday, July 23, 2014

A First Attempt at Nail Foils - Foiled Dots

Affiliate Links Press Sample

Hello Loves!  I posted an open invitation for my fans to share their manicures on my facebook page last week.  I was surprised to see several foil creations were shared, and it inspired me to get my foils out and give them a try.  I've had these in my nail art collection for a while but after reading how difficult they can be to work with, I never had the urge to play with them.  But seeing so many beautiful creations changed my mind.
Manicure with nail foil and Couture gel polish

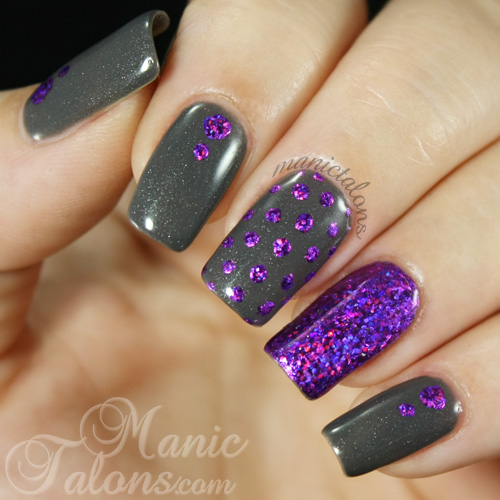
For this look, I did a complete gel manicure with Couture Gel Polish London's Fog.  London's Fog is a beautiful, shimmery grey gel.  It is opaque in two coats.  Please excuse the difference in skin tone and nail length in the swatch photo.  This is one I took this winter when my nails were shorter and my skin was quite pale (not that it isn't pale now, but it is less transparent in the summer).
Couture Gel Nail Polish London's Fog Swatch

After I removed the tacky layer from the top coat, I applied nail foil glue to the entire nail on the ring finger and added dots of foil glue to the other nails.  Once the glue dried, I pressed the transfer foil sheets onto the glue, then peeled them back off leaving the foil behind.  I then added a layer of Couture Gel Top Coat to seal the foil.  I have had this foil in my collection for so long now that I honestly don't remember where I got it.  It was a small square that is enough foil to cover maybe 5 nails if I covered them completely.  I tried to find them online but didn't see anything that looks like them.
Manicure with nail foil and Couture gel polish

I would love to be able to tell you that foil is the easiest thing ever to use, but it completely wasn't for me.  My nails have such deep c-curves that the foil creased on the nail.  I had to go over the ring finger twice to get full coverage.  And the dots...those were interesting too.  On the middle nail, the foil actually pulled the glue dots off of the nail in several places.  So I had to dot those a few times to finally get the design to transfer.  My final thought:  Foil is difficult and something I really need to practice to master!

Have you played around with nail foils?  Any tips or tricks to share?

~Michelle

*This post uses Amazon Affiliate Links.  Purchases through these links generate commissions that help fund this site.  The polish featured in this post was supplied by Couture Gel Nail Polish for my honest review.  All other products used were purchased by me.

Read more ...

Monday, July 21, 2014

Pueen Encore Collection - Swatches and Review (pic heavy)

Affiliate Links Purchased by Me

Pueen Encore Collection Review

Hello Loves!  As you know, I'm a huge fan of Pueen stamping plates.  I have all of their collections, so it was just natural for me to get the new Encore Collection as well.  I left several of the photos in this post as very large files so that you can click on them and expand them to see the detail.  I apologize if the large photos slow down the load time of the post.

Let's start with a mani, shall we?  I started with a base of FingerPaints Gel Polish in Petite Bouquet.  Petite Bouquet is from the Spring collection and is limited edition, but I'm pretty sure my Sally Beauty Supply had them on clearance so if this is a color you like you might still be able to find it.  I then stamped with Sally Hansen Insta-Dri Grape Going and a portion of the image from SE01B.
Subtle Stamping Manicure with Pueen Encore Collection

Now onto the review.  The Encore Collection plates are different than any of the plates we have seen so far in that they are etched on both sides.  I really like this feature because it minimizes the space required to store them.  Not to mention the 8 designs compressed to 4 plates weighs half of what it would if they were only etched on one side.

The plates come in this cute accordion style holder.  Nevermind that the bow on mine is upside down, it's not a bad way to store them, I think.  The only down side I can see is that the pockets inside are a much thinner plastic than the vinyl sleeves Pueen has used in the past.
Pueen Encore Collection Case and Packaging

The actual plates come in vinyl sleeves.  This is where I have to question what the designers at Pueen were thinking.  As you can see, the sleeves have knockout style windows to expose the etched portion of the plate.  This is great in theory - it allows the sleeve to remain on the plate to protect your hands from the sharp edges. 
Pueen Encore Collection Packaging

Sadly, theory doesn't always translate to reality.  When I tried to remove the knockout window, I found that it wasn't cut very well and the vinyl started to stretch and rip.
Pueen Encore Collection Packaging

I was able to remove it carefully with scissors with only a little stretching, but then I encountered the next problem.  The plates are protected inside the vinyl cover by a blue film.
Pueen Encore Collection Packaging

I'm not sure how Pueen expected us to remove the film without destroying the vinyl sleeve.  As you can see, even after carefully removing the film, the sleeve is badly stretched.
Pueen Encore Collection Packaging

So, yeah, I'm calling the packaging on this one a fail.  As you may have noticed in the post preview picture, I ended up cutting the sleeves off of all of my plates.  They just aren't practical.  Even if they didn't stretch out of shape, I can see them collecting polish and limiting the direction you can scrape.

The great news is that the plates themselves are fabulous!  The designs are quite nice, though some elements are similar to those in the Buffet collection.  The back sides of the plates are less polished than the front, but it doesn't impact the images at all.  I only found one spot on one plate that gave me touch of trouble, but a second attempt with a different scrape direction cleared it right up.  Want to see closeups of the plates and my test stamps?  These are the photos I left a little large so you can click them to blow them up and see the details better.  The photos speak for themselves, so I'll shut up and let them.  ;)

Pueen SE01 A and B

Pueen SE01 A and B Test Stamps

Pueen SE02 A and B

Pueen SE02 A and B Test Stamps

Pueen SE03 A and B

Pueen SE03 A and B Test Stamps

Pueen SE04 A and B

Pueen SE04 A and B Test Stamps

I just realized that some of the test stamps are upside down.  Sorry about that!  But I think they still show how the images transfer so I'm going to leave them.

What do you think of the Pueen Encore Collection?  Do you need it in your stamping arsenal?

~Michelle

*This post uses Amazon Affiliate links.  Purchases through these links generate commissions that help fund this site.
All items featured in this post were purchased by me.
Read more ...