Tuesday, December 31, 2013

Happy New Year!

Affiliate Links Purchased by Me

Happy New Year!

I usually don't make resolutions because, well, I know I'll break them.  So this year I am making some blogging resolutions that I know I can keep!

1) I will take better pictures.  I have a great camera, but I don't fully understand how to use all the features.  To remedy this, I'm taking a class on the second that is being offered by an amazing local photographer by the name of Craig Gum.  He has helped me with some white balance issues in the past, and I'm super stoked to have the opportunity to pick his brain some more.  Check out his use of light!  (Disclaimer: some of his work includes tasteful nudity)

2) I will try new techniques and do more video tutorials.  I experimented outside of my comfort zone in 2013 and picked up a few new techniques, but I really plan to test the limits in 2014.

3) I have been supported over the past few months by some incredible bloggers in the nail community.  In 2014, I will do one manicure a month that is inspired by another blogger - and attempt to do techniques with gel that are usually done with RNP.

4) I will post more than one shot of each manicure to better show the colors and art. 

Ok, ok...enough about my blogging resolutions.  Want to see my New Years mani?  I thought you might.
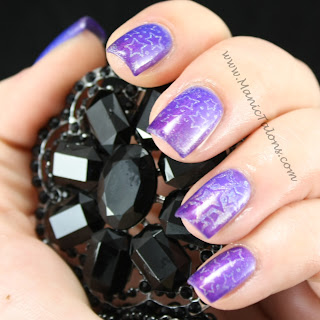
The base for this mani is LeChat Mood Frozen Cold Spell.  I swatched it previously in this post.  I then stamped them with Color Club Harp On It using images from Pueen 44 (ring finger) and Dashica XL sdp-8.  Stars aren't usually my thing, but I love the effect of the holographic stars over the thermal polish.

Here are a few more shots. 


I hope you all have a great New Year's Eve/Day and wish you the best year in 2014!

~Michelle

Read more ...

Sunday, December 29, 2013

Neutral, Gold and Ladybugs: A New Years Mani Fail

Contest Prize Purchased by Me

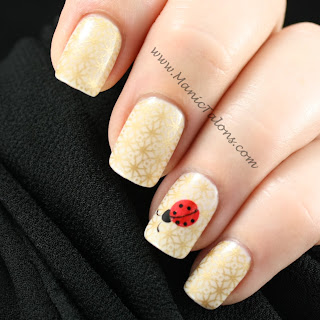
Hello Loves.  The mani I have been wearing for the past few days is a bit of a failure in my opinion.  It looked great in my head but didn't translate to the nail as well as I hoped.  I knew better than to attempt a neutral and gold combination.  Those two together never look good with my skin tone.  Since I love the overall design, I decided to show it to you even though it looks horrible on me. 

The base for this manicure is the second color I won in the Couture's Halloween Nail Art Contest.  Couture Gel Nail Polish Dance til Dawn is a gorgeous, slightly tan leaning, milky, white polish.  I took a picture before I added the stamping, but I forgot I changed my camera settings to take pictures of the boys on Christmas morning so the pictures didn't turn out.  I snapped a few of my swatch stick to show you until I get a chance to do another hand swatch.
Couture Dance til Dawn Swatch

I also snapped a shot of Dance til Dawn beside Couture Ooh La La French, which is a pure white.  This shows the true color of Dance til Dawn much better, I think.  Dance til Dawn is on the left, Ooh La La French is on the right. 
Couture Dance til Dawn swatch

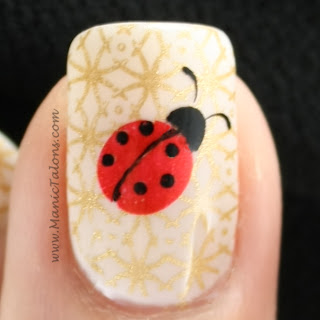
Onto the nail art details.  The full nail image is from Dashica XL sdp-34 and is stamped in Maybelline Metallic Bold Gold.  I then added this cute little ladybug from Pueen 46 from the Love Elements set.  The body of the ladybug is stamped in Sally Hansen Insta-dri Red-io Active and the head is Mundo de Unas Black.  I then used a fine dotting tool to fill in the spots on his back and a fine nail art brush to fill in between the wings.
gold and ladybug

You may be wondering why I added the ladybug for what was supposed to be a New Years mani.  Well, long story short, 2013 has been a rough year.  Ladybugs are believed to bring good fortune, and I can certainly use some of that in the new year!  Of course, the good fortune is mostly true for farmers since ladybugs eat crop destroying aphids, but maybe this adorable little lady will bring me a bit of fortune as well.  While I plan to remove this mani and try again before New Years, he will appear again in my next design.  :)

~Michelle

Note: Couture Dance til Dawn was provided as a contest prize by Couture Gel Nail Polish.  All other products used in this post were purchased by me.  

Read more ...

Tuesday, December 24, 2013

Merry Christmas Everyone!

Purchased by Me

Hello Loves!  Here's wishing each and every one of you a Merry Christmas!  For those who do not celebrate, Happy Holidays!

My firstborn son is 3 years old this year, so I have been busy, busy, busy getting ready for Christmas.  I can't wait to see his face on Christmas morning!  Of course, this also means I haven't had time for swatching these past few weeks.  I barely managed to squeeze in a new Christmas mani and I'm slightly embarrassed to share the pictures.  My poor hands have taken a major beating with all the boxing and wrapping of gifts.  So please excuse my poor, throbbing index finger (paper cut) and sad cuticles all around.

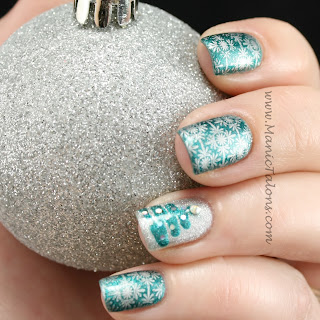
I decided to go with green and silver this time.  As usual, details to follow.
Christmas Manicure
Primary Base: SensatioNail Rock My Emerald
Accent Base: Orly Gel FX Shine
Stamping Image: Dashica SDP-6
Stamping Polish: Sally Hansen Insa-dri Silver Sweep
Accent Nail: Freehand tree using Rock My Emerald with an ss6 crystal AB Czech crystal on top and silver holo glitter accents

Christmas Manicure 

I promise I'll get back to swatching after the holidays!  In the mean time, if you haven't voted for my MoYou London December Pinterest Contest entry, please take a second to like (counts as one point) and/or repin (two points) my entry. :)  This is the mani I submitted. :)
http://www.pinterest.com/pin/547187423447161554/

~Michelle
Read more ...

Monday, December 23, 2013

Featured Artist: Someone Who Has Inspired Me Greatly!

Purchased by Artist


Hello Loves. I apologize for the late post. We had a bit of a plumbing issue that dominated my day yesterday.

Today’s post is a little different than my usual. Instead of showing you more swatches or my own nail art, I’m going to introduce you to someone who has been very inspirational to me in my journey with gel polish. When I first discovered gel polish, I joined a group of ladies online and quickly made a few friends. Gail is a lady who simply leaves a lasting impression on everyone she meets – both online and in her daily life. As a nurse and mother of 5, it absolutely amazes me that she not only has time to dedicate to her own nails, but also does manicures for her friends, family and coworkers on a regular basis free of charge!

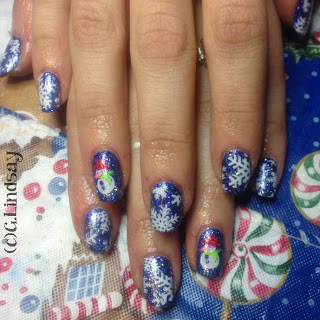
Look at this adorable wintery mani. As usual, details to follow the picture.
winter snowflake manicure
Base Color: OPI Eurso Euro with ArtsyFartsy Crafts Ultrafine Blue Holographic Glitter scrubbed into the tacky layer.
Stamping Images: Snowflakes – MoYou Christmas Collection plate #3. Snowman: Bundle Monster BM 316.
Stamping Polish: Mundo de Unas white
Additional touches: Gail added color to the snowman by adding various gel colors with a dotting tool. Then for a touch of added sparkle, she finished each nail with a layer of Shellac VIP Status before the final top coat.

I picked a few more of her recent manicures to show you, but before I do, I want to tell you a little about her and how she got into gel.

Gail grew up on a small dairy farm in Michigan as is the oldest of 4 children. She says she never had a lot growing up and was usually "making something crafty out of otherwise junk". She sewed her first outfit at only 7 years old. So the DIY way of life is very much a part of who she is. She is a mother of 5 and a works full time as a nurse in the peri unit of a local hospital.

Like many of us, Gail had weak, bendy nails and traditional polish just wouldn’t stick. She always wanted nice, beautiful nails, but her polish would always dent and chip. As a nurse, she is not allowed to wear acrylic nails. When soak off gel was starting to become popular, a coworker came in with a gel mani and it immediately got Gail’s attention. The coworker was wearing a Geleration mani and had the entire system that she received as a birthday gift from her sister. Gail says she was amazed, but also skeptical. She found The Purse Forum and started reading everything she could about application, products available, and which system to buy. She ended up choosing Gelish due to availability, color selection, and price. Unlike many of us who dive in head first, Gail took it an extra step. She booked two appointments to have a SOG manis done in a salon to see how it is applied and removed. They had only 12 Shellac colors to choose from, were using a generic UV light, and the tech was running behind schedule, but she stuck it out in the name of research. After seeing the application and removal in person, she was convinced she could do it herself and ordered the supplies. She spent less than $100 getting started – which was only slightly more than the 2 gel manis she had done in the salon ($40 each). Of course, she has branched out into other brands now, but it all started with Gelish.

Gail’s first DIY mani was a french with a base of Gelish Vegas Nights with Up in the Blue tips to match her light blue scrubs at work. She was addicted!!! She only did her own gel manicures for a while, but eventually started doing her mother’s nails too. It then turned into a family gathering staple with Gail doing manicures for all the girls in the family. She told me that every time one of her sons brings home a new girlfriend, she grabs her up and does her nails, learning a lot about them in the process. (Such a great tip! I’ll have to remember that one for when my boys are older.) As she continued to do nails for others, her confidence grew. She honed her skills and tried new techniques, often going to work with manicures that used techniques others had never seen before. Before long, she was doing nails for her coworkers too. Gail also noted, “By the way, I don't charge money- never have. It’s about boosting self confidence and moral. Its funny how something as simple as manicured nails can make someone feel. This is why I Iove it so much! Now that being said, people do provide donations that get put right back into it - new polishes, new supplies, stamping supplies, glitter, etc.”

So, now that you know a little about Gail, let’s take a look at some of her work.

This next one is her entry in the MoYou London DecemberPinterest Contest. If you like what you see, please feel free to follow thislink and like or repin her entry. Gail noted that this is the first contest she has ever entered. She attempted this manicure with freehand a year ago at Christmas and was not happy with the result. The stamping made it so much easier and she is happy with the result this time.
Peppermint Nails
Base Color: Shellac Wild Fire
Stamping Images: Moyou Christmas Collection plate #3
Stamping Polish: Mundo de Unas White
Additional touches: she traced the white stripes and swirls with Ink Frosted Flakes for added depth and enhanced some of the red stripes with Shellac Ruby Ritz. She then finished each nail with a coat of Shellac VIP Status before the final top coat.

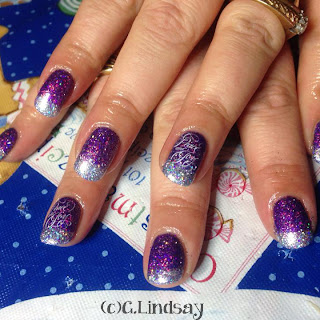
The final mani I chose to show you today is this gorgeous non-traditional Christmas glitter fade. Gail noted “I love doing the glitter fades. Every time I do this on someone new, I love seeing their face when I start applying the glitter. Smiles galore!!!”
Glitter fade nails
Base: LeChat Our Secret Eden over the entire nail with Orly Shine on the tips. She then scrubbed Artiglio’s Jules glitter over the Orly Shine at the tips and Artsy Fartsy Crafts Ultrafine Purple Holo glitter over the rest of the nail.
Next layer: Shellac Iced Vapor (to lock the glitter into place)
Stamping Image: Chez-Delaney Xmas 001
Stamping Polish: Mundo de Unas
A few tips and tricks: Gail notes that she cleans up the glitter by running a cleanup brush along the cuticle and side of the nail to pull any excess glitter away from the cuticles before locking the glitter into place. Prior to top coating, she lightly files the free edge to smooth any roughness left behind by the individual glitter pieces.

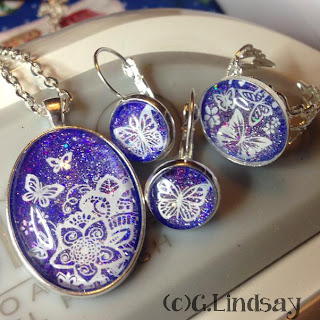
Gail has also started making nail polish jewelry with her gel and stamping supplies. Take a look at these! So creative! I swear, if I had just an ounce of her DIY creativity, I could put Martha Stewart to shame. ;)
Nail Polish Jewelry 
So, here’s the bummer. Gail is not a blogger! Shame, right? With a full time job, husband, and 5 children, she simply doesn’t have time. I did introduce her to instagram, so hopefully she’ll find time to share her creations with us there. Her Instagram is Lindsaymomof5 if you would like to follow her.

And that’s all for today. Thank you, Gail, for being such an inspiration to me over the years and for sharing your knowledge and talent. J

~Michelle
Read more ...

Monday, December 16, 2013

Holiday Glitter Ruffian Tutorial: How to manipulate loose glitter


Hello Loves.  A few people asked how I applied the loose glitter without getting it all over the nail in the Glittery Ruffian Holiday Mani that I shared earlier this week.  I am a HUGE fan of using loose with soak off gel, especially around the holidays.  I usually scrub the glitter into the tacky layer and top coat over it, but that method is a bit difficult when trying to apply glitter to one specific area of the nail.  Since I used a different technique for this one, I threw together a quick video tutorial to show you how I did it.

Please feel free to ask questions if there is anything I need to clarify.  Also, since this is my first video tutorial, I am certain there is room for improvement.  I appreciate and welcome any feedback that I can apply to future tutorials.  :)

Update: To clarify based on a question from one of my readers, the top coat used in this tutorial is soak off gel top coat. :)


~Michelle
Read more ...

Sunday, December 15, 2013

Glittery Ruffian Holiday Nails

Contest Prize

Hello Loves.  Wow it has been a busy weekend!  Between work, parties and Christmas shopping, I didn't have much time to dedicate to my nails.  I did manage to squeak out a mani to compliment my outfit for our annual Christmas party at work.  Yes, I have a day job.  I am the marketing database analyst for a financial industry training firm.  In other words, I'm a data dork.  I love what I do, and I especially love that being so far behind the scenes allows me to wear outlandish designs on my nails without anyone caring that I constantly violate the dress code.  ;) 

But I digress.  Onto the nails.  I picked up two lovely Couture Gel Nail Polish shades as my prize for third place in their Halloween nail art contest.  I will swatch the other as soon as possible, but I decided to wear one of them last night.  As usual, I couldn't leave it alone.  So I added a little bling.  Details below.
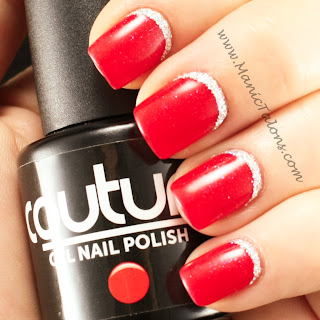
Couture Gel Nail Polish Red Carpet

The base for this mani is Couture Gel Nail Polish Red Carpet.  This gorgeous, traditional orange leaning red has a subtle pink shimmer that gives it a touch of surprise.  The shimmer is great, but it wasn't quite enough pop for my tastes.  So I added ArstyFartsy Crafts Ultrafine Silver Holographic Glitter at the cuticle to create this fun Ruffian mani.  Because, well, nothing says the holidays like a little bit of glitter.  ;)  Sadly, I forgot to take a picture of this one before I added the glitter.
Glittery Ruffian Mani

I'm not usually a fan of ruffian manicures.  To me, it looks like I got lazy and just filled the grow out of a previous mani with a different color.  Not to mention they tend to make nails look shorter by breaking up the length.  However, I think the glitter in this one is just the right touch.  Want to see it again?  How about a crappy outdoor shot from my iphone?  I tried to get a good outdoor shot with my Canon, but it simply refuses to capture the holo of the glitter.  My phone makes the base color appear pinkish, but it does show the glitter much better.  Please note that Red Carpet is a true red with a subtle pink shimmer. 
Soak Off Gel Ruffian

That's all for today.  How do you feel about Ruffian manicures?  Love them?  Hate them?  No preference?

~Michelle

*Red Carpet was provided to me free of charge by Couture as a contest prize.  ArtsyFarsty Crafts Ultrafine Silver Holographic glitter was purchased by me. 
Read more ...

Wednesday, December 11, 2013

FingerPaints Gel Polish: Swatches and Review

Purchased by Me

Hello lovely readers.  With the holidays approaching, I'm being a good girl and resisting the new collections that I so desperately want to buy.  Instead, I'm working my way through my current stash.  Today, I have a few FingerPaints Gel Polish colors to show you.  These are available for purchase at Sally Beauty.

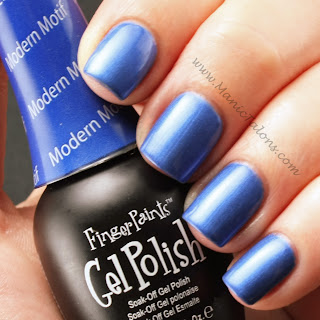
The first polish I have to show you is Modern Motif.  This is a gorgeous metallic blue.  It appears a bit darker in less direct lighting, which gives it a nice range of tones and variations.  You can see this a bit on my pinkie nail. 
FingerPaints Modern Motif Swatch

The bottles are 1/3 fl oz (9.8 ml), which is a bit small but slightly larger than Gelish Mini or Red Carpet Manicure.  The brush is thinner than I prefer, but still manageable.  But the biggest annoyance in the bottles for me is the wrapper on the top.  It's a shrink wrap label similar to those on the OPI GelColor bottles, and I find that it often spins when you try to remove the top so that you can't really unscrew it without a lot of effort.  I have to pop the label off to unscrew the top and then replace the label when I'm done.  The bottles are not marked in any other way to indicate the color inside as far as I can tell.

The second color I chose to swatch for you may be my favorite out of my FingerPaints Gel colors.  This deep, royal purple is Hue Do You He-Art.  I adore the subtle shimmer.
FingerPaints Hue Do You He-Art Swatch

The gels do come in a nice range of colors and finishes.  The formula is ok.  Not too thick or too thin, but it can be extremely tricky in an unusual way.  Some of the polishes seem to settle and separate, which results in pitting when you apply them.  It almost seems like there are oil spots on the nail and the polish avoids those spots.  It doesn't happen with every bottle, and it seems that it is not specific to a color.  Very strange.  I have five colors.  Two of them pit.  I have friends with the same colors and they do not have issues with them but have issues with colors that are fine for me.  I have found that warming the gel a bit and shaking the devil out of it helps tremendously.

In addition to the colors, I also have the FingerPaints bonder, Base coat and Top coat in my arsenal.  Overall, I like the system.  The base wears well for me and soak off is average.  The top coat is comparable to brands like Gelish and Red Carpet Manicure in terms of shine.  The Bonder, however, is my favorite component!  I use it for every manicure (even with other systems) to prevent lifting so that I don't have to buff my nails.  It's great and works flawlessly.

All in all, I like the wear and colors enough that the small packaging issues and pitting doesn't deter me from purchasing more. :) And, again, I simply can't live without that bonder!


~Michelle


Read more ...

Monday, December 9, 2013

All About You: Do you Blog? Instagram? Pinterest?


Hello Lovely Readers!  No nails today as this post is all about you. :)  I would love to know more about my readers.  Are you a gel user?  Stamper?  General nail art fan?  What are your favorite brands?  Is there a topic you would like for me to cover?  If you have a blog, instagram or pinterest account, please share it in the comments as well.  I will swing by and add you to my reading list.  :)


~Michelle
Read more ...

Sunday, December 8, 2013

Wintery Blue Snowflakes

Purchased by Me

Hello lovely readers.  The stamping group challenge for this week is a mani using three blues.  My first thought was that this one would be so easy!  Well, I was wrong.  It certainly isn't easy when you have so many blues to choose from!

You see, I started buying every blue I could find when I was pregnant with my second son.  My oldest son came 5 weeks early due to growth restriction and weighed only 4 lbs and 4 oz.  Since the doctors couldn't say what caused him to stop growing, I was considered high risk and was monitored closely during my second pregnancy.  When I started nearing the third trimester, my second started slowing down on his growth too and I convinced myself that I had to wear blue polish at all times.  Because, well, if I wore any other color I would go into labor and my nails would be the wrong color for his birth.  I know, it was a crazy way to think.  But I guess there's a part of me that is a tad bit superstitious and another part that simply knows I have that kind of luck.  As long as my nails were blue, he would keep growing and developing.  Needless to say, I came up with a lot of different ways to wear blue.  And when his doctors did decide it was time to take him (3 weeks early at 5 lbs 4 oz), I was already wearing the perfect blue polka-dot mani.  :)

But enough about why I have so many blues and onto my current mani.  It took a while, but I finally decided my three blues should be a base, a glitter, and a stamp.  As usual, details below.
I started with a base of Red Carpet Manicure Country Club Chic.  I then topped that with a glitter fade from the cuticle edge using ArtsyFartsy Crafts Ultrafine Light Blue Holographic glitter.  I finished it off with snowflake stamps from Bundle Monster BM-319 and Gals GA-41 in Mundo de Unas Pastel Blue.

Once again, my light box killed the glitter.  Below is a short video to show all it's glittery holo goodness.


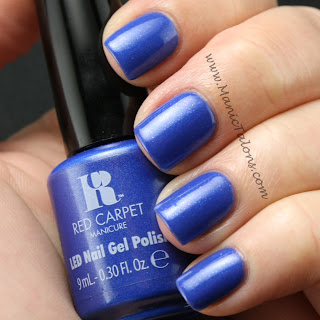
Here's the swatch of Country Club Chic on it's own.  This gorgeous blue shimmer is from the limited edition Hamptons collection.  I personally think RCM should bring this one back as a permanent shade.  It is such a great blue!
Country Club Chic Swatch

Oh, and one more thing...I entered my glittery roses manicure from last week in the MoYou-London December Pinterest Contest (ends December 31, 2013).  Each like counts as one point and each repin counts as two points.  The top three pins win some of the incredible new Fairy Tale plates.  I will be ever so grateful if you will click here to see my entry and like and/or repin it.  Thanks!


~Michelle
Read more ...

Wednesday, December 4, 2013

Tips and Tricks: Using Regular Polish with Soak Off Gel

Purchased by Me

When people ask me about soak off gel, there are several reasons I am given most as to why more people don't make the switch from regular polish.  1) "I have a large collection of nail polish.  I would hate for it to go to waste."  2) "I can't commit to a color for that long.  I like to change it up." 3) "I like to wear bold colors on the weekends, but I have to keep it conservative for work."

My answer to all of these reasons is usually something along the lines of "Ok, but why is that stopping you?"  One thing many people don't realize is that there are several ways to use RNP with SOG.  I'll list them now and elaborate on each in a few moments.  1) You can apply RNP over a SOG manicure.  2) You can sandwich RNP between layers of gel.  3) You can use RNP for nail art.

1) If you have a dress code for work or simply can't commit to a color for longer than a few days, you can still get the strength and protection of SOG without giving up your ability to change your nail color.  I wear RNP over my gel on a regular basis.  And the best part is you can apply and remove RNP without damaging the gel underneath!  Simply use non-acetone remover and you're good to go.  Plus there are added benefits to layering SOG under your RNP.  First, the RNP dries much faster over gel.  Second, the gel hides any ridges or imperfections.  This is awesome for metallic polishes that tend to show every flaw in the nail.  Third, the gel adds strength and protection to your nails to help reduce the risk of breaks.  Last but not least, RNP tends to wear longer without chips over SOG. 

I'm wearing this complete SOG manicure at the moment.  The color is OPI GelColor Bubble Bath.  It's a great, office friendly nude. 
OPI GelColor Soak Off Gel
But what fun is that?  So I've applied Sally Hansen Insta-dri in Jet Set Jade on top of my SOG mani.  Excuse the poor application.  I was in a bit of a hurry so I just slapped on a few coats and ran out the door.
I took a few quick pictures as I removed the polish from my index finger to show the pristine SOG mani under the RNP even after removal. 
So, in summary, you can wear RNP over a SOG mani and remove it non-acetone remover without damaging the SOG. 

2) If you have a bottle of RNP that you simply love but can't find a SOG alternative, no problem.  There are many types of polish that simply are not offered in SOG.  For example, linear holos.  I don't know why there isn't a SOG holo on the market, but I assume it has to do with the gel being too thick of a base for the holo pigments.  Either way, I love my holos and I love that I can still wear them without giving up the strength from the SOG mani.

When I wear my holos and other special RNP, I could layer them over the gel and use a RNP top coat, but I often want them to last even longer.  So I sandwich the RNP between gel layers.  Also, I should note that I can't wear RNP by itself.  I have tried every combination of base, color and top coat I possibly can, but it always chips within 24 hours.  I am simply too rough on my hands.  SOG has been a God send for me. 

Here are the steps to doing a successful RNP sandwich.
1) Begin your gel mani as usual, following your regular prep and cure the base coat.  Be sure to cap the tips, allowing a bit of gel to overflow onto the underside of nail as I show in this post.   
2) If you're using a semi-sheer RNP that needs undies, apply a coordinating gel color and cure.  If your RNP is opaque, you can skip this step.
3) Apply your gel top coat, cure as usual, and remove the tacky layer.
4) Apply your RNP as you usually would, allowing each coat to dry before adding the next.  Cap the tips, but be careful to leave a bit of the gel showing on the underside of the nail where you allowed it to overflow when you applied your base.  Having the gel that extends past the RNP on the underside of the tip gives the top coat something to grab. 
5) Finish with a RNP fast dry top coat if desired to protect your color until it has time to dry completely.  I usually wait at least 4 hours before continuing to step 5.
6) Give your nails a quick scrub with a nail brush and an oil cutting soap without moisturizers to remove any oil that may have come in contact with your nails while your RNP was drying.
7) Swipe the nails with isopropyl alcohol or dehydrating prep (as you would before beginning your SOG mani). 
8) Apply two coats of gel top coat, curing each as directed.  Be sure to cap the tips and wrap the top coat as you did the base in step 1 so that it extends past the RNP layer and completely encapsulates the RNP in gel. 
9) Remove the tacky layer, moisturize with cuticle oil, and you're done. 

This is the same gel mani pictured above (OPI GelColor Bubble Bath), but I have added two coats of Color Club Halo Hues Cloud Nine and topped it with a coat of Gelish Top It Off.  Sadly, my photography skills didn't capture it in all it's glory.  However, you can clearly see that the SOG top coat didn't hurt the holo effect.  Another added bonus: if you wear holo polishes, you know they often don't last long.  Sandwiching a holo is the perfect solution.  And the gel hides any imperfections that holos tend to accentuate. You also don't need an aqua base when using SOG. 

3) You can use those RNPs for nail art either on top of a SOG mani or sandwiched between gel layers.  I use RNP for stamping nail art as well as dotting and striping.  Actually, I have found that you can't really stamp with SOG polish.  If you can get it to transfer, it doesn't give crisp lines.  I have a number of stamping polishes, but I also found that most of my RNP stash will stamp. 

4) If none of the uses above appeal to you, then there's always one more way to use RNP.  Pedicures.  Though I do tend to use SOG on my toes as well.  ;)

As you can see, there are many ways to combine RNP with SOG.  You can use it to spice up a boring work appropriate SOG mani (or to hide a non-work appropriate SOG mani).  You can sandwich RNP between layers of gel for lasting wear.  And you can use RNP for nail art on SOG manis.  So if you're already using SOG, break out your old RNP stash and use those babies!  Or grab that new RNP that caught your eye at the drug store but you passed up because you only wear gel.  And if you're avoiding SOG due to one of the reasons I mentioned at the beginning of this post, I hope I have helped you put your fears aside.

~Michelle
Read more ...

Tuesday, December 3, 2013

An Experiment: Can You Stamp With Gel Polish?

Purchased by Me

Hello lovely readers.  I'm going to do something a little different for today's post.  One of the questions I am asked most frequently is "Can you stamp with soak off gel polish?"  The answer is a little bit tricky.  Yes, you can combine stamping nail art and soak off gel polish, but can you use soak off gel polish as stamping polish?  THAT is the question I get most.  I could simply tell you the answer, but where is the fun in that?  Instead, let's do a little experimenting.  :)

A quick google search led me to a few videos of people stamping with Soak Off Gel.  Specifically with Shellac.  Well, I'm not really a Shellac fan as I prefer LED cure.  And since many of you also use LED brands, I decided to test out a few for stamping.

Gelish is a common brand among my readers, so I chose a highly pigmented Gelish color for my first test: Gelish My Favorite Accessory (note: pictures are not color accurate...close, but not exact).

The first problem I ran across is getting a clean scrape.  Because it doesn't dry on it's own, gel polish tends to smear instead of scraping cleanly.
Does soak off gel work for stamping

If you are accustomed to stamping with stamping polish or traditional lacquer, you know that a smear like this often won't transfer to the stamper.  Unfortunately, that is not the case with SOG.

Assuming you do get a clean scrape, you run into another issue caused by the fact that gel doesn't dry on it's own.  It tends to bead up on the stamper.  See how the lines in the image below are thin and the gel pools in places?

Let's look at the same image using Mundo de Unas stamping polish.  You can see the image on the stamper is much bolder and more defined.

Moving on, I transferred the SOG image I picked up above to a swatch stick that has been prepared with two coats of Ink Glacier and top coated with the tacky layer removed.  In my experience with sog nail art, removing the tacky layer helps keep the gel from spreading as much.  I rolled the image onto the swatch stick with a super light touch - lighter than is required for RNP or stamping polish.  Yet the image is still weak and fuzzy.
Can you stamp with gel polish

Let's compare this to the same image using the Mundo de Unas stamping polish.  (excuse the spotty transfer - I let it dry a bit too long while taking pictures of the image on the stamper)

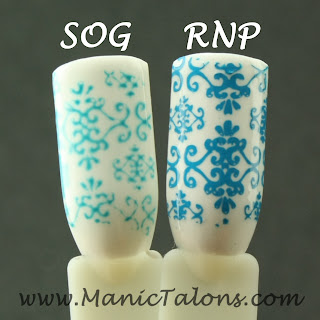
Now, let's look that the two swatches side by side.  At this point, I have cured the Gelish stamping swatch to prevent further spreading of the image.
can you stamp with gel polish 

The conclusion:  Stamping with Gelish is a fail.  But wait, we aren't done yet.  I completed the same test with one of the thickest, most pigmented polishes I own: Ink Glacier.  My theory was that a more pigmented polish might hold it's shape better.  Here's what happened:

As you can see in the picture below, Glacier does hold it's shape a bit better on the stamper, but there is still pooling from the lack of drying.

For comparison, here's the same image with Mundo de Unas White.

And here's what happened when I transferred the Ink Glacier image to a swatch stick prepared with two coats of Couture Little Black Dress and top coated with the tacky layer removed.  Again, I used the lightest touch humanly possible and rolled the image onto the swatch.  This one smeared worse than the Gelish!

Here's the Mundo de Unas swatch for comparison.  Again, excuse the spotty transfer and the cotton fiber.

Let's look at these two side by side.  Like before, the SOG stamp in this photo has been cured to prevent further spreading.
 

So, can you stamp with gel polish?  I think the answer is pretty clear.  While you can get the image to transfer to the stamper (sort of), and you might be able to get it to transfer to the nail (somewhat), the final product is not something I would want to wear on my nails for a week or two.

How do you combine stamping with gel polish to achieve a flawless manicure that lasts for weeks?  It's unbelievably simple.
  1. Do a complete gel manicure, including removing the tacky layer.  Do not oil.
  2. Break out your favorite stamping plate, stamper and stamping polish.
  3. Stamp the image directly onto the finished SOG mani. 
  4. Allow the stamp to dry for about 5 minutes.
  5. Carefully apply another layer of top coat, being careful to cover the entire stamp.  Cure.
  6. Apply another layer of top coat just to be certain you covered the stamp completely. 
  7. Remove the tacky layer with cleanser or 90% isopropyl alcohol.
  8. Remove the overstamp with polish remover (cleanup doesn't get any easier than this).  I actually swipe over the entire nail with a cotton ball soaked in acetone.  This quick swipe will not hurt your gel mani.  But if you want to play it safe, non-acetone remover will also work.
  9. Remember to moisturize!

Note:  There are two other ways to combine stamping with gel.
  1. You can remove the tacky layer from the final color coat before top coating and stamp directly on this color coat.  This will make soak off a bit faster than stamping over the top coat.
  2. Instead of using a gel top coat in steps 5 and 6, you can use a RNP top coat and clean up as if you were stamping over RNP.  This gives you the option of changing your stamp without soaking off your gel manicure.  Simply remove the stamp with non-acetone remover and stamp again.

There you have it.  I hope you've enjoyed by little experiment.  :)

~Michelle


Read more ...

Sunday, December 1, 2013

ArtsyFartsy Crafts Glitter Review: When In Doubt, Add Glitter! (pic heavy)

Purchased by Me Affiliate Links

Hello lovely readers.  I hope everyone had a wonderful Thanksgiving.  I spent my down time swatching and photographing some of my glitters from ArtsyFartsy Crafts.  I have a lot of glitter.  A LOT of glitter.  At last count (before I stopped counting many orders ago), I was up to 200 different glitters of varying shapes and sizes.  Over half of them are from ArstyFarsty Crafts.  When it comes to glitter for SOG, AFC is the best I have found.  The owner, Sandy, also uses Soak Off Gel, so she knows what to put in a good mix.  It's pretty much guaranteed that I am going to buy the new mixes every time they are released.

Update:  Sandy just sent me a message that she is extending her Black Friday sale until December 5th, 2013!  Use code CYBERMONDAY for 20% off.  :)

With that said, I'm going to do things a little backward today.  I'm going to start this post with my final mani and work backward to a sampling of glitter swatches.  First things first, you may notice I'm rocking some serious shorties.  I broke a nail last week and had to file them all down even.  Short is not for me, so hopefully they'll grow quickly.  Anyway, here's what I'm wearing.  As usual, details to follow.
Artsy Fartsy Crafts Glitter Manicure

I'm completely in love with this mani.  It reminds me of the velvet and foil art pieces you could find in just about every truck stop in the 80s.  You know...the ones that were usually of either Unicorns or Elvis (I just dated myself, didn't I?).

Rather than break it down as I usually do, let's break it down in pictures.  Under this gorgeous reverse rose stamp from MoYou London's Pro Collection 04 plate, is several layers of SOG and glitter.

The bottom layer is IBD Just Gel Entralled.  This is my go-to shimmery red.  Of course, my light box killed the shimmer, but if you look closely you can still see it, I think.
IBD Just Gel Entralled Swatch

I then scrubbed AFC Ultrafine Red Holographic glitter into the tacky layer of the last color coat of Entralled.  Scrubbing is a simple way to add glitter to a SOG mani.  You simply cure the last coat before the glitter, then use a brush to press the glitter into the tacky layer.  Press the glitter flat on the nail with a plastic bag for a linear effect, or simply pat it on without pressing it flat for a scattered effect.  Blow away any excess and apply your top coat over the glitter to seal it in.  You may want to keep a separate bottle of top coat for glitter, but I simply wipe the brush before putting it back in the bottle to prevent contaminating my top coat bottle with glitter. (Note: These next photos were taken under my ottlite as the light box killed the holo effect)
Red Holographic Glitter

I love Red Holo, but for this mani I wanted something a little deeper, so I added a layer of Gelish Stand Out on top.  Stand Out is a gorgeous, deep red jelly.  This is the resulting ruby red base for my stamped roses.  I added another coat of standout over the stamp in the final mani as well to create a multi-layer jelly sandwich.

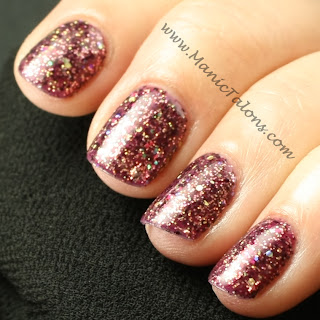
I swatched one more glitter on my nails before turning to my swatch sticks for the others I'll show you in a few moments.  This is Autumn Sunset, which is an awesome mix of varying sizes of glitter in fall tones.

I scrubbed Autumn Sunset into the tacky layer of the final color coat of a base of IBD Just Gel Indian Sari.
IBD Just Gel Indian Sari Swatch

Let's keep going with the mixes.  I have a few mixes swatched to show you.  For each of the following, I scrubbed the glitter into a matching base color.

This gorgeous green holo mix is called Poison Ivy.  The holo effect from this one is much stronger than shows in this picture.  I'll show all of the holos in a quick video at the end of this post.  Swatched over Couture Aloe Very.

This next holo mix is a personal favorite.  On the AFC website, it is listed as Red-dy To Go, but my bag came labeled as "Michelle's Red-dy to Pop" as I was only a few weeks away from delivering my youngest son.  :)  Swatched over IBD Just Gel Entralled.

This next mix is not a holo, but is gorgeous none the less.  This one is called Watermelon and is a pink iridescent glitter with larger dark green hexes and black diamonds.  You can also get just the diamonds.  This one is swatched over a base of IBD Just Gel All Heart.

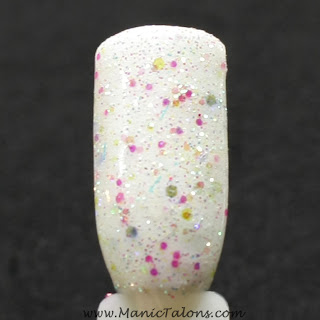
Red, White & Blue is another chunky glitter mix, but this one uses squares, varying sizes of hexes, and strips.  I don't know if you can really see it in the picture, but the base is an ultrafine iridescent white glitter.  Very festive.  Swatched over Ink Glacier.

If you're looking for something a little less bold, check out one of the finer mixes like Sea Urchin.  Iridescent ultrafine glitter with larger aqua and blue hexes, plus a few strips thrown in for good measure.  Swatched over a base of Ink Glacier.

These next mixes are a bit unique as they include glow powder.  Yes, they glow in the dark!  First up, Pink Glow-in-the-dark Glitter Mix.  Swatched over IBD Just Gel I'm No Damsel.
Glow in the dark glitter

If you're feeling blue, try Blue Glow-in-the-dark Glitter Mix.  Swatched over LeChat Angel From Above.
Glow-in-the-dark Glitter

Don't let this Violet Glow-in-the-dark Glitter Mix fool you, it looks white but it glows Violet.  I'll prove it in a minute. ;) Swatched over Ink Glacier.
Glow in the dark glitter

The final glowing mix I have swatched for you is called Northern Lights.  It appears to be sold out, but Sandy is constantly coming up with new mixes that are equally as gorgeous.
Glow in the Dark Glitter

Want to see them in action?  I thought you might.  Top is in full light, bottom is in the dark.  From left to right, Blue Glow-in-the-dark Mix, Northern Lights, Pink Glow-in-the-dark Mix, Violet Glow-in-the-dark mix. 
Glow in the dark glitter
(Note: I forgot to shake Violet before I scrubbed it, and the glow dust tends to settled to the bottom.  When shaken before scrubbing, it glows brighter.  However, it is not as bright as the others.  You can check out the other glowing glitters here.  I have and love them all!  They glow all night.  Seriously, all night.  The first time I wore one, it freaked me out to wake up to feed the baby at 3:00 am and see my nails still glowing.)

Want to see some more Ultrafine holos?  I think I've mentioned before that I'm a complete sucker for holos.  I have the entire set of ultrafine holos from Artsy Fartsy Crafts and was tempted to show them all, but I decided to let my son pick his favorites to show you instead.  I swatched all of these with a scattered look, but they will be much more linear if you press the glitter flat on the nail.

(swatched over Couture Gilded)

(swatched over Gelish My Favorite Accessory)

(Swatched over Couture Little Black Dress)

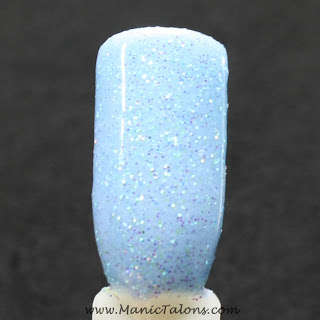
(swatched over Ink Blue Ice)

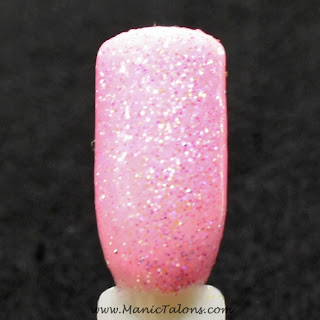
Ultrafine Fuchsia Holo*
(Swatched over IBD Just Gel All Heart)
*This one is currently not listed on her website for purchase.  However, she is in the middle of switching her inventory over to her new website so she'll have much more listed in a few weeks.

(Swatched over IBD Just Gel Happliy Brighter After)

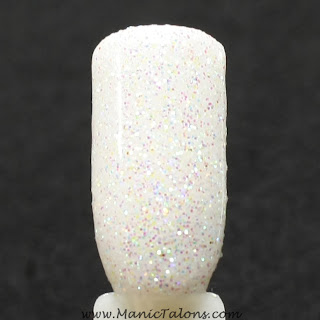
(Swatched over Orly Mirror Mirror)

Let's take a blurred look at the Silver.  The picture above does not do it justice!

Want to see the holos in action?  Let's start with my final mani from the beginning of this post.  Excuse how horrible my skin looks.  I had to sacrifice my complexion for the sake of my nails in this video.  ;)


And now for all of the holos and holo mixes.


Whew!  That's all for today.  Check out the Artsy Fartsy Crafts store for a ton of other glitter options, ranging from fine to chunky and everywhere in between!

~Michelle
Read more ...