Friday, May 30, 2014

Jewelry in Candles Review with a Simple French Manicure

Affiliate Links

Hello Loves!  I have something a little different to show you today.  My friend, Pamela, recently became a rep for a company called Jewelry in Candles.  Of course, I was intrigued and purchased one.  It’s like a cereal box prize, but with candles and jewelry!
Jewelry in Candles Review

I have seen companies that offer this type of product before, but what got my attention about this specific brand is that you are able to select the type of jewelry – earrings, necklace, or ring.  If you choose a ring, you are also able to select a size so there’s little chance of getting something you won’t be able to enjoy.

According to the Jewelry in Candles website, the jewelry inside may range in value from $10 to several thousand dollars.  It may be titanium, silver or gold plated, solid sterling silver or gold, or even platinum.  The stones range from cubic zirconium to genuine gemstones or diamonds.  I’m not sure how you would tell if you had a $2000 piece vs. one of lesser value, but it’s still a fun product.

I chose a Gardenia scented candle with a ring in my size.  The candles are 21 oz natural soy candles with a burn time of 100-150 hours.  I was pleasantly surprised at the strength of the fragrance!  I was able to sniff through a few scent samples before I chose my candle, and I can tell you that they are all quite powerful.  I was a little worried that they might be too powerful when warm, but that isn’t the case at all.  My living room is quite large and this candle had no problem filling the entire room with the scent of gardenias without smelling like a perfume shop.  Every time I walked into the room, I was reminded of the huge gardenia bush at my parents’ house.  Fond memories, for sure!

I wish I could show you an awesome series of reveal pictures, but I can’t.  I had every intention of doing so, but after letting the candle burn for 8 hours I noticed I could see the top of the foil pouch that contained my surprise ring.  That’s when I turned into the most impatient person in the world!  Yep, I dug that sucker out with a spoon.  lol  I suspect it would have taken another 5-8 hours to fully reveal the pouch and remove it properly, but I simply have no self control.
Jewelry in Candles Review

They also offer tarts with jewelry inside.  Since my candles aren’t always the best choice around my children (one who tries to pull things over and another who likes to blow out candles), I will likely order tarts next time!

The ring from my candle was enclosed in a plastic bag inside a foil pouch – completely protected from the wax.  I did get a bit of wax on it when I opened the bag, but I was able to easily remove it with a soft nail brush and warm water.

So, what did I get?  This amazing costume jewelry ring!  I really wasn’t expecting to find such an awesome piece in my candle.  My taste in jewelry is very specific and usually simple, so I was thrilled to find a piece inside that I honestly love.
Jewelry in Candles Ring, American Manicure, French Manicure

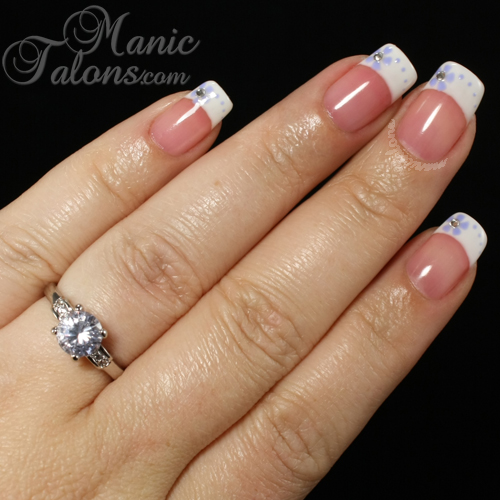
Here's a close-up of the ring.  Isn't it gorgeous?  I love the soft lavender stone.
Jewelry in Candles Ring

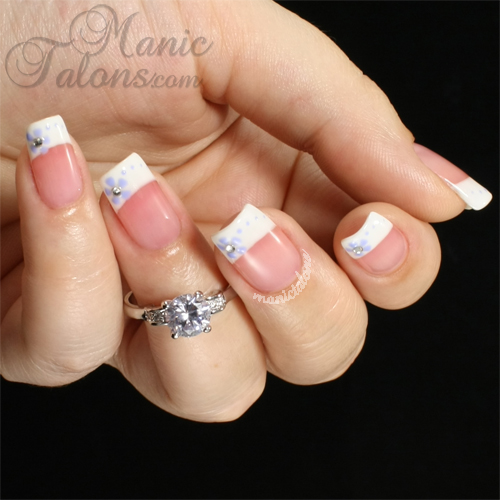
Naturally, I had to do a classic French Manicure with crystal accents to go with it.  Well, technically this is an American manicure due to the sheer pink base, but you know what I mean! ;)
American Manicure, French Manicure, Couture Gel Polish

I started with a base of one coat of Couture American.  American is a pink tinted, sheer polish.  I then added the French style tips with Couture Ooh La La French (swatched here).  The flowers and dots are Couture Lavender Lace (swatched here) and the centers of the flowers are ss4 crystals from Born Pretty Store.  I love these little crystals because they are reusable and affordable!  After top coat, I can’t tell much of a difference between these and genuine Swarovski crystals.

Here’s a closer shot of the manicure. :)
American Manicure, Couture Gel Polish, Couture American, French Manicure

If you would like a candle of your own with a jewelry surprise, be sure to check out Pamela’s store here.  Also, code “SummerFun” is good for 15% off during the month of June. 

~Michelle

*Disclosure: This post uses Born Pretty affiliate Links.  Purchases through these links generate commissions that help fund this site.  The links to Jewelry in Candles direct the viewer to Pamela’s site where she can assist with any orders.  If preferred, you may also visit the main Jewelry in Candles site.
Read more ...

Wednesday, May 28, 2014

Lily Anna 09 Stamping Plate Review

Press Sample Affiliate Links

Lily Anna Stamping Plate Review

Hello Loves.  I have my first Lily Anna Plate to show you today.  I’ve been eyeing these plates for a while now but kept bumping them down my list thanks to new Messy Mansion plates being released.  Julia sent me Lily Anna 09 to try out, and I think I need more!

I had no doubt that I would love the Lily Anna plates.  They are designed by Lily Anna and produced by Messy Mansion, so you know the quality is superb.  The designs are quite nice as well, and I love that the designs on this particular plate are made up of smaller patterns that will work well with nails of various sizes.

Once again, I wanted to do a video but couldn’t find time when the kids were sleeping.  Ah, the joys of motherhood.  ;)  So I did a few manicures instead.

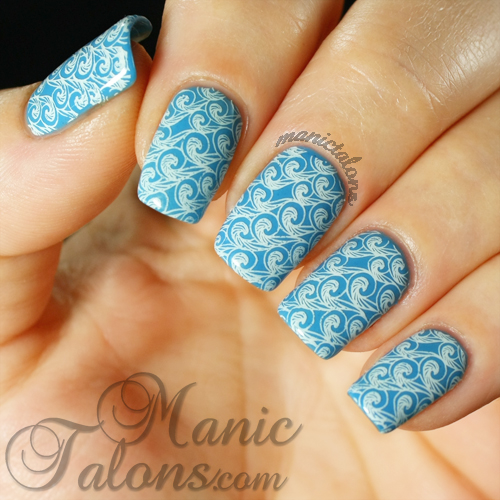
When I saw this awesome wave pattern, I knew I had to try it out.  Fine detail images usually give me trouble, but this one stamped beautifully!  As usual, the stamping polish is Mundo de Unas White.
Wave image Lily Anna 09 Stamping Plate

Once I had it on my nails, my brain immediately jumped to rubber duckies.  I have no clue why, but I figured I’d give it a shot.  Not my best freehand work with acrylic paints, but my children loved them.  My oldest insisted I use his bath ducky as a hand prop.  lol
Rubber Duckie Manicure with LilyAnna 09

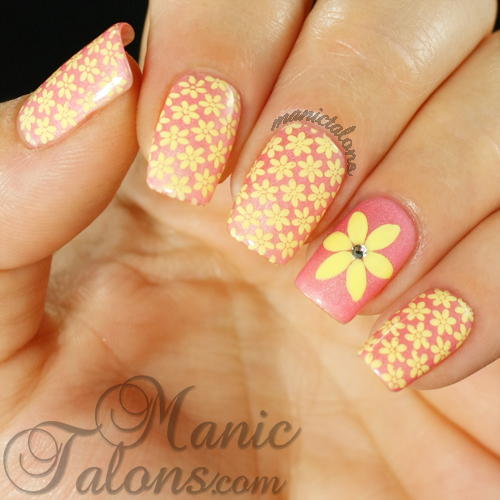
I did a second manicure from the plate using the repeating flower pattern.  I love how this one turned out!  The accent nail is freehand with an ss5 crystal from Born Pretty in the center.  The stamping polish is Mundo de Unas Pastel Yellow.
Stamped Flowers Manicure from Lily Anna 09

Finally, I thought I would show you a few of my test stamps.  I tried to choose a variety of patterns, but realized when I put the collage together that I ended up using images that are all from one side of the plate.  Sorry about that!  All of the patterns (even those of the other side) stamped beautifully, though.  Click the photo to enlarge it for more detail.  Also, excuse the green polish.  I’m running low on my Mundo de Unas Black so I grabbed my bottle of Mundo de Unas Green to test the plate.  :)
Test Stamps from Lily Anna 09 Stamping Plate

Sorry for the quick post today.  My children were sick all weekend, so I didn’t have as much time as I would have liked to play with this plate.  Rest assured, you will see it again soon!  Be sure to check out the other gorgeous Lily Anna Plates at MessyMansion.com!

~Michelle

*The stamping Plate, Lily Anna 09, featured in this review was provided by Messy Mansion for my honest review.  This post uses Born Pretty Store affiliate links.  Purchases through these links generate commissions that help fund this site.  All other links are NOT affiliate links and do NOT generate commission.
Read more ...

Monday, May 26, 2014

Memorial Day 2014: Some Gave All

Press Sample
Memorial Day Nail Art

Happy Memorial Day, Loves!  As those of us in the US are preparing to fire up the barbeque and spend time with family and friends, I want to take a moment to reflect on the true meaning of the day.  Today is a day of celebration but also a day to remember the fallen soldiers who gave their lives fighting for our freedom.

I tend to relate life to music, and on this day every year these lyrics come to mind:

“All gave some, and some gave all 
Some stood through for the red, white and blue
And some had to fall.
And if you ever think of me
Think of all your liberties and recall
Some gave all”
~Some Gave All, Billy Ray Cyrus

To all of the mothers and fathers, husbands and wives, son and daughters, brothers and sisters, relatives, friends and soldiers who have lost a loved one while fighting for our freedom, please know that we have not forgotten their sacrifice.  Today, we celebrate those honorable men and women who gave their lives so that we may be free.

My manicure today is in their honor.

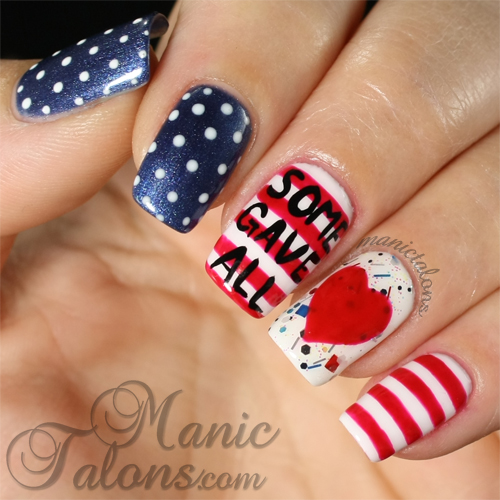
Memorial Day Nails

I started with a base of Couture After Midnight (swatched here) and Couture Ooh La La French (swatched here).  I then dotted the After Midnight nails with Ooh La La French. 

I scrubbed ArstyFartsy Crafts Red White and Blue glitter onto the ring finger and freehanded stripes of Couture Haute Pink on the middle and pinkie nails.  The heart on the ring finger is also Couture Haute Pink, and the words “Some Gave All” are painted in Mundo de Unas Black.

I don’t think I’ve shown you Couture Haute Pink before.  The name is a bit misleading.  This is not a pink, but rather a classic red cream.  It applies beautifully and is opaque in two coats.
Couture Gel Polish Haute Pink Swatch

I hope everyone has a fun and safe Memorial Day!

~Michelle

*The gel polishes used in this post were provided by Couture Gel Nail Polish for my honest review.  All other products were purchased by me.

Read more ...

Friday, May 23, 2014

Couture Gel Polish Fashionista with Abstract Flowers

Press Sample

Hello loves.  I have a simple mani to show you today, along with a swatch of the ever gorgeous Couture Fashionista.  As soon as I swatched this bright pink beauty, I knew I had to pair it with a little bit of black.
Couture Gel Polish Fashionista, Mundo de Unas Black

Something about pink and black just makes me really happy.  It may be my perfect color combo.  Edgy, yet feminine.  Couture Fashionista is a pink cream that is bright, but not quite neon.  It's the perfect shade for a bit of pop.  I also adore the slightly blue undertones.  This one applies very well with no streaking.  I swatched three coats below for consistency, but it was perfectly opaque in two.
Couture Gel Polish Fashionista Swatch

I added the black flowers and dots with a fine detail brush.  The polish is Mundo de Unas Black.  While it is technically made for stamping, this polish is fantastic for freehand nail art too!  It is super opaque and dries slower than most polishes so it is very easy to work with.  Plus a little bit goes a long way!  I absolutely adore this polish and use it constantly.
Couture Gel Polish Fashionista, Mundo de Unas Black

What do you think?  Is black and pink a winning combination in your opinion?  Do you need Couture Fashionista for your stash?  If so, don't forget to use the code "ManicTalons" for 10% off!

~Michelle

*The gel polish featured in this post was provided by Couture Gel Nail Polish for my honest review.
Read more ...

Wednesday, May 21, 2014

Featured Artist: Kim from Ten Little Canvases

Affiliate Links

www.tenlittlecanvases.com

Hello Loves.  It has been a minute since I've written a post about someone who has inspired me in my nail art journey.  I spend a lot of time showing you my work and talking about myself, but today I want to take some time to introduce and thank someone who has not only inspired me, but has also become a true online friend.

As I've mentioned in the past, I never painted my nails before discovering gel.  Regular polish just doesn't stick for me, so I didn't bother.  What I may not have mentioned is that my nails were very plain for the first few years that I used gel polish.  An accent nail of a different color was as bold and daring as I would go.  Then I met Kim through a facebook group, and her intricate manicures blew me away.  At the time, neither of us had blogs, but we did have facebook and kept Kim's inbox full of questions about various techniques!  Kim started blogging around the same time I created Manic Talons.  If you don't already follow her, pop on over to Ten Little Canvases and do it now.  Seriously, you'll thank me later.

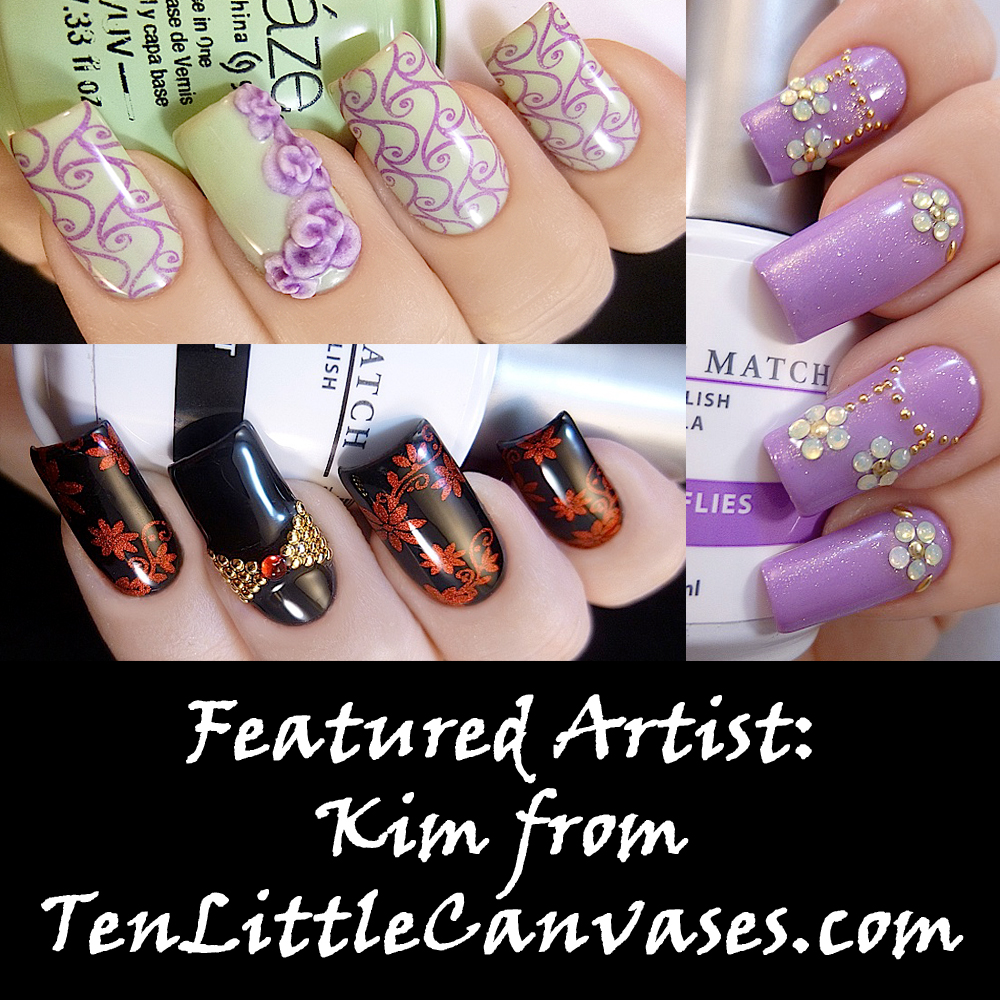
Ok, if you need a little convincing first, keep reading.  As I said, my nails were quite plain before I "met" Kim.  Then I saw some of her creations such as these.  (Click the photos to see her related posts)
http://tenlittlecanvases.com/2013/10/05/butterflies-and-flowers/

http://tenlittlecanvases.com/2013/11/05/weekly-mani-black-tie-and-flowers/

Her use of stamping and crystals blew me away.  I messaged her and picked her brain on types, sizes, and applications of studs and crystals.  Before long, I ordered a few and created my first crystal manicure.  She has since done a wonderful tutorial that shows how to apply crystals with gel polish, and I'm betting she wishes she had this to send me to me back then when I was surely exhausting her with questions.  lol  Be sure to check it out here!

Once I had the bling down pat, I looked back at that glorious stamping.  I yet again I started messaging Kim and picking her brain.  She recommended the Pueen Love Elements plates as a great starter set.  I ordered them the same day and picked up a Wistonia squishy stamper.  I created my first stamped manicure using that set and the rest is history.  I have since found inspiration in other great stamping artists, but Kim continues to wow me with her artistic ability and inspire me to try new things.  I mean, seriously, how does someone look at a pile of crystals and studs and see this????
http://tenlittlecanvases.com/2013/12/26/weekly-mani-purple-and-green/

But Kim doesn't stop there.  She is constantly pushing the limits and trying new techniques. From watercolor to foils to acrylic flowers.  Better still, she's been burning up youtube lately with tutorials on almost all of her designs!  I'm constantly watching (cough*stalking*cough) to see what she'll come up with next.

Like this recent foil creation, for example.


If you're looking for inspiration, I encourage you to pop on over to Ten Little Canvases and poke around.  You won't be disappointed.  Though I guess I should throw out a disclaimer...Kim's blog may result in unplanned nail related purchases!  ;)

If you're a regular reader of my blog, be sure to thank Kim for that too!  If I hadn't been inspired by her amazing talent, I wouldn't have ventured into nail art and felt the need to start Manic Talons as a way share my creations. :)

Kim, thank you for always being an inspiration, pushing the limits and trying new techniques, and sharing them with us!

~Michelle

*This post uses Amazon Affiliate links.  Purchases through these links generate commissions that help fund this site.

Read more ...
Monday, May 19, 2014

Peek-a-boo Lace with Messy Mansion MM44 and Couture Gel Polish

Press Sample Purchased by Me

Hello Loves!  I have another Messy Mansion plate to show you today - the Lace plate (MM44).  This plate caught my eye the first time Julia shared the design (before it was even produced), and I just knew I had to have it.  Julia offered to send it to me in my next blogger sample package, but I just couldn't wait to get my hands on it so I declined the offer and ordered it right away.  It came in the mail Saturday, and I am in love!
Lace Manicure, Messy Mansion MM44, Couture Gel Polish

So, what made this plate a must have in mind?  Lace.  Glorious lace of every shape and size.  Seriously, I have been looking for a plate exactly like this since I first discovered stamping.  The detail is amazing!
Messy Mansion Lace MM44
Even more amazing is that every tiny line transfers beautifully.  No joke, I used 5 of the images from this plate in this manicure and every single one of them transferred on the first try without a single skip.  That is almost unheard of with such fine detail and one of the reasons I am so head over heels with Messy Mansion plates!  The quality is just outstanding.  The images used are the top left, top center, center, center right, and bottom.

Back to the mani.  I started with a base of Couture Skinny Dip.  This is my perfect nude cream.  Hello mannequin hands.
Couture Gel Polish Skinny Dip Swatch

I then taped off sections of each nail with masking tape before stamping the images to prevent the black stamp from showing through the red.  The images are stamped in my go to black - Mundo de Unas.

I gave the stamps a little time to dry, then used a fine detail brush to fill in around them with two coats of Couture Fierce.  Fierce is your classic, pin-up red cream.
Couture Gel Polish Fierce Swatch

Finally, I finished the edges by outlining the stamped designs with a fine detail brush and Mundo de Unas Black.

I really like how this one turned out...for the most part.  I did send Julia at Messy Mansion a message on FB and suggested she include a disclaimer with the plate - something along the lines of "Warning, using this plate with black, nude and red may result in a manicure that crosses over into Dr. Frank N Furter territory from Rocky Horror Picture Show."  lol
Lace Manicure, Messy Mansion MM44, Couture Gel Polish

I think it's the thumb design that screams Frank N Furter to me.  It's not quite as Rocky Horror if I omit the thumb from the shot.  I still love it either way, but I wasn't really going for the Rocky Horror vibe.  lol  But seriously, look at the detail in that lace!  Simply amazing. 
Lace Manicure, Messy Mansion MM44, Couture Gel Polish

So, what do you think?  Rocky Horror or sexy peek-a-boo lace? 

~Michelle

*The Couture Polishes featured in this post were provided by Couture Gel Polish for my honest review.  All other products used, including the stamping plate, were purchased by me.
Read more ...

Friday, May 16, 2014

Easter and Owls with Messy Mansion: MM36 and MM38 Review

Press Sample

Messy Mansion MM36, Messy Mansion MM38

Hello Loves.  I have two new Messy Mansion plates to show you today: the Easter plate and the Owl plate.  I know it's a little late for Easter, but I do have a sweet little mani to show you using this plate that isn't very Eastery.  (Is that even a word?)  And the owl plate is pretty fabulous!

Let's start with the MM36, aka the Easter plate.  This plate consists of eggs and bunnies galore with a pretty amazing basket image to seal the deal.
Messy Mansion Easter Plate, Messy Mansion MM36

I wanted to do a video on these, but I couldn't catch a moment when the boys were in bed to get it done, so I took photos of my first test stamps instead.  These are my very first attempts for various images on the plate.  I apologize for the glare in the upper left of each image.  I couldn't eliminate all of the reflections on the polish no matter how hard I tried.  The actual transfers in those areas are solid.
Messy Mansion MM36 Review

As you can see, I got a small skip in the nose of the bunny in the upper left image.  I did a second test outside of the light box and did not get the skip, so that is a user error.  I am very pleased with the basket image and the bunny faces.  Check out those eyes!  The egg image is a bit tricky.  I was able to get a transfer that I was happy with outside of my light box, but it did take a few tries.  With that said, I find this to be the case a lot of the time with fine detail images.  Overall, I love this plate and can't wait to use it for Easter next year!

So, how about that not-so-Easter mani I mentioned?
Rose manicure, Messy Mansion MM36
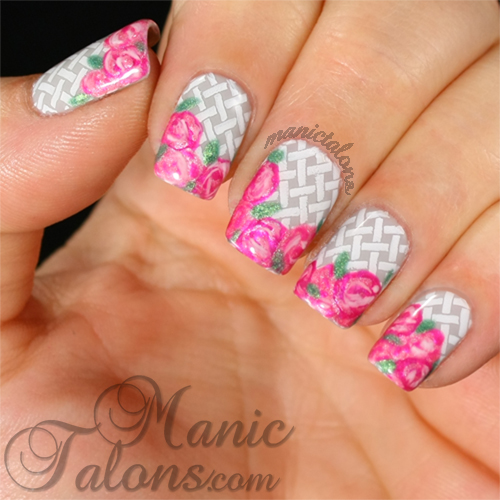
Ok, I guess it could be an Easter mani, but it doesn't have to be!  I stamped the basket image from MM36 in Mundo de Unas White over a base of Couture Private Jet (I'll share the swatch of Private Jet at the end of the post).  I then freehanded some messy roses on the tips with Couture Oui Madame, Ooh La La French, Oh So Glam and Aloe Very (swatched previously). 

Now for MM38, aka the Owl plate.  I am more than a little excited about this one!  So many adorable little owls to choose from!
Messy Mansion MM38, Messy Mansion Owl Plate

As with the Easter plate, I took a few shots of my test stamps.
Messy Mansion MM38, Messy Mansion Owl Plate

I am quite pleased with the detail on this plate.  As you can see, I did get a few skips in the first image (upper left), but I'm pretty sure those are user error as they were not duplicated on every nail in one of the manicures I have to show you.

You'll notice I didn't test stamp the two owls on the limb or the trees with the bird houses.  That's because I couldn't resist using them right away!  They're just so freaking adorable!
Messy Mansion MM38, Owl Manicure

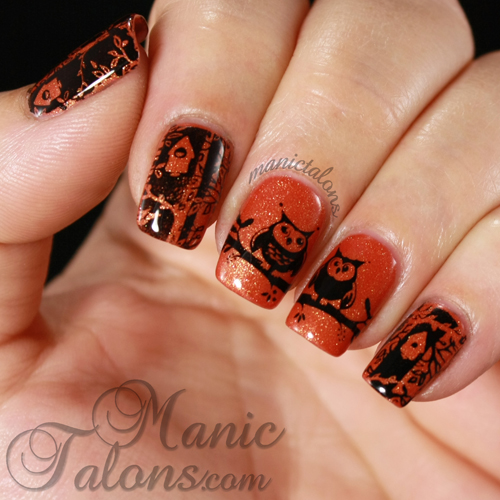
For this mani, I started with a base of Couture Center Stage (swatched below) and stamped with Mundo de Unas black.  I did have a little bit of trouble with the solid black portion below the larger bird house from the tree image (index finger), but as you can see on the thumb it was user error.  What can I say...my stamping skills aren't perfect.  :)

When I test stamped this plate, I realized I just couldn't complete this post without showing you those sleepy little owls stamped in white over a blue base.  Would this not be perfect for a baby shower?
Messy Mansion MM38, Baby Owls Manicure
For this one, I used Couture Naughty-Cal for the base and stamped with Mundo de Unas White.  Please note that the base color is not accurate in the photo above.

The Owl Plate (MM38) is currently sold out on the Messy Mansion website, but check back if you want it as she restocks regularly.  Also, follow Messy Mansion on facebook to be sure you don't miss the restock!  This is a very popular plate.  :)

I know I rave about my Messy Mansion plates a lot, but they really do deserve all of the love I give them.  They are high quality, I never have to stretch an image, and Julia's designs are fabulous!  Every time I think I have acquired all of the ones I can't live without, she comes out with a new design that blows me away and gets added to my "must have" list.  While they do ship from Australia, I have found that delivery times to the U.S. are usually quite fast for international shipping.  So far I have always received my plates within 5-10 days of ordering.  The customer service is impeccable as well!

The plates I have shown you today are press samples that were provided by Messy Mansion for my honest review, but I have purchased many as well and have never had an issue with delivery or quality.  I just placed an order for two more plates last week and am anxiously awaiting their arrival.  Now if she could just find a way to get her LeadLight Lacquers out of Australia and onto my nails, I would be in Heaven!

As promised, here are the swatches for the base colors I used in the manicures above.

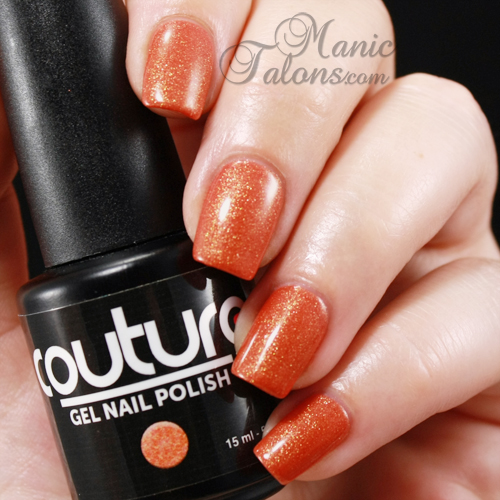
Couture Center Stage is a burnt orange base that is loaded with golden shimmer.  I found this one very easy to apply - no streaks and opaque in two coats.  As usual, I swatched three just to be consistent.
Couture Gel Polish Center Stage Swatch

Couture Private Jet is a delicate grey cream.  This one did require my usual three coats to be fully opaque.  Depending on how thin you apply each layer, you may find it to be opaque in two.
Couture Gel Polish Private Jet Swatch

Finally, Couture Naughty-cal is a muted blue cream with lavender tones.  I swatched this one before but realized when I put it on again that I failed to shake it well before the previous swatch, thus resulting in an inaccurate color representation.  The photo below is accurate to the color of the gel when the pigments are properly distributed.
Couture Gel Polish Naughty-Cal Swatch

What do you think of the Messy Mansion Easter and Owl plates?  Do you need them?  Are there other Messy Mansion plates you can't wait to get your hands on?  I'm eagerly awaiting delivery of the Lace plate and the Scriptorium plate right now!  They should be here within the next week and I can't wait to show them to you.  Also, check back next week for swatches of Lily Anna 09 and the Messy Mansion Pirate plate!

~Michelle

*The stamping plates featured in this post were provided by Messy Mansion for my honest review.  The gel polishes swatched in this post were provided by Couture Gel Nail Polish for my honest review.

Read more ...

Wednesday, May 14, 2014

LeChat Sugar Me Up Collection Swatches

Affiliate Links

LeChat Sugar Me Up Collection Swatches

Hello Loves!  I have swatches of the LeChat Sugar Me Up collection to show you today.  My bestie won them in an Instagram contest and was kind enough to let me swatch them for you!  I'm sure there are at least two of these I need for my own collection.  :)  I was a little surprised that most of these are brighter than they appear on the LeChat facebook page.  I was expecting pastels, but I'm not disappointed at all. 

Before I get to the swatches, I couldn't resist a few nail art pieces with this one.  I'll show you one now and one at the end of the post.  I was going for something sweet.  I'm not sure I like it.  Rather than being sweet, it reminds me of the Circus.  But look - I managed to use tape!  I do love these adorable little bows from Born Pretty Store, though!
LeChat Sugar Me Up Collection Manicure

Ok, onto the swatches.  First up is Lollipop.  This is a slightly muted, slightly coral leaning orange cream.  Application was standard for LeChat - it went on smooth and streak free.  This is three coats, but it would have been fine with two.
LeChat Lollipop Swatch

Cotton Candy is a sweet, slightly muted pink cream.  Application was similar to Lollipop.  Again, this is three coats but two would have been fine.  I actually only used two for the base of the manicure I showed you before I started the swatches.
LeChat Cotton Candy Swatch

Lemon Drop is a very aptly named polish.  It is the exact color of a lemon drop candy.  This yellow cream applied nicely but not quite as well as the two before it.  This one did require three coats for it to be opaque.
LeChat Lemon Drop Swatch

This next swatch is Mint Jubilee.  This is a soft, bluish green mint cream.  It was a bear to photograph but is beautiful in person!  This is color accurate on my monitor, though I had to shoot a little darker and sacrifice skin tone to get it right.  Application was the same as with Lollipop or Cotton Candy and only two coats are truly needed.  I swatched three anyway for consistency. 
LeChat Mint Jubilee Swatch

Spearmint is a bright green that reminds me a lot of the color of Double Mint Gum.  This one has a subtle shimmer.  You can see it a bit on the middle and ring finger nails.  Sadly, I had to shoot this one a little dark to get it accurate as well.  The shimmer wanted to make it appear blown out under my lamps.  This is yet another two coater than I swatched as three anyway.
LeChat Spearmint Swatch

Finally, Rock Candy is a gorgeous blue with the same muted shimmer as Spearmint.  I had a very hard time getting this one color accurate.  This photo is still a bit off.  The tone is correct, but it is a little brighter in the photo than it looks in real life.  This one also applied beautifully and is opaque in two coats.  It did seem a little thicker than the other 5, but I don't consider that a negative at all.  It wasn't thick enough to give me issues.
LeChat Rock Candy Swatch

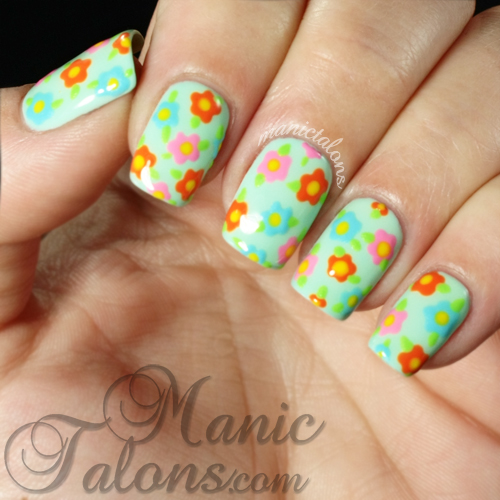
Finally, here's the other mani I put together using all 6 of the colors in the Sugar Me Up Collection.  I really like how this one turned out, but my husband says it looks like my Grandmother's shower curtain.  I swear that wasn't my inspiration, but it does look very similar.
Flowers with LeChat Sugar Me Up Collection

Which of these are your favorite?  I definitely need Lemon Drop and Mint Jubilee.  I'm a little torn on Lollipop since I don't wear orange very often, but it is a gorgeous orange!

LeChat has a new collection out now called Mermaid Treasures.  I'll have swatches of that one too as soon as I can get my hands on them!  Hopefully very soon.  :)

~Michelle

*This post uses Amazon and Born Pretty Store Affiliate links.  Purchases through these links generate commissions that help fund this site.

Read more ...
Monday, May 12, 2014

KBShimmer Early Summer 2014 Collection

Press Sample Affiliate Links

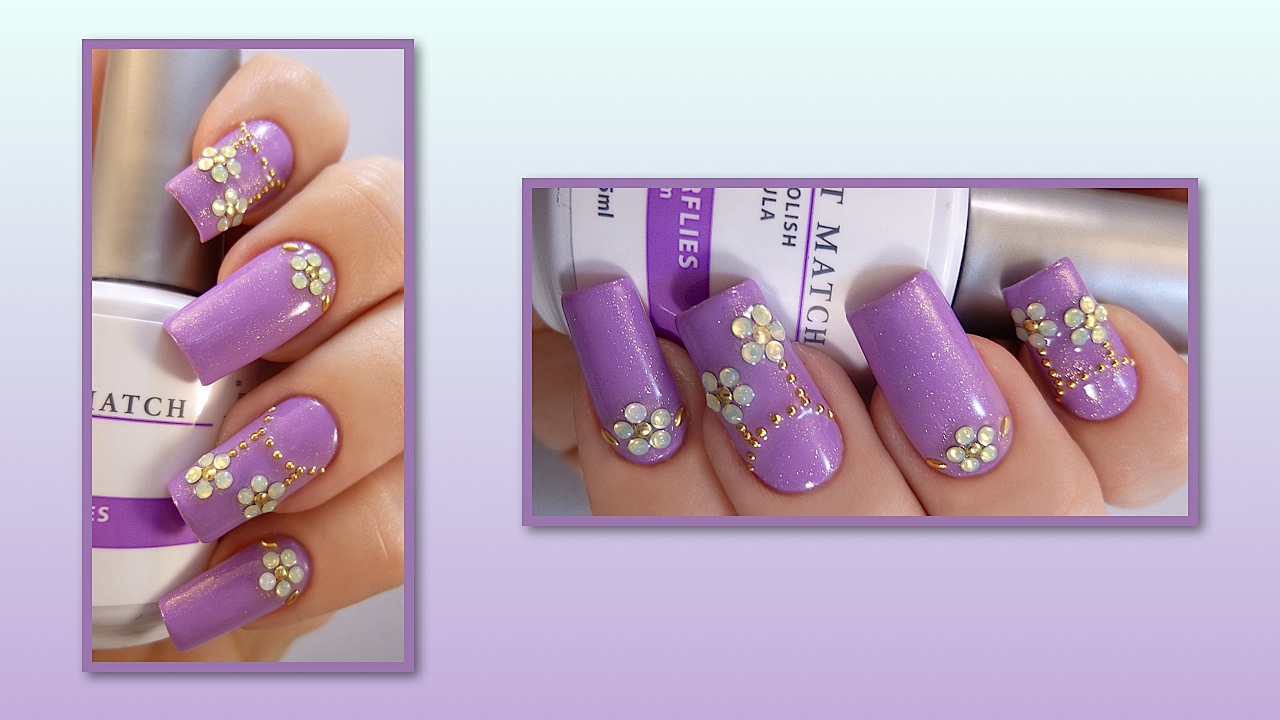
Hello Loves!  I apologize for the late post today, but I promise it's worth it!  I have 6 pre-release polishes from the KBShimmer Early Summer 2014 Collection to show you today.  These are all traditional polish, but I have sandwiched them with Soak Off Gel as a gel addict is bound to do.  ;)
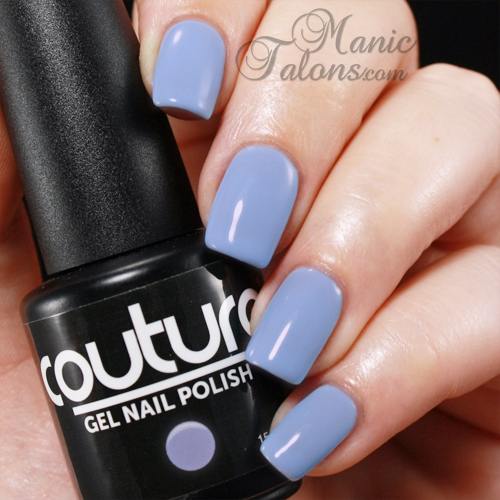
KBShimmer Early Summer Collection 2014 Swatches

This collection consists of 3 gorgeous creams, 3 incredible textures, and 6 new amazing holos.  I chose two of each to show you.

I'll start with the creams.  If you're a gel user, you're probably wondering why I picked cream RNPs when creams are readily available in almost every shade imaginable in gel.  Well, two reasons.  First, they're gorgeous and I just couldn't resist them.  Second, I have given up on tape manis using gel and the KBShimmer formula is fabulous, so I plan to attempt a RNP sandwich tape mani.  ;)

The first cream is this gorgeous royal blue called Low And Be Bold.  This one reminds me a lot of Couture Royalty but in a cream instead of a jelly.  Simply stunning!  As I mentioned, the formula is fabulous and I struggled very little with application - which is saying something considering how out of practice I am at applying RNP!  Shown below is three coats of Low And Be Bold over a clear SOG base with SOG top coat.
KBShimmer Low And Be Bold Swatch

The second cream I chose is this beautiful pink toned coral called Let's Not Coral.  The color is fabulous and the application was smooth.  I will say this one whooped my tail a bit, but at no fault of the color.  I kept dinging it and having to start over.  Dry time on RNP kills me!  As with the swatch before, this is three coats over a clear SOG base with SOG top coat. 
KBShimmer Lets Not Coral Swatch

The next two polishes I have to show you are holographic.  I swatched these as SOG sandwiches as well, again with 3 coats between a clear base and SOG top coat.  I adore these so much!  The formula is fantastic and they both applied smooth as butter on a hot roll.  Holos are usually tricky for me, but I had no trouble with these at all.

When it came time to choose my colors, I didn't have to think twice about this one.  Nude and holo?  Yes Please!  In Bare Form is opaque in two or three coats but can be worn as one coat for a sheer look.  It's so incredibly versatile and I just had to have it.  Isn't it gorgeous?  It takes on a slightly golden tone on my skin, but it is more of a taupe in the bottle.
KBShimmer In Bare Form Swatch

Since linear holos do not exist in gel, I took another shot.  Trust me, you need it.
KBShimmer In Bare Form Swatch

The second holo I have to show you is Stark Raven Mad.  It is described as a charcoal shade, but I consider it to be black.  And an awesome black at that!  The holo in this one is much stronger than appears below.  Top coat does tend to mute the holo a bit, but I wanted to show how it looks sandwiched for longevity.
KBShimmer Stark Raven Mad Swatch

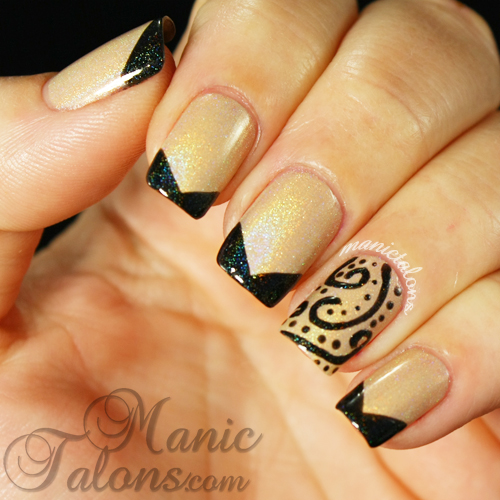
Did I mention how much I love these?  Yes?  No?  Well, let me say it again!  I loved them so much I couldn't resist using them for a little nude and black nail art.  This is a completely new look for me and I'm pleased with how it turned out.  The accent nail is made up of simple swirls and dots using a fine detail brush and Stark Raven Mad. 
KBShimmer In Bare Form, KBShimmer Stark Raven Mad, Nude and Black Nails

Finally, I have the two textures to show you.  I saved these for last because they are simply my favorites!  I seriously regret not getting the other texture in this release because now I have to wait for the release on May 23rd to get my hands on it.  I am very picky about textured polishes.  The first one I tried was a NOPI and I think it set the standard for me.  I like my textures to be a bit chunky, but easy to apply.  Well, these certainly fit the bill!  I was half expecting to fight with them like many glitter polishes and other textures I've tried, but I didn't have to fight at all.  No dabbing.  No arranging glitters.  Simply three coats applied like the creams.  Fabulous!

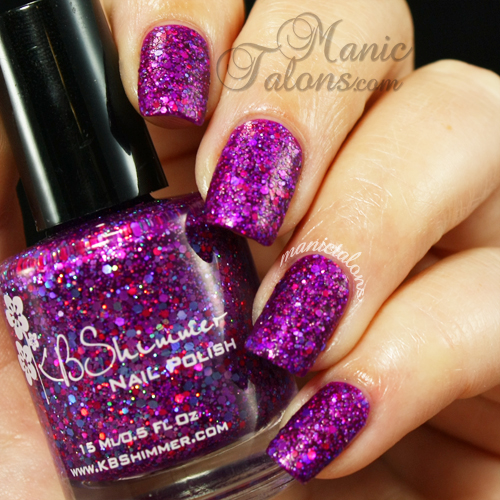
First up is Too Pop To Handle.  This texture is a slightly red toned purple that is packed with holographic glitters.  I can't even think of the words to describe it, so I'll let the pictures do the talking. Check out the texture!  This is three coats over a clear SOG base without top coat.
KBShimmer Too Pop To Handle Swatch, Textured Polish

Want to see it a little closer?  I thought you might, so I took a macro shot.  It turned out a little blurry.  Sorry about that...I haven't quite mastered macro shots with my camera yet.  But hey, points for trying, right?  ;)
KBShimmer Too Pop To Handle Swatch, Textured Polish

If you're not a fan of textures, that's ok.  She's even more incredible with two layers of SOG top coat!  I used Gelaze top coat since it's a bit thicker than my others.  A-May-Zing!
KBShimmer Too Pop To Handle Swatch, Textured Polish

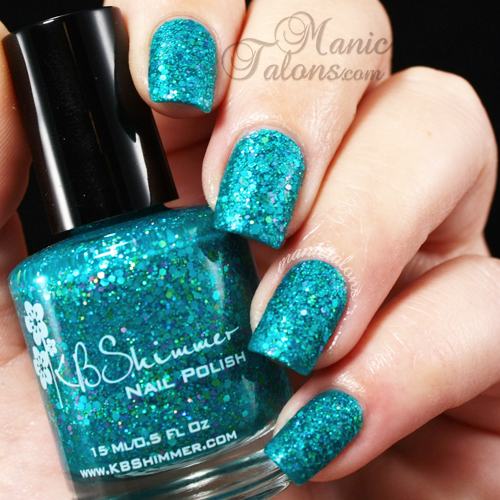
So, I saved the best for last.  She Twerks Out is my personal favorite of the six I'm showing you, and I am wearing it in my final mani for the week!  I have shown this aqua beauty here over a clear gel base.  I'm in love with the aqua, green and purple holographic glitters.
KB Shimmer She Twerks Out Swatch, Textured Polish

I promise the colors are in there.  They got a little lost in my photos, sadly.  You can see them better in this macro shot.  Thankfully, this macro turned out better than the other one!
KB Shimmer She Twerks Out Swatch, Textured Polish

Want to see this one with top coat?  Believe me, you really do.  Again, I added two coats of Gelaze top coat.
KB Shimmer She Twerks Out Swatch, Textured Polish

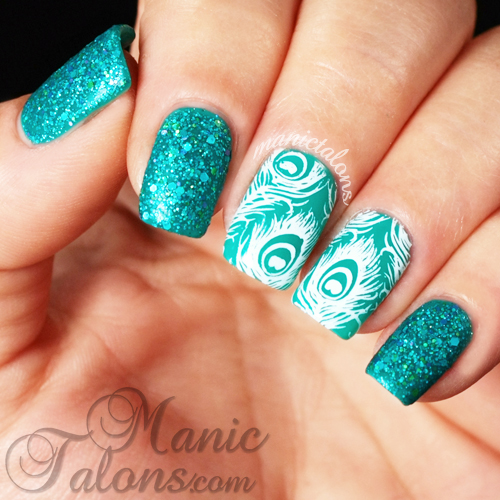
Since I mentioned my mani for this week, would you like to see it too?  I started with a base of Gelish Radiance is My Middle Name.  I didn't think to grab a swatch photo.  Sorry about that.  I then applied two coats of She Twerks Out to the thumb, index and pinkie nails.  The middle and ring nails are stamped with Mundo de Unas White using the peacock feather image from MoYou London Pro 05.   I left the main nails textured for now, but I might add top coat later in the week to change it up.
Peacock Manicure, KBShimmer She Twerks Out, Textured Polish, Stamping

The official release date for this collection is May 23, 2014.  They will be available for purchase then.  In the mean time, be sure to follow KBShimmer on Facebook, Twitter and Instagram to see other colors in the collection and to be sure you don't miss the release!

Which of these are your favorite?  See any you personally can't live without?

~Michelle

*The polishes featured in this post were provided by KBShimmer for my honest review.  This post also uses affiliate links.  Purchases through these links provide funding that helps support this site.
Read more ...