Wednesday, December 31, 2014

Happy New Year!

Hello Loves!  I'm back!  What better way to come back from a short holiday break than with glitter?  Of course, I have to show you my bling-tastic New Year's mani.
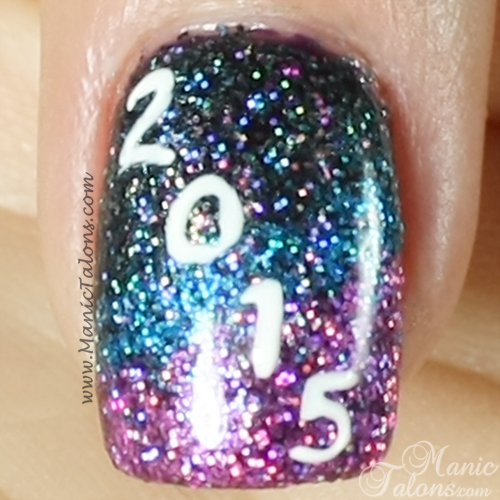
Rock Star Glitter Manicure with ArtsyFartsy Crafts Glitter

I just couldn't help myself.  I need something sparkly to bring in the new year.  So I broke out my ArtsyFartsy Crafts holographic glitters and went to work.  As I'm sure you know by now, ArtsyFartsy glitters are my glitter of choice.  Sandy makes sure that all of her products are top quality and they are absolutely perfect for nail art.  Plus I love that she offers them in small quantities that are just right for the DIYer.  If you haven't tried them yet, what are you waiting for?!?!?  You're not going to find higher quality glitter or even the same quality at a better price.  $0.99 for a teaspoon that is more than you'll need in your lifetime is a steal!  Try one, or two, or a dozen.  You'll thank me later.

I started with a base of Madam Glam Deep Dark Purple.  I had planned to place the glitter directly into the tacky layer of the 2nd color coat, but Deep Dark Purple isn't quite as tacky as I had hoped.  So I added a layer of top coat and started by pressing random lines of AFC Ultrafine Sky Blue Holographic Glitter onto each nail.  I then came in on one side of the Sky Blue with AFC Ultrafine Purple Holographic Glitter and AFC Ultrafine Black Holographic Glitter on the other.  This definitely satisfied my need for bling!  I topped the glitter with a thick layer of gel top coat for a smooth finish.
Rock Star Glitter Manicure with ArtsyFartsy Crafts Glitter

Of course, to make it more New Years themed, I freehanded "2015" on the ring finger nail with Akzentz Gel Play in white.
Rock Star Glitter Manicure with ArtsyFartsy Crafts Glitter

I am super in love with this mani!  The pictures really don't do it justice, but here's a slightly blurred shot to show the holographic effect of the glitter a little better.
Rock Star Glitter Manicure with ArtsyFartsy Crafts Glitter

I apologize for the thickness.  Apparently adding four layers of gel polish plus glitter on top of acrylic equals super thick nails.  I'll be so glad when my natural nails grow out again.  I miss them so bad!  Acrylic is fun and all, but it's just not the same.  :(

Any who, I'm back and ready for action.  I wish I could say that my little break left me refreshed with a ton of content ready to post, but instead it left me exhausted with a cold.  But I do have a fun gel polish to show you on Friday.  Here's a hint:  it's from Bundle Monster, and it's a tricolor thermal! 

I hope you have a wonderful and safe New Years Eve!  How do you plan to celebrate this year?  I suspect my rock star nails and I will be wrapped up and snoring in a NyQuil induced coma.  ;)

~Michelle

Read more ...

Monday, December 22, 2014

The Nail School Chronicle: Week 5


Hello Loves!  Want to hear what we learned in week five in nail school at GCI?  Yeah?  Me too!  Sadly, I don't have much to share this week.  My little one caught the flu, so I was only able to attend class for two of the four sessions.  As if I needed anything else on my plate, right?  Thankfully I've had my flu shot and it seems to be keeping the flu at bay.  Of course, we're having to be extra careful to keep Keith from catching it.  The flu on top of his broken ribs from the accident would be pretty brutal.

Anyway, I may have only been in class for two days, but I did have a breakthrough.  As you know, I have been struggling with ball size and consistency when working with acrylic.  I've become a master at filing down and shaping mountains of acrylic, but my application was still lacking.  When talking to my instructor, she mentioned that watching different techs might help since everyone has a different technique to reach the same result.  About that time, the night instructor came in.  Ms. V is the cutest, funniest lady ever!  So I put her on the spot and asked her to show me her method.  Bless her heart, she wasn't quite sure what to think at first.  Like maybe she thought I was insulting my instructor?  lol

Anyway, watching Ms. V definitely helped.  My instructor is amazingly talented with acrylic, but she rolls the ball off of her brush, which makes it difficult for me to see how wet the ball really is.  Since Ms. V uses a flat brush, she gently presses the ball onto the nail and it made a world of difference for me to see that little puddle of liquid on top of the ball when she pulled her brush away.  Previously, I have been able to finish one set of blended tips with an acrylic overlay in about 4 hours.  Now I'm rocking along at 4 sets per full class day.  Given, I still need a lot of practice, but I have my consistency, ball size and placement much closer to correct now.  Yea!  You won't have to hear me whine about the size of my balls anymore.  lol  Turns out I was working way too dry and overlapping the balls too much.

Moving on...I did find that there is a benefit to wrecking your nails and wearing enhancements.  I can play with my nail shape risk free!  Don't like my current shape?  No biggy.  I can just sculpt out another shape.  So I decided to give round a try.  I'm personally not a fan.  The shape is ok but they feel too short to me.  I think I'll extend them to true almonds after Christmas.  I might even go stiletto for a week since we're on Winter Break until January 5th.  ;)  Of course, my right hand still has natural nails, so they're still square/squoval.  After all, I couldn't possible have nails that match completely on both hands.  I don't even want to think about what might happen if both of my hands matched.  The world just might stop turning.  Or the polar ice caps would melt in a day.  Or Hell might freeze over.  I'm really not sure, but I'm not going to risk it.  ;)

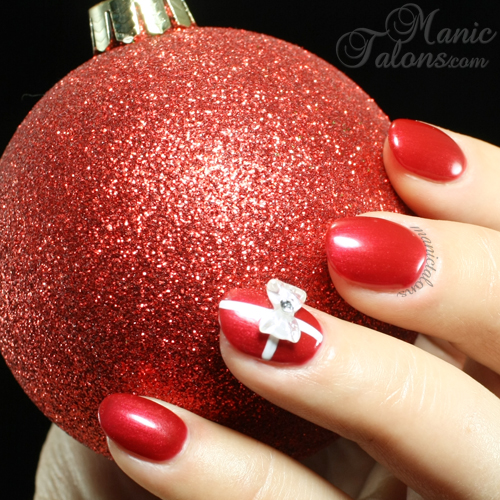
Wanna see my sculpted rounds all dolled up for Christmas?  Of course you do!  I took a bunch of photos this time.  Why?  Well, when else can you pose with a glittery red ornament without looking crazy?  ;)
Christmas Nails with Ribbon and Bow

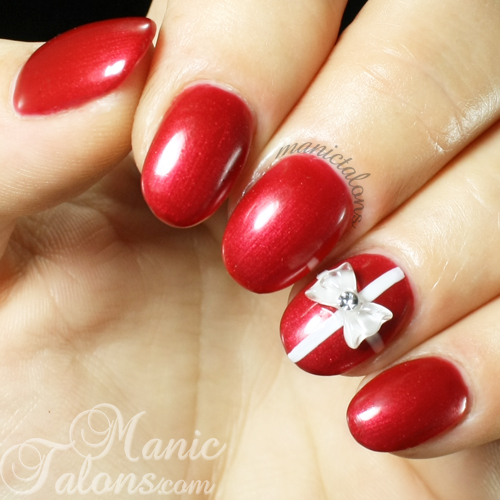
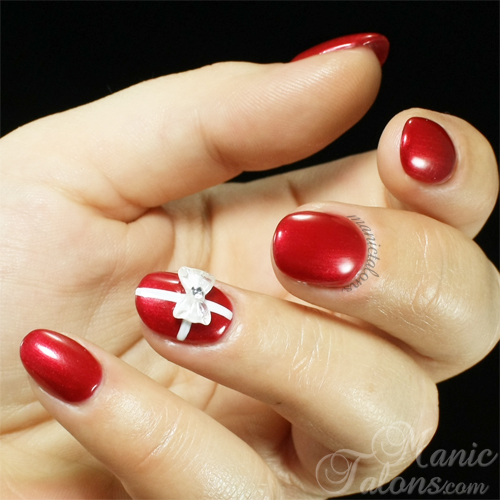
After sculpting the acrylic into this round shape, I applied two coats of Moulin Rouge by Pink Gellac.  This is one of the new colors that Chickettes has brought to the States.  I'll have true swatches of this and the other 5 new colors for you in a week or so.  (Not that these photos aren't true.  They are.  But I'll have swatch pics without the art soon).  I added a few white stripes for ribbons using Akzentz Gel Play and topped it off with a bow.  Simple, but I think it is pretty.
Christmas Nails with Ribbon and Bow

The photo above shows why I'm not in love with this nail shape.  My nails look too...bubbly?  Chubby?  The shot below, however, shows the one great thing about this shape.  My crooked finger and crooked nail don't look quite as crooked as they do with my beloved squovals.  lol
Christmas Nails with Ribbon and Bow

The shape is definitely growing on me a little.  I don't know that I'll ever completely learn to love it, but there is something very elegant about it.
Christmas Nails with Ribbon and Bow

Finally, another shot with my glittery Christmas ornament, because, well, glitter!
Christmas Nails with Ribbon and Bow

Sorry I don't have anything else to share this week.  I'm telling you, things have just been crazy.  I'm really looking forward to a new year.  2014 has simply sucked.  Anyway, I'm being pulled in a million directions right now.  With Keith out of commission from the wreck, William sick with the flu, Christmas only a few days away, and shopping still left to do, I'm drowning.  So as much as it breaks my heart to do it, I'm going to take a week off from blogging.  There simply isn't enough time to squeeze it all in.  Since Christmas and the flu have to be so rude and force themselves into my "me time", I guess I have no choice.  ;)

I'll be back around the first of the year (give or take a day) with some pretty awesome swatches.  I have the new Pink Gellac colors, the Bundle Monster Metallic gels, a few Bundle Monster thermals, some random OPI GelColors, and some stamping plates to show you.  Plus I'm playing with a few nail art techniques that are new to me.  We're going to start the new year off right, I promise!

Until then, I hope each and every one of you have a peaceful, happy and flu-free holiday season.  To those who celebrate, Merry Christmas! To my Jewish readers, Happy Hanukkah! To all others, Happy Holidays! Please be safe out there as 2014 winds down.  And if I don't make it back before the 31st, Happy New Year!

~Michelle

Read more ...

Thursday, December 18, 2014

Teadora Nourishing Body Polish Review

Press Sample Affiliate Links


Hello Loves.  I know this isn't my usual type of review, but I couldn't resist.  I get horrible dry skin this time of year, so I have to exfoliate regularly.  I've tried a lot of different exfoliating scrubs over the years, but I also have sensitive skin and find them to be irritating.  So when I was offered the chance to try the Nourishing Body Polish from Teadora, I simply had to say yes!  Teadora offers high quality, organic bath and body products made from sustainable ingredients from the Amazon Rain Forest.  Teadora products are also 100% Vegan and cruelty free.

Winter is horrible for my skin.  Between the dry heat indoors, cold air outdoors, and long sleeve sweaters, my skin gets seriously ashy.  I put Teadora Nourishing Body Polish to the test for the past few weeks.  As usual, when I say I put something to the test, I REALLY put it to the test.  I started using the Body Polish every other day just over two weeks ago.  Sounds great, right?  Yeah, I like to take things a step further than that.  I stopped using my winter body lotion and have been using my thinner summer lotion instead.  I figure if this exfoliating scrub really works, the light summer lotion will be all I need since exfoliating should allow lotions to penetrate easily and work better.


Before I get into the full review, let me tell you a little about the Teadora Nourishing Body Polish.  Straight from the Teadora Press Release:  "Teadora’s Nourishing Body Polish is loaded with powerful, sustainably harvested natural and organic ingredients from the Amazon rainforest. The formula includes Teadora’s Icons of the Rainforest (Buriti, Pitanga, Cupuaçu, Andiroba and Açaí) and Rainforest Hydration Elixir (Babassu, Brazil Nut, Rose Hip Seed and Passion Fruit oils), plus a potent combo of Açaí Seeds for deep exfoliation and Amazonian Clay to help reduce blemishes for brighter, healthier, smoother skin."  Now, I'm not even going to pretend to know half of what of those things are.  The only ones I recognize are the Açaí, Brazil Nut, Rose Hip Seed and Passion Fruit Oils.  But I know those are great for the skin so I assume the others are too.  ;)  The body polish comes in two 100% natural fragrances - Rainforest at Dusk and Rainforest at Dawn.

I chose the "Rainforest at Dawn" fragrance.  I'm not really sure how to describe it, but it has a definite earthy scent.  My husband says it smells like perfumed dirt.  lol  He's not 100% wrong.  I can definitely smell the clay in it, but I also pick up woodsy notes that remind me of sandalwood (I apologize for not having a better description...I'm not drawn to woodsy or earthy fragrances so I don't even know how to describe them).  It is quite pleasant even though it isn't my personal taste in scents.

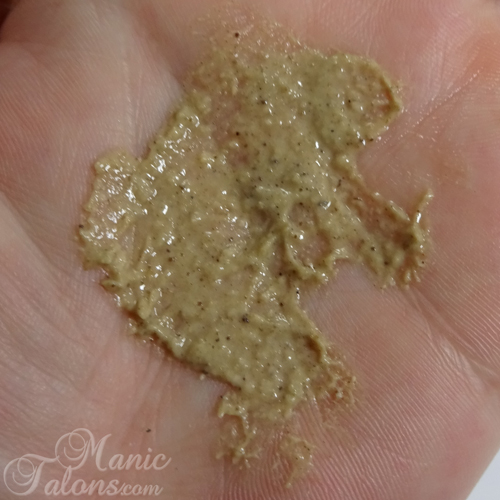
The formula itself is more important, I think.  Unlike many exfoliating scrubs, the grit in this one is very fine.  Definitely more of a polish than a scrub.  While it is a bit more expensive than your typical drugstore exfoliating scrubs, unlike sugar or salt scrubs, it doesn't melt or dissolve so a little bit goes a really long way.  The photo below is straight out of the bottle.  I spread it around just a tad so you can see the texture better.  By the way, this little amount is enough to exfoliate my entire upper body...and at 209 lbs I'm not a small gal.  (Yes, I just posted my actual weight for the world to see.  There's no shame here!)
Teadora Nourishing Body Polish

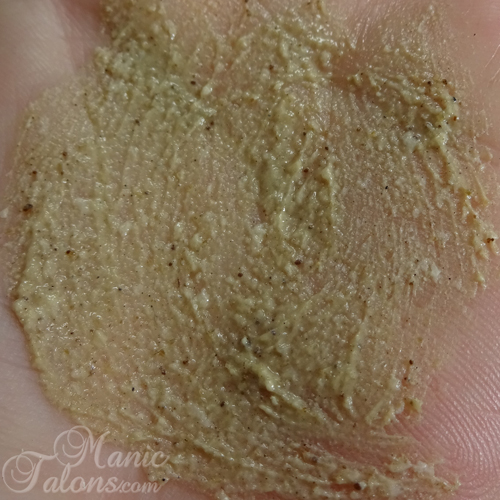
This is after rubbing it around a bit more.  As you can see, it's not quite sand texture but definitely gritty.
Teadora Nourishing Body Polish

So, does it work?  Yes, yes it does.  As I mentioned above, I have been using it every other day for just over two weeks.  It hadn't really gotten cold yet when I started, so I would call this my fall skin.  As you can see, it is a little bit ashy.  I apologize for the tattoo photo, but it is easier to show the difference in skin brightness over ink than just a photo of a random patch of skin.  You can see the dryness most over the black ink as it looks more grey than black.  This photo was taken an hour after my shower without body lotion.  (Wow...looking at this tattoo in macro mode makes me realize I really need to have it touched up!)
 Teadora Nourishing Body Polish Results - Before

And here's the same tattoo after using the Teadora Nourishing Body Polish every other day for two weeks.  Again, this is an hour after getting out of the shower without body lotion.  You can see that the black ink looks much bolder because it isn't covered by a layer of dull, dry skin.  My skin around the tattoo also looks brighter and has a nice glow.  :)
Teadora Nourishing Body Polish Results - After

I'm really impressed with this gentle yet effective exfoliating scrub.  Even though I'm not a huge fan of earthy scents, I'll continue using it because it works for me without irritating my skin!  I can't even begin to tell you how huge that is for me.  I actually need to pick up another bottle.  No doubt this is the product that will help me survive winter.  :)  I'm really curious to try some of the other Teadora products now too!

Speaking of picking up another bottle, if you would like to try it you can get your own bottle at www.TeadoraBeauty.com or click on any of the links scattered throughout the text above to purchase through Amazon.

~Michelle

*The Nourishing Body Polish featured in this post was provided by Teadora for my honest review.  This post uses Amazon Affiliate links.  Purchases through these links generate commissions that help fund this site.  All other links are non-affiliate links and do not benefit ManicTalons.com.
Read more ...

Tuesday, December 16, 2014

The Nail School Chronicle: Week 4

The Nail School Chronicle Week 4

Hello Loves.  Ready for another nail school update?  Yeah, me neither.  lol  I apologize for the late post.  Last week was crazy crazy crazy, but I have lots to talk about. 

So, I only got in three days of school last week.  Back to back sick kids.  Blah.  One with a nasty cold and the other with yet another ear infection.  Usually it wouldn't be a two day absence, but since Keith is still unable to lift anything (or anyone) with his broken ribs I had no choice but to miss class.  It wouldn't be a big deal except I also missed my second test and what would have been my first pep rally.  Yes, GCI has monthly(?) pep rallies for the students.  By what I'm told, it was a lot of fun and apparently my fellow classmates have a ton of pep in them.  They won the "Spirit Stick" for having the most school spirit.  I'm still really bummed I missed it.  I guess I'll have to wait for the next one.  Anyway, my instructor was kind enough to send me the class photo to share so you get to see my classmates.  :)  My instructor, Ms. Rhonda, is the second from the left in the back row in the traditional red and white Santa hat.  Isn't she adorable?

Moving right along...here are my Nail School Observations for the week.
  • I still hate acrylic.  Ok, maybe I don't hate it, but it is completely stomping my butt.  I'm definitely improving, but not as quickly as I would like (pics in a few).  I know it's crazy...it's only been 4 weeks, but I can't seem to get past this notion that I should have mastered it by now.  It really sucks to be an over-achieving perfectionist.  Needless to say, I'm still struggling with acrylic consistency and ball size.  Yes, I'm talking about the size of my balls yet again this week.  ;)  But in all seriousness, getting the right size acrylic ball is amazingly difficult for me.  I either end up with too much acrylic on my brush or not enough.  Blah.
  • I can honestly say that I have mastered the art of filing down a mountain of acrylic into a decent shaped enhancement.  Nevermind that I'm wearing the grit off of two files a day.  :/  I'm in the market for a good e file that won't break the bank...you know, just in case I manage to break it.  I've been told that I won't mess up an e file, but I assure you I can and likely will break one.  Its a special talent I possess - I can break anything.
  • I did my first pedi this week.  Ewww...feet.  Just kidding.  Having a stranger's foot less than 2 feet from your face while filing away dead foot skin isn't as traumatizing as I thought it would be.  One word:  gloves.  Gloves make everything better.  I kid, I kid.  The gloves do help, but I found that instead of focusing on the fact that I was holding a stranger's foot, I was focused on doing everything right.  This really shocked me.  I seriously hate feet.  No lie, I've been with my husband for 9 years now and I have never touched his feet.
  • With that said, I seriously need a practice foot (believe it or not, they do make them.  And not just for Halloween props!).  Polishing toe nails is ridiculously difficult.  I knew I suck at polishing my own.  Bending over to touch my toes isn't exactly easy these days.  I subscribe to the saying that if God wanted me to touch my toes, he would have put them on my knees.  But I digress.  I didn't expect to suck so bad at polishing someone else's toes.  Getting the right amount of polish on such a tiny surface is tricky.  Looks like poor hubby is going to have quite a few painted piggies over the next few months and I'm going to have to break my 9 year no touch streak.  ;)
  • That second test...aced it.  I'm on a roll with the theory tests.  Let's hope I can keep it going and graduate with a perfect record.  ;)
  • I also had my first spa project.  We had to create a custom spa mani or pedi service.  Easy Peasy.  I focused on Jasmine and Vanilla aromatherapy.  It sounded like a great combo when I started and it didn't hurt that I already had the oils in my personal stash.  Both are great for relieving stress and promoting relaxation, plus Jasmine oil helps even skin tone.  Shame the Jasmine oil is so expensive, though.  Aced the project too.
  • Learned something else while researching for my Spa Project.  Jasmine and Vanilla are both aphrodisiacs.  Oops.  Or Yea!  ???  I'll let you be the judge of that.  
  • Jasmine Green Tea is pretty nasty.  Given, green tea on it's own is an acquired taste...I can drink it but I don't love it.  But Jasmine Green Tea...blech!  It's like chewing on flower petals.  It tastes exactly like Jasmine smells.  Not cool.  Needless to say, the Jasmine and Vanilla Green Tea beverage that was supposed to be part of my spa pedicure just might have to be scratched if I ever actually offer the service.
  • I have absolutely no idea how nail techs have nice hands.  Seriously, my hands are so badly beaten its not even funny.  I now have officially broken, split or otherwise mutilated every nail on my swatch hand.  My poor, beautiful, natural nails are no more.  I don't have a single natural nail tip left.  They are all sculpted in something or another at this point.  I would have just left them as nubs, but there's swatching to do...if I can find the time to do it between kids, holidays, the injured husband, class, a desperate need for sleep...you get the picture.  Mama is worn out!
  • I'm really starting to think I prefer acrylic over hard gel.  Blasphemy, I know.  And yes, I am aware that I started this list by saying that I hate acrylic, so let me explain.  I have found that my enhancement attempts so far have ended with lifting after a week.  I know what I'm doing wrong.  I just can't seem to do it right.  Between the two, gel has to be filed off and acrylic can be soaked off.  Removal of botched acrylic is simply easier.  Me thinks me needs some CND Brisa Lite!
  • Yeah, yeah, yeah...I hear you.  Michelle, you're rambling.  Lack of sleep - that's my story and I'm sticking to it.  So let's just wrap this up and move on to a few pics, mmmkay?

Before we get back to the nail stuff, allow me to take a quick detour.  If you follow me on Instagram, you may have already seen this pic, but I'm sharing it anyway.  I was at Lowe's the other day picking up one of those long grabber things so Keith can pick things up without bending over.  I found this awesome purple toolbox.  They had it in pink too.  Now, I don't need a tool box for tools, but it is perfect for carrying my basic mani and pedi supplies down to Mom's so I don't have to lug my huge, heavy OPI case down there.  Best part?  It was only $13!  I had to have it, and the young prince insisted on carrying it around the store.  It's almost as big as he is and he was just precious with his little bump, thump, bump, thump, bump, thump walk as he tried to lug it from the garden center to the cash registers.  Like any good mother, I took a few blurry pictures (cut me some slack - it's nearly impossible to get pics of a kid on the move with a cell phone and not have them turn out blurry).
Oh, but the story doesn't end there.  When I grabbed my kit to put it in the car this morning, I turned around to see William standing there with his (my) purple toolbox.  He wanted to be just like Mommy and insisted I put it in the trunk with my kit.  Sweet, silly boy!

Ok, ok...back to the nails.  As I mentioned at the beginning of my rambling list above, my acrylic work is definitely improving.  These are blended tips with pink and white overlays from last week.  They aren't too horrible, I don't think. Definitely not perfect, but not bad.

And here's the comparison between my first attempt and this most recent set.  The shape is better and I'm pretty pleased with those smile lines.  Now if I could just manage to do it without having to file and shape so much, I would be tickled pink.

Finally, want to see my naked swatch hand?  The middle and ring fingers are still the sculpted hard gel nails that I posted last week.  The thumb, index, and pinkies are now sculpted acrylic.  I'm kind of digging the look of the acrylic nails over the hard gel ones.  I'm not sure if it's just that my technique is improving or if I've bumped my head, but the acrylic nails just look better to me.  Now if I can just find time to throw a coat of polish over them, I think I'm good to go.  The clear is kind of creeping me out, but I think it will keep my swatches truer than if I had used a white on the tip.  Probably not going to polish them tonight, but I will at least remove the traces of white polish from around my cuticles.  I might even remove the red polish from the pad of my thumb too.  lol  Oh, and please excuse my poor, beat up skin.  Yikes!  It's super difficult for me to file and shape acrylic on my own hands without hitting my skin with the file.  I'm sure that will improve over time, but for now Neosporin will be my best friend.  :(
(Side note, my hands and cuticles aren't really this red.  I snapped this pic with my point and shoot instead of my Canon and it tends to make everything look too warm.  It's a white balance issue for sure, but I haven't had time to read the manual and figure out how to change that yet.  As you know from my past photos, my skin has yellow tones, not pink.)

I guess that pretty much wraps up the past week.  I'm a day behind on posts, so check back on Thursday for a new post.  I'm not 100% sure what I'm going to write about yet, but it will be a review for certain.  ;)  Oh, and like the past few posts, I apologize for any typos.  As usual, please feel free to laugh at me.  I'm running on coffee, nicotine, and sheer will power at this point.  lol

~Michelle

Read more ...

Friday, December 12, 2014

BMC Speed Gel Bliss Collection Review

Press Sample Affiliate Links

Bundle Monster Speed Gel Bliss Collection Review

Hello Loves!  I have swatches and a review of the Bundle Monster Speed Gel Bliss Collection for you today.  The BMC Speed Gels are one step gel polishes that do not require a separate base or top coat.  The Bliss Collection is made up of 6 gorgeous, shimmering holiday themed colors that are LED compatible.

Application


The BMC Speed Gels impressed me right off the bat with application.  While not as thick as some of the regular Bundle Monster Gel Polishes, the coverage is awesome!  Four of the six polishes in this collection can easily be worn as one coat.  The other two are nice two coaters.  They apply smoothly and self level nicely.  Those with glitter are easy to apply without the glitter trying to creep down the nail.  Like I said, I'm impressed.  I will say that even though they offer one coat coverage in most cases, I prefer two or more anyway for added strength.  

Swatches


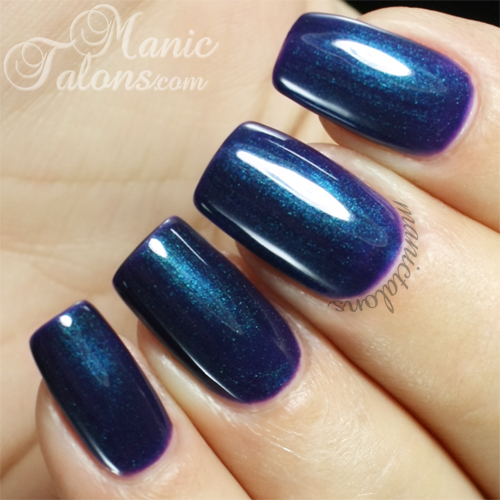
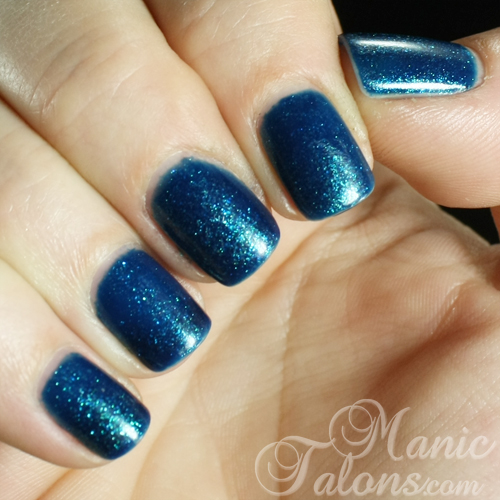
The first polish I have to show you is called Frozen.  Frozen is a royal blue jelly base that is loaded with blue micro glitter.  This one flashes teal in some lights, but I was unable to capture it.  Frozen offers one coat coverage.
Bundle Monster Speed Gel Frozen Swatch

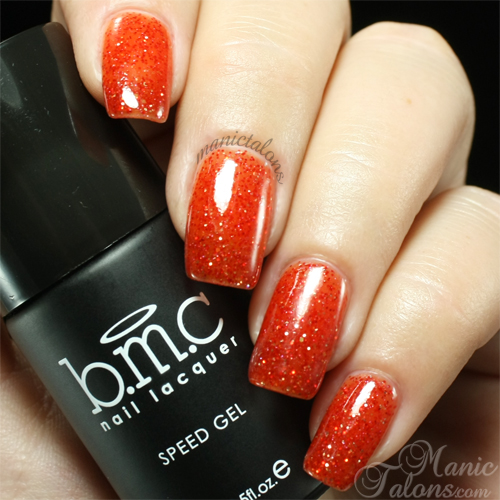
Jingle Bell Rock is an orange toned red jelly base with red and holographic micro glitter.  The shimmer is stunning!  Jingle Bell Rock needs two coats for opacity.
Bundle Monster Speed Gel Jingle Bell Rock Swatch

Mistletoe Kisses is one of my favorites from this collection.  The emerald green base is full of greenish teal shimmer.  The result is a shifty finish.  This one is also a true one coater.
Bundle Monster Speed Gel Mistletoe Kisses Swatch

Polar Express is a rusty gold jelly base that is loaded with golden shimmer.  I love the orange tone of this golden polish.  Polar Express is opaque in one coat.
Bundle Monster Speed Gel Polar Express Swatch

Sparkling Raspberry is a purple jelly base that is loaded with purple shimmer.  This one has a bit of a plum tone and is opaque in one coat.
Bundle Monster Speed Gel Sparkling Raspberry Swatch

Finally, Sugar Plum Princess is a purple base with blue shimmer that gives it a deep blurple appearance.  I did find that this one needs two coats for full opacity.
Bundle Monster Speed Gel Sugar Plum Princess Swatch

Wear


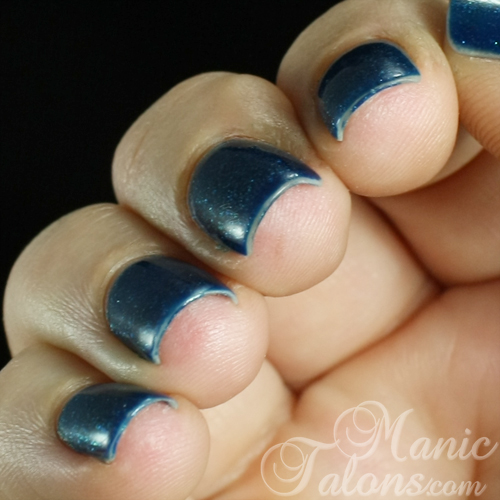
I told you about application in the beginning of the post, so let's talk for a second about wear.  I didn't get to do a full wear test with this one because of school, but I was able to test it for 8 days.  Please excuse my messy application.  I was feeling a little ill when I applied the polish for this test.  I applied two coats of Frozen.  After 8 days, the shine still looks pretty good.  There are a few scuffs where I hit my nails with my file, but the rest of the finish looks the same as when I applied it.
BMC Speed Gel Wear Test Results

I did note a good bit of tip wear though.  No chips, but the tips are definitely wearing away in spots.  This could be a result of the abuse from class, but I can't say for sure.  I shortened my nails on this hand so they wouldn't get in the way of my file as much, but I did still hit them some.  For example, I know the side of the index nail is from my file.  But I don't think I hit the others.
BMC Speed Gel Wear Test Results

Removal


Of course, Removal is always a large factor in my reviews.  So let's talk about the removal.  One Step Gels tend to have strange removals in my experience.  They don't like to flake off of the nail but instead disintegrate and turn powdery.  This one is no different.  I buffed the top coat slightly, the wrapped each nail.  After 10 minutes, the 2nd coat started to bubble and the first started to disintegrate.  I was able to push most of the gel off of my nails at this point, but had to soak another 10 minutes to get the majority of the rest.  I ended up with a few small spots that didn't release during soak off due to damage on my nail plate, but I was able to buff those out.
BMC Speed Gel Removal Results


Final Thoughts


So there you go.  Application is quite dreamy with these gels.  They are nicely opaque in 1-2 coats.  Wear is average and removal is as expected for a one step gel.  I'll definitely wear them again, though I'll probably use a base coat if I still have damage to deal with and I'll add a separate top coat for extra protection until I learn to use a file without filing my own nails.

If you're interested in the BMC Speed Gels, you can purchase them on Bundle Monster's website or through Amazon here.  Note, the Amazon link defaults to Frozen but the others are available as purchase options.  ;)

~Michelle


*The polishes featured in this post were provided by Bundle Monster for my honest review.  This post uses Amazon Affiliate Links.  Purchases through these links generate commissions that help fund this site.

Read more ...

Wednesday, December 10, 2014

Sparkling Snowflake Overload

Press Sample Affiliate Links

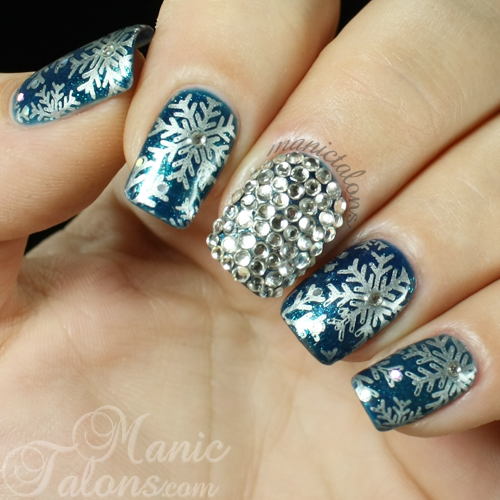
Hello Loves.  This week's mani started out as something simple and then took on a life of it's own.  I'm trying to squeeze in a wear test on the Bundle Monster Speed Gels.  Sadly, it looks like I'll only get to run this test for a week, but that's better than nothing, right?  Anyway, as you know, I test on one hand and play on the other, so I started off with a base of Frozen from the BMC Speed Gel Bliss Collection.  I'll show you the full collection on Friday.  :)
Snowflakes and Crystals Nail Art

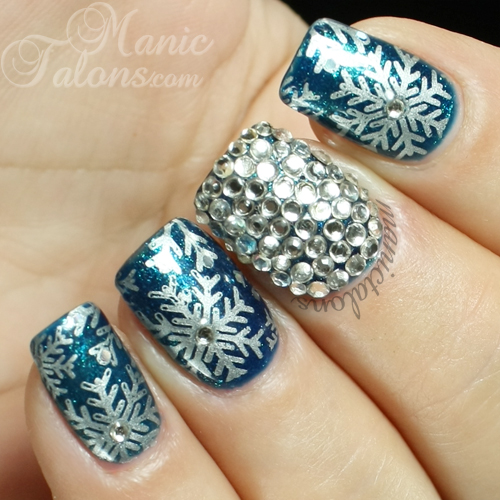
I then stamped each nail with the full coverage snowflakes from Cici and Sisi 04.  Somewhere around this time, the fog lifted from my brain and I remembered I had just soaked off snowflakes!  Dang it!  Don't get me wrong, I love snowflakes.  But wearing a similar design two weeks in a row gets boring really fast.  And that's where things got a little crazy.  See, what had happened was...

I originally thought I would add a crystal to the center of each large snowflake and small silver glitter pieces on the other snowflakes.  As you can see on the pinkie, ring, and index nails, that's exactly what I did.  But, you see, something strange happens when I break out my crystals.  I go from the Dr. Jekyll of Nail Art to the Mr. Hyde of Bling in the blink of an eye.  Hello full coverage crystal nail.
Snowflakes and Crystals Nail Art

I wish I had used a silver base, but it wasn't exactly planned.  Believe it or not, this is the first time I have attempted a full coverage crystal nail.  The placement could use a little work, but not bad for a first try.  Honestly, now I know why I haven't done one before.  This nail is dangerous.  I've already scratched both kids with it.  But what's worse...never, ever pick your nose with a full crystal nail.  Owwwie!  (Oh come on, don't act like you never pick your nose.  If you spend all day filing acrylics, you're going to end up with cement in your nose that hurricane force winds couldn't blow out.  It's inevitable.  Don't judge.)

I really like how it looks, but I don't know that I'll do it again.  The sheer bling makes my wedding set look dull.  lol  What's worse, I have no clue how I'm going to get all of these crystals off.  As I mentioned on Monday, the ring finger and middle nails on this hand are sculpted with hard gel and those crystals kind of prevent me from filing off the color.  If anyone has removal suggestions, I would love to hear them!

Here's one last look.  :)  I'm really happy with how the sculpted nails turned out.  They were a little wide in the pictures I shared Monday, but I shaped them some more before adding the gel polish.
Snowflakes and Crystals Nail Art

Check back on Friday to see swatches of the BMC Speed Gel Bliss Collection!  Maybe by then I'll figure out how to remove these crystals.  lol

~Michelle

*The Bundle Monster Speed Gel shown in this post was provided by Bundle Monster for my honest review.  This post uses Amazon Affiliate Links.  Purchases through these links generate commissions that help fund this site.

Read more ...

Monday, December 8, 2014

The Nail School Chronicle: Week 3


Hello Loves!  I survived another week of nail school at GCI, and I have some interesting things to share.  This week, we covered the basic manicure.  There's not a whole lot to it, really.  Shape, cuticle work, massage, polish.  Ok, there's a little more than that to it, but those are the main steps.  lol  I did a practice basic mani on my mother tonight, so I'll share the before and after photos of that toward the end of this post.  Believe it or not, it was the first time she has ever had a manicure!

Before we get to that and a few other things I want to cover, how about my weekly observations?
  • The dust from acrylics is awful.  It gets everywhere.  And I do mean everywhere!  Heck, it even gets in your nose and makes you feel like you've been snorting the stuff.  :/
  • I can paint my own nails flawlessly with no effort at all.  Ask me to paint someone else's nails with regular polish and you might as well have asked a two year old to do it.  I'm not even kidding.  Who would have guessed that pulling a brush toward you instead of horizontally in front of you would be so different?
  • My dogs hate me and love making me late.  Since Keith can't walk them to the fence right now (they pull like mules), I have taken over that duty.  A few mornings back, Scarlett slipped her collar and took off for a trip around the neighborhood.  I looked everywhere for her before finally finding her in the neighbor's fence.  She found her way in but couldn't find her way back out through the open gate.  Geeze, she can find a hole in our fence without even looking.  Anyway, so I walk over to show her how to get out and she slips by me again.  This time, she bolts back home.  Yea!  Uhhh, no.  I forgot to shut my car door, so she hopped up into my seat and proceeded to drink my coffee before I could get back into the yard!  Little brat.  I was late to class for the first time AND didn't get my coffee that morning.  :(
  • If you've never had a spa facial, get one!  Seriously, make it a priority.  I had the opportunity to receive a facial from the Esthetics department the other day and it was divine!  I never would have thought I could fall asleep with a stranger smearing weird stuff all over my face, but I absolutely did.  lol
  • I'm still having trouble with my balls.  Brenda from Tuff Enough Nails gave me a bit of advice, so now I'm not struggling as much with dry versus wet, but I'm totally struggling with ball size.  I either end up with too much product or not enough.  It's SOOOO frustrating!  I've been doing this for three weeks.  I should be a pro by now, right?  ;)
  • That test I was so worried about last week?  Aced it.  Seriously, perfect score.  Whoo Hoo!  I also learned that there is nothing funnier than listening to a redneck trying to pronounce words like "Lunula" or "Melanonicha" or "Onychogryposis".  Even with the pronunciations on the cards, he still butchered them.  Bless him for helping me study and review my flash cards.  It definitely helped me with the test, and the comic relief was much needed as well!

Now that we have gotten that out of the way, I want to talk about the myth that acrylic and gel enhancements destroy the natural nail.  It simply is not true.  Saying that enhancements destroy the natural nail is like saying that spoons cause obesity or your car makes you speed.  It's absurd, really.  When applied and removed correctly, acrylic and gel enhancements will not harm the natural nail.  And I have photos to prove it.

If you caught my posts last week, you know that I suffered a bad break and some low splits on my swatch hand.  I sculpted the broken nail with clear acrylic and did an overlay over the rest.  Below is the photo I shared of the sculpted nail.  Before sculpting this nail and doing the overlay on the others, I lightly buffed my natural nails like I would before applying gel polish.  That's it.  No drilling or thinning the nail plate.  Just a simple buff to rough the surface a little and remove the shine.  Mind you, this was my first attempt on a real nail, so it's not perfect.

Since I used gel polish over the acrylic, I decided to soak it off.  In case you didn't know, acrylic CAN be removed by soaking in pure acetone.  Actually, that's how it should be removed to prevent damage to the natural nail.  To remove this extension, I filed it thinner (to reduce soaking time) and then wrapped the nail with a Gelish gel polish remover wrap saturated with pure acetone.  It takes a while...as in 45 minutes or so...but the acrylic will soften to the point it can be easily pushed off of the nail without damaging the nail plate.

Here are my naked nails after removing the acrylic.  My poor little nubby!  Ignore the ring finger.  I applied a silk wrap (poorly) in an attempt to save that nail since it had a significant split.  Sadly, it didn't work as you'll see later in the post.  Yes, the silk wrap was another first.

In this shot, you can see that my nails have not been thinned out.  They are as thick as they were before I applied the acrylic.  Well, except for the nubby, but that's because the nail split between the layers so it is much thinner toward the free edge.

And finally, they are just as strong as ever.  You can see I am putting significant pressure on the tip of my index nail and it is not bending like it would if the nail had been thinned before application or over-filed during removal.

Ok, so why am I showing you all of this?  Yes, I know...I'm a gel polish lover through and through.  But this is important because it shows the difference between doing things the correct way and the incorrect way.  I have chatted with many of you over the past few years - through facebook, one on one, or through other social networks.  I can't count the number of you who have told me that enhancements destroyed your nails.  I have learned over the past three weeks that the enhancements are not to blame.  Poor application and removal are to blame!  What's more, I have learned some things that might scare the daylights out of you.

I have gone to several nail salons over the years, and I have learned that NONE of them were high quality, professional salons.  Let's face it, nail salons are like every other service or product out there.  Some are top quality and others are not.  Depending on your area, you may find budget friendly services that are high quality, but you might also find budget friendly services that are, well, not nail friendly.  I've learned that most people don't know what to look for in a high quality service.  I certainly didn't.  So allow me to share a few of the initial red flags that you aren't in the right salon.

Think about your last salon experience:
  • When you last had a salon manicure, did the nail tech have you wash your hands before starting the manicure?  Did he/she wash his/her hands?  Or at the minimum sanitize your hands with hand sanitizer?  If not, that's a HUGE issue.  Our hands are covered in bacteria from day to day activities such as opening doors, handling money, even scratching our noses.  If both parties are not washing their hands before the service, that's a lot of bacteria that is introduced into your manicure.
  • Did the nail tech look at your hands front and back before beginning the service?  Did he/she remove your polish before filing your nails?  If not, that's a red flag as well.  A tech should always check your hands for signs of fungus and bacterial infections before any service.  Now, now, don't get offended.  Of course you know if YOUR hands are ok and free of fungus or infection like warts that can spread by contact.  But do you know that the person serviced before you could say the same?  If the tech didn't check you, odds are he/she didn't check the person before you either.  If sanitation is lacking, that's a chance for you to catch something.
  • Think about your last spa pedicure.  Did the tech remove your polish and look at your feet before placing them in the spa tub?  No?  Red Flag!  The tech should look for things like athletes foot or nail fungus that would prevent service before placing your feet in the tub.  If he/she doesn't and something of that nature is present, the pedi spa becomes contaminated.  Again, you might know your feet but you don't know about the person who sat in that chair before you.  And you also don't know if the salon disinfected the tub thoroughly between clients.  Can we say "Ewww"?  Oh, and take a look at those files and pumice stones.  If they look worn, they have been used on someone else.  Those suckers can't be sanitized. 
  • This one might surprise you.  Did your tech ask about any health conditions or allergies you might have?  Medications you might be taking?  Ok, I know what you're thinking.  That sounds like a personal question that a tech doesn't need to know, but it IS something a tech should know before performing a service.  Why?  Say you have an allergy to shellfish.  Many salon products have ingredients such as seaweed that can trigger a shellfish allergy.  What if you have blood clots?  Massaging can cause them to move.  What if you are diabetic?  The tech should not use cuticle nippers or metal implements to reduce the chance of nicking your skin.  What if you have arthritis?  That massage could be more pain than relief if the tech doesn't modify his/her massage techniques.  What about thyroid medications, chemo, radiation, and a slew of other medications you might be on?  They can cause skin sensitivity that might limit the types of services that can be safely performed.

I could go on and on, but I'll stop there.  Bottom line, when choosing a nail tech or salon, ask to see the tech's license.  Watch for sanitation issues.  Ask questions.  If you are able, watch how the person before you is serviced.  If you have had a bad experience, odds are you were NOT sitting in the chair of a professional, high quality nail tech.  Oh, and here's another shocker.  Not all "techs" working in salons are licensed.  Some are apprentices who are training under a licensed tech.  Not all apprentices get the same amount of instruction.  So that guy doing your pedicure might not know any more than you do about proper sanitation or even how to correctly perform the service.  Others might technically be assistants who shouldn't be performing services at all. 

Ok, ok, I'll stop for real this time.  So I soaked off my sculpted acrylic nail and overlay.  You know I'm not walking around with a nubby, right?  I also mentioned that my silk wrap attempt at saving my ring finger nail failed.  That's two nubbies.  That's just not happening.  ;)  So...I sculpted two new nails.  But this time I used gel.  Let me tell you, for a gel polish lover, hard gel is tons easier to work with than acrylic!  Sculpting with gel felt like second nature for me.  I used clear gel so I can swatch over it without impacting the colors.  Given, they aren't perfect...but not bad for a first attempt. 
I did end up going back and shaping them a bit more after taking the picture.  My ring finger doesn't fan out quite as bad anymore.  You'll see what I mean when I share my mani later this week.  I would share it now, but it isn't finished yet.  lol  Hmmm...and I need to figure out how to sculpt without getting bubbles.  I'm sure that will come in time.

Finally, Mom's mani.  Bless her heart, this was her first ever full manicure.  She's had long nails her entire adult life but always does them herself.  She rarely wears polish at all.  It was really fun sitting down and doing her nails for her from start to finish.  My Mama is an incredible woman with a huge heart.  She does so much for so many people.  It was nice to be able to do something for her!  You might also notice that I inherited her crooked fingers.  ;)

Here's the before shot.  Next time I'll pose her hands better so I can crop a little closer.

And here's the after.  This is also her first time wearing red polish!  She usually goes for pink or bronze, so I was shocked when she chose OPI Red.  I think the red really suits her and makes her hands look much younger.  :)  Of course, this was a learning experience for me too.  I really suck at applying regular polish on other people.  Sheesh, I need some serious practice! 

That's all for today.  I know I promised last week that I would show you the contents of my kit.  I'm still going to do it, but I figured it would be a good post for later this month while I'm on winter break since I won't have updates from class during that time.

Oh yeah, once again I'm writing in the middle of the night with only a few hours to sleep before I have to get up to go to class.  So if there are any glaring grammatical or spelling errors in this post, please forgive me.  Feel free to giggle and call me names under your breath, but forgive me none the less.  ;)

~Michelle
Read more ...