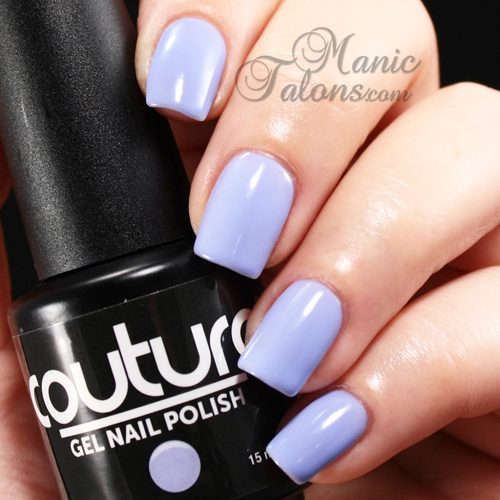
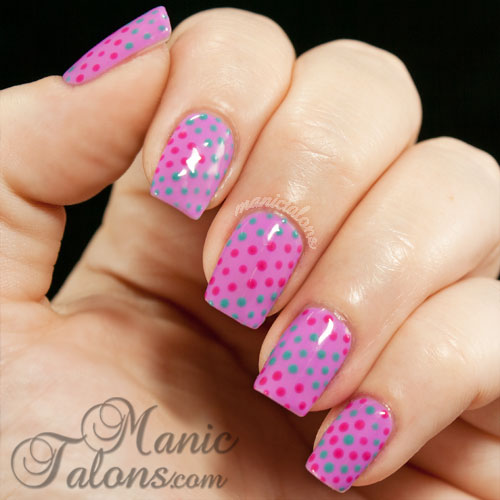
Wednesday, April 30, 2014

Quilted Twin Nails with Traditional and Gel Polish

Hello Loves!  Today I have teamed up Jessica at Be Happy and Buy Polish for a quilted twin mani!  This was a super fun challenge for me since it's not a technique that is traditionally done in gel polish.
Quilted Twin Nails

Jessica's quilted nails turned out fabulous, don't you think?  Be sure to check out her blog post to see more of her awesome mani!

Here's another pic of mine.  It was extremely difficult to capture the texture on the quilted nails.
Quilted Nails, Gel Polish, Dot flowers, Couture Gel Polish

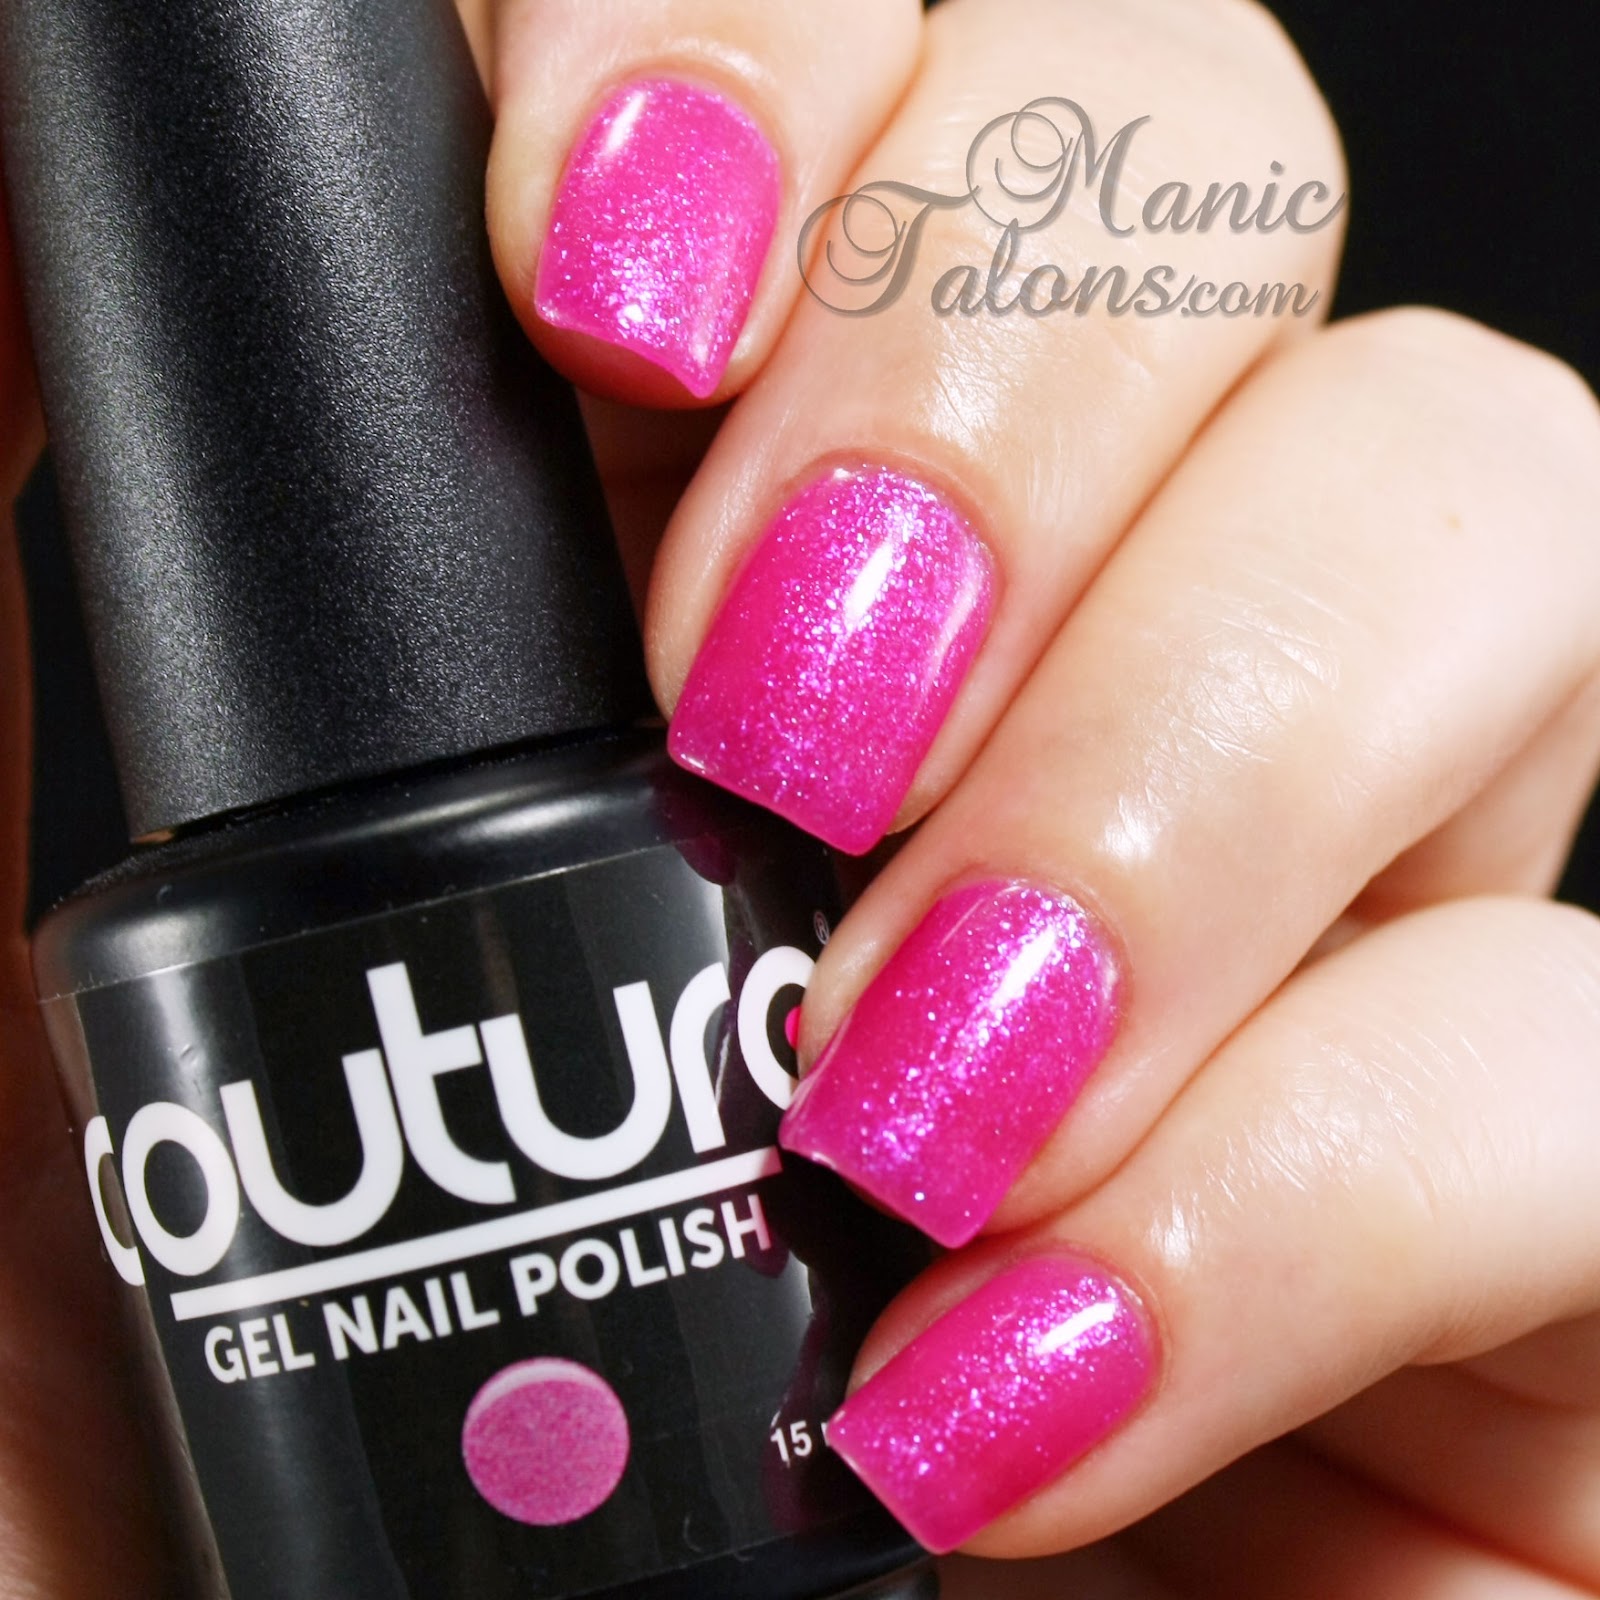
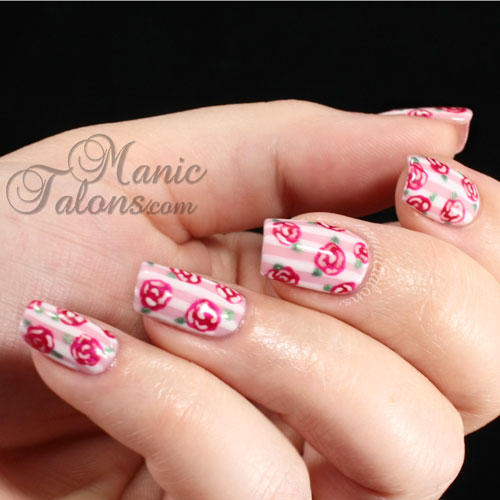
To create this design, I started with a base of Couture Come On Barbie! (swatched previously here) and Couture Ooh La La French (swatched here).  I then created simple dot flowers on the white nails with Come On Barbie! and added leaves in Couture Spa Day (swatched here).  That was the easy part! 

The quilted nails were a challenge, and I'm not 100% happy with how they turned out.  The top coat flattened out the texture a bit more than I like.  I started with one coat of Couture Come On Barbie!  I then added a second coat and carved the lines for the quilt with a thin detailing brush.  Once the lines were finished, I cured the layer.  I then used the detail brush to add an additional layer of gel to the squares created by the lines, being careful not to allow to gel to spill into the carved lines.  I cured again and then added a very thin layer of top coat over the entire nail.

Carving is a fun technique for adding depth and texture to a design and is much easier for me than the dreaded striping tape! There are some great tutorials on youtube for this technique, but this tutorial by Johanna Agledal using Couture gel polish is my personal favorite.  Her instructions are extremely easy to follow.


Here's my standard closeup shot. You can see the texture of the quilted nail a little better on the thumb in this one.
Quilted Nails, Gel Polish, Dot flowers, Couture Gel Polish

Are you a fan of the quilted look?

~Michelle

Read more ...

Monday, April 28, 2014

Purple One Stroke Flowers

Affiliate Links

Hello Loves!  I'm super excited to show you my first successful attempt at one stroke flowers!  I've been fighting with this technique for months now and finally figured it out.  While I certainly need more practice, I'm pretty pleased with how this mani turned out.
One stroke flowers, Couture gel polish, French affair

I started with a base of Couture French Affair.  I swatched French Affair in this post if you would like to see it on it's own.  For this mani, I only used one coat for a softer shimmer.  After top coating and removing the tacky layer, I broke out my acrylic paint set and got to work.  While I'm sure there are better acrylic paints out there, I picked up a basic 12 color set and have been happy with it so far.

I sponged pink acrylic paint on the tips first.  Then I used the white and purple for the one stroke flower petals.  The leaves are a dark green with a lighter green layered over it for highlighting since I couldn't quite figure out the one stroke leaves.  Baby steps, right?  I finished by dabbing a little black in the centers of the flowers and added a few purple dots around the edges. 

I'm so excited to have finally produced a semi-decent one stroke flower, I even took a macro shot.  It doesn't look very smooth in macro, but I'm still tickled pink.
One stroke flowers, Couture gel polish, French affair

If you're reading this and have mastered one stroke nail art, I'm sure you're laughing at me right now.  Heck, I'm laughing at myself!  We'll all just laugh together.  I feel a little like a child who just figured out how to clap.  Such a simple accomplishment, but it completely made my day.  lol

As a side note, when using acrylic paints with gel polish, it is crucial that you wrap the tips really well with your base and top coats to fully seal the acrylic paint.  If you don't, water can penetrate the layers and turn the acrylic paint into a mushy mess.  It's a mani wrecker for sure.  I learned this lesson the hard way with my Great Pumpkin mani last Halloween.  I was heartbroken when it only lasted a few days.

Finally, here's the standard closeup. 
One stroke flowers, Couture gel polish, French affair
 
Have you mastered one stroke flowers?  Do you have any tips to share?  Can you recommend a good brush?  I feel like my brush is one of my biggest issues.

~Michelle

*This post uses Amazon Affiliate links.  Purchases through these links generate commissions that help support this blog.
 
Read more ...

Friday, April 25, 2014

Lattice, Glitter and Dots - A Dreamy Combination

Affiliate Links Purchased by Me

Hello loves.  I absolutely love how today's mani turned out.  I can't really think of the words to describe it, so I'll let the pictures do the talking.  As usual, details to follow.
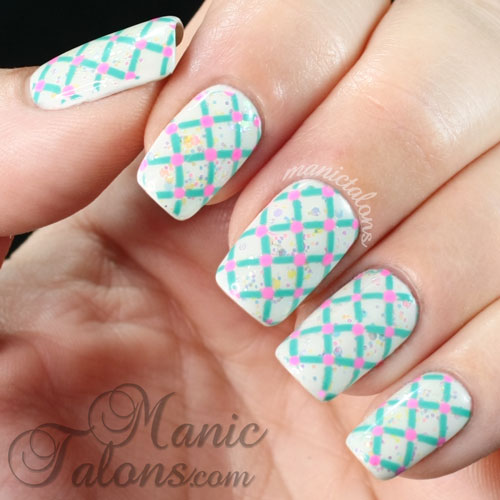
Stamping with Pueen 54 over gel polish

First things first, I apologize for the tip wear.  I finished this mani on Easter weekend and didn't have a chance to photograph it until a few days later.  With that said, on to the details.

I started with a base of Gelaze White on White (swatched previously here).

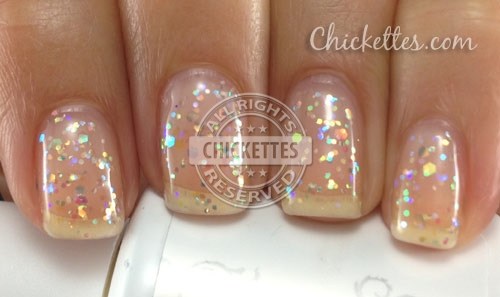
I then topped it with Gelish Silver Sand.  That's where things got tricky.  Sadly, when I opened the bottle to use it, the gel inside was partially cured.  I'm not sure how it happened, but I suspect the bottle is faulty.  I managed to save it just enough with gel polish thinner to use it for this manicure, but I had to toss it afterward.  Such a shame!  It's a beautiful topper and I have already ordered a replacement bottle.  Of course, in my frustration over the state of the gel, I didn't get to take a proper swatch picture.  This is one that you really need to see without the stamping obscuring the glitter, so I was really bummed that I didn't get to swatch it.  Thankfully, Andrea at Chickettes came to my rescue and agreed to let me borrow her gorgeous swatch.  :)  If you aren't already a reader of Chickettes, I strongly urge you to check it out.  Andrea's swatches are gorgeous and she has swatched the entire Gelish line to date!  Not to mention the numerous other brands she has featured.  Chickettes is a gel polish swatch mecca and her nail art is to die for.

This is Gelish Silver Sand .  It is a clear base with multiple sizes of iridescent glitters. Isn't it awesome!?!?!  It's the perfect topper for darks and lights, and I adore how it gives any polish that Indie feel.
Gelish Silver Sand

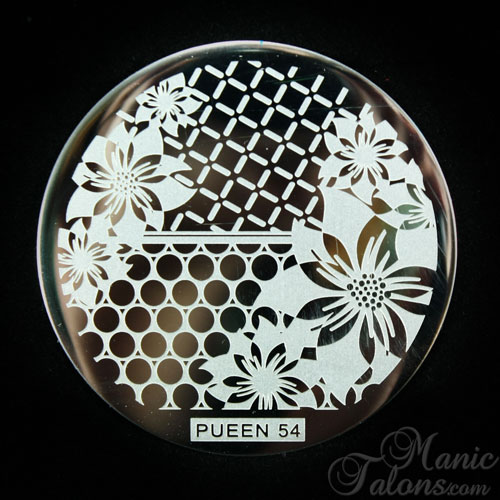
I then stamped with Mundo de Unas Aqua using the lattice part of the image from Pueen 54.  This is one of the Buffet Series plates.  I seriously adore the style of these plates!  They are so easy to use without having to worry about stretching images or lining them up perfectly.  This has become my go-to set when I need to stamp quickly.
Pueen stamping plate 54 from the Buffet Series

I decided it needed a little more color, so I then finished it off by filling in the holes in the pattern with dots of Mundo de Unas Pink.  I really couldn't be happier with the final result and received many compliments while wearing it.  My brother even grabbed my hand and asked how long it took me to paint "all those lines".  Bless his heart.  ;)

Here's the standard shot.  As you can see, the pink is a little more subtle when not side by side with the pink flowers I used for a prop in the first photo.  I think they were azaleas? 
stamping with Pueen 54

Do you have the Pueen Buffet plates?  If so, do you love them as much as I do?

~Michelle

*This post uses Amazon Affiliate links.  Purchases through these links generate commissions that are used to support this site.
Read more ...

Wednesday, April 23, 2014

More Fun Colors from Couture Gel Polish

Press Sample

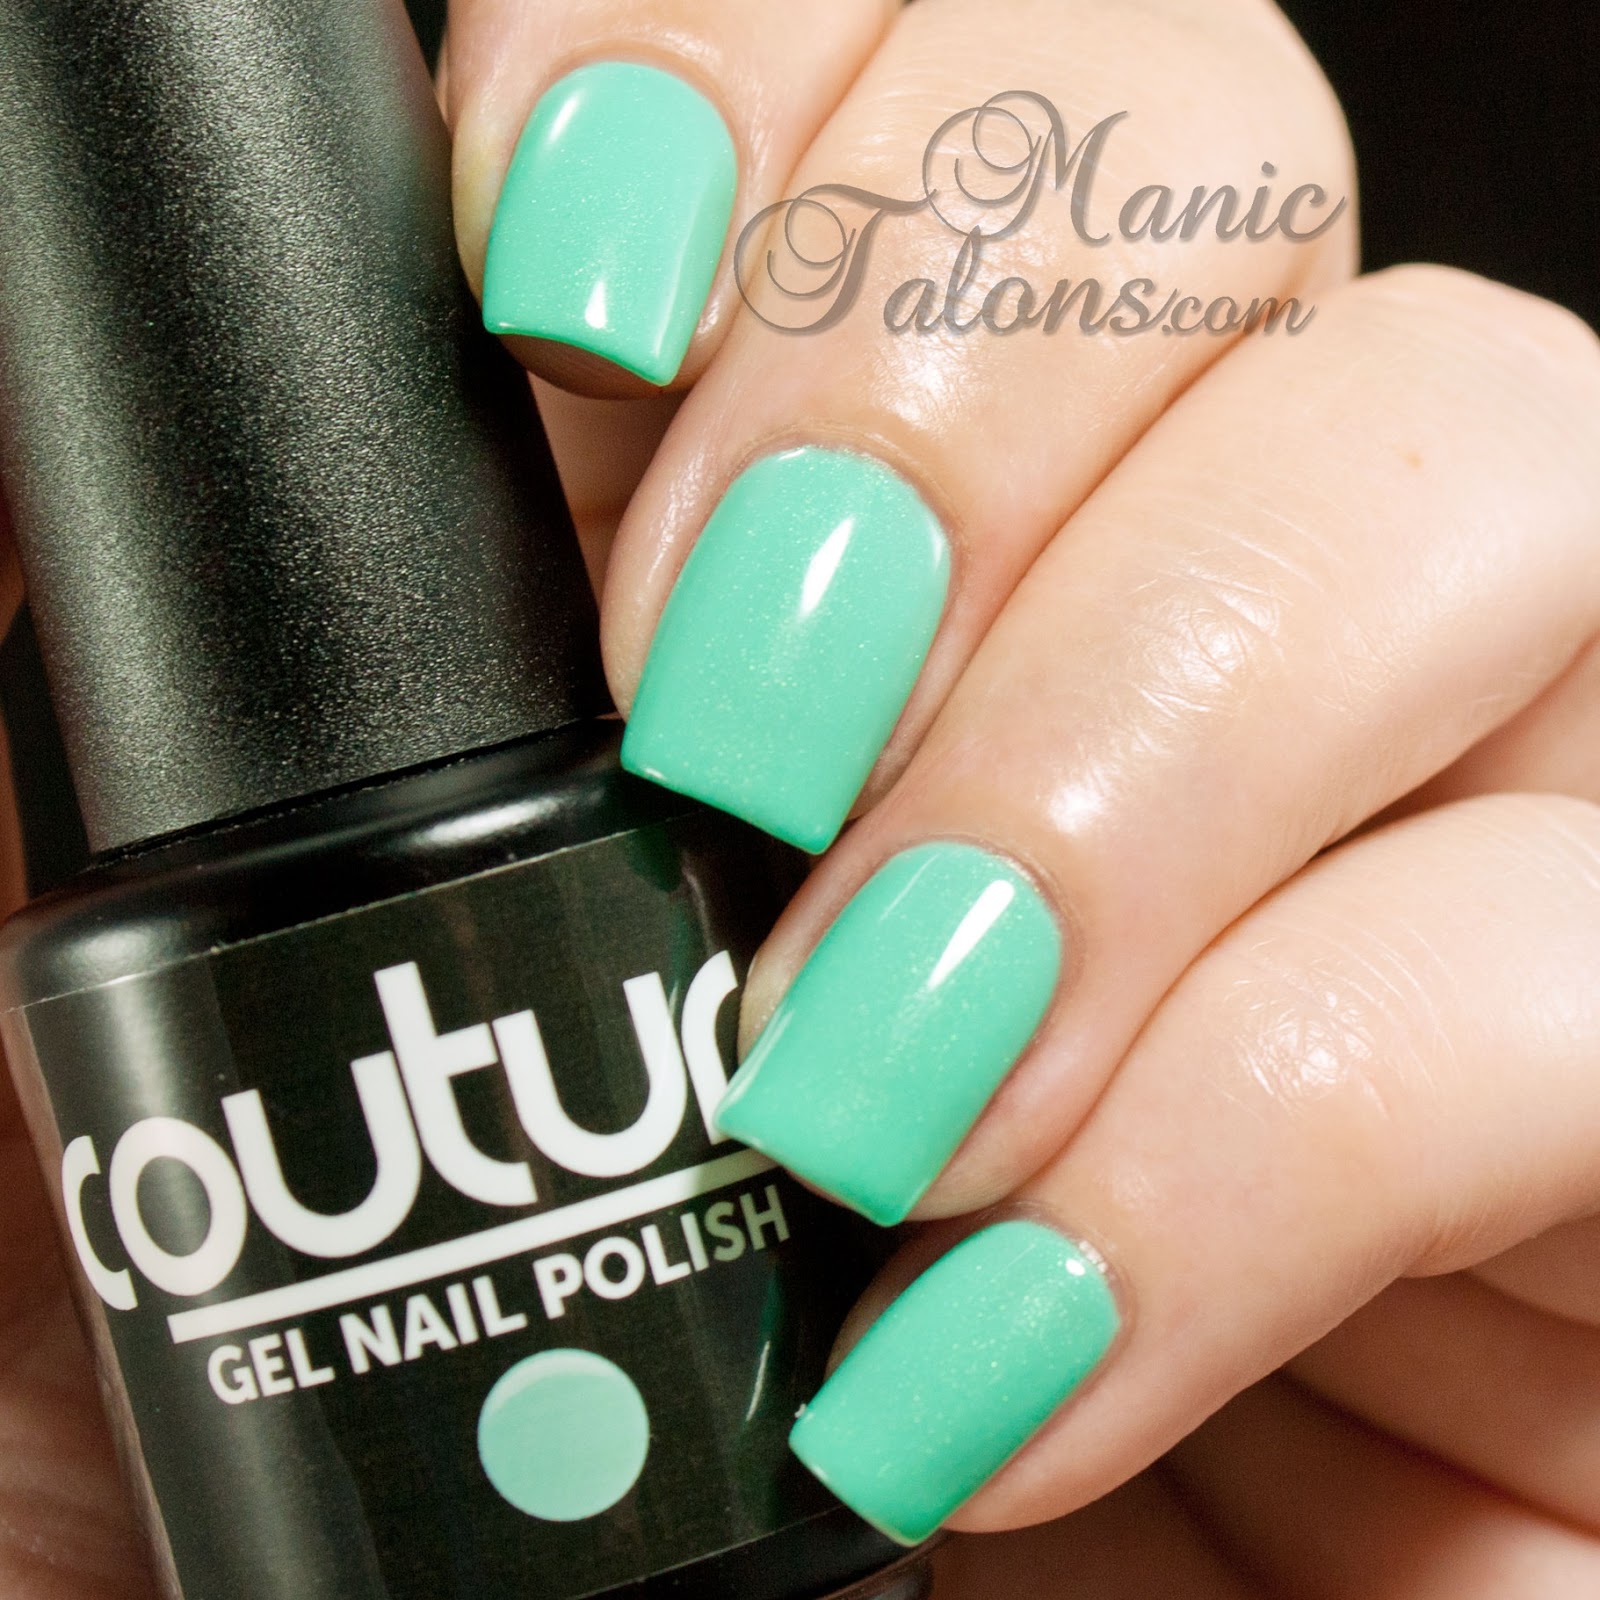
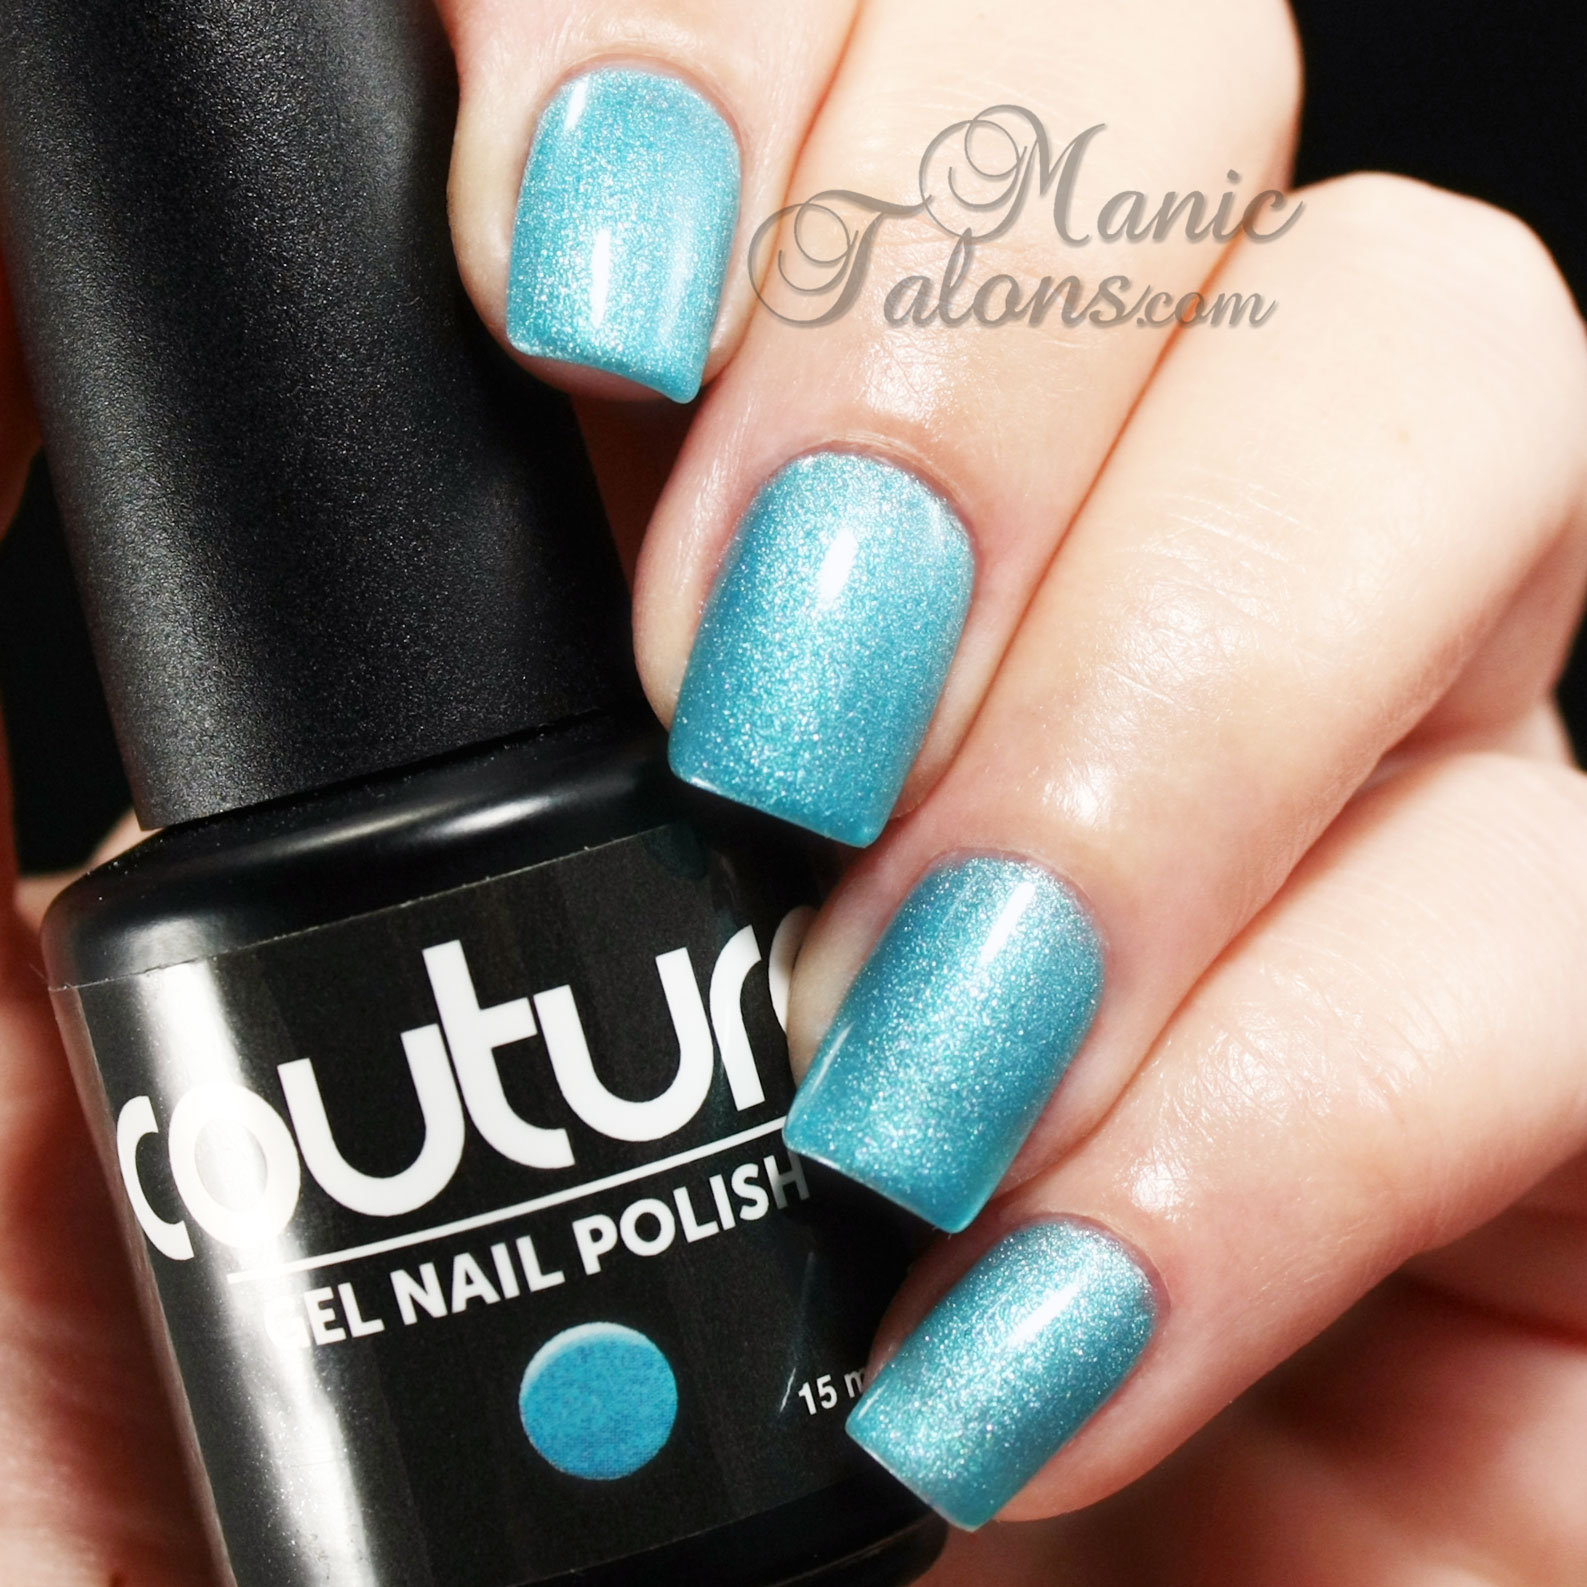
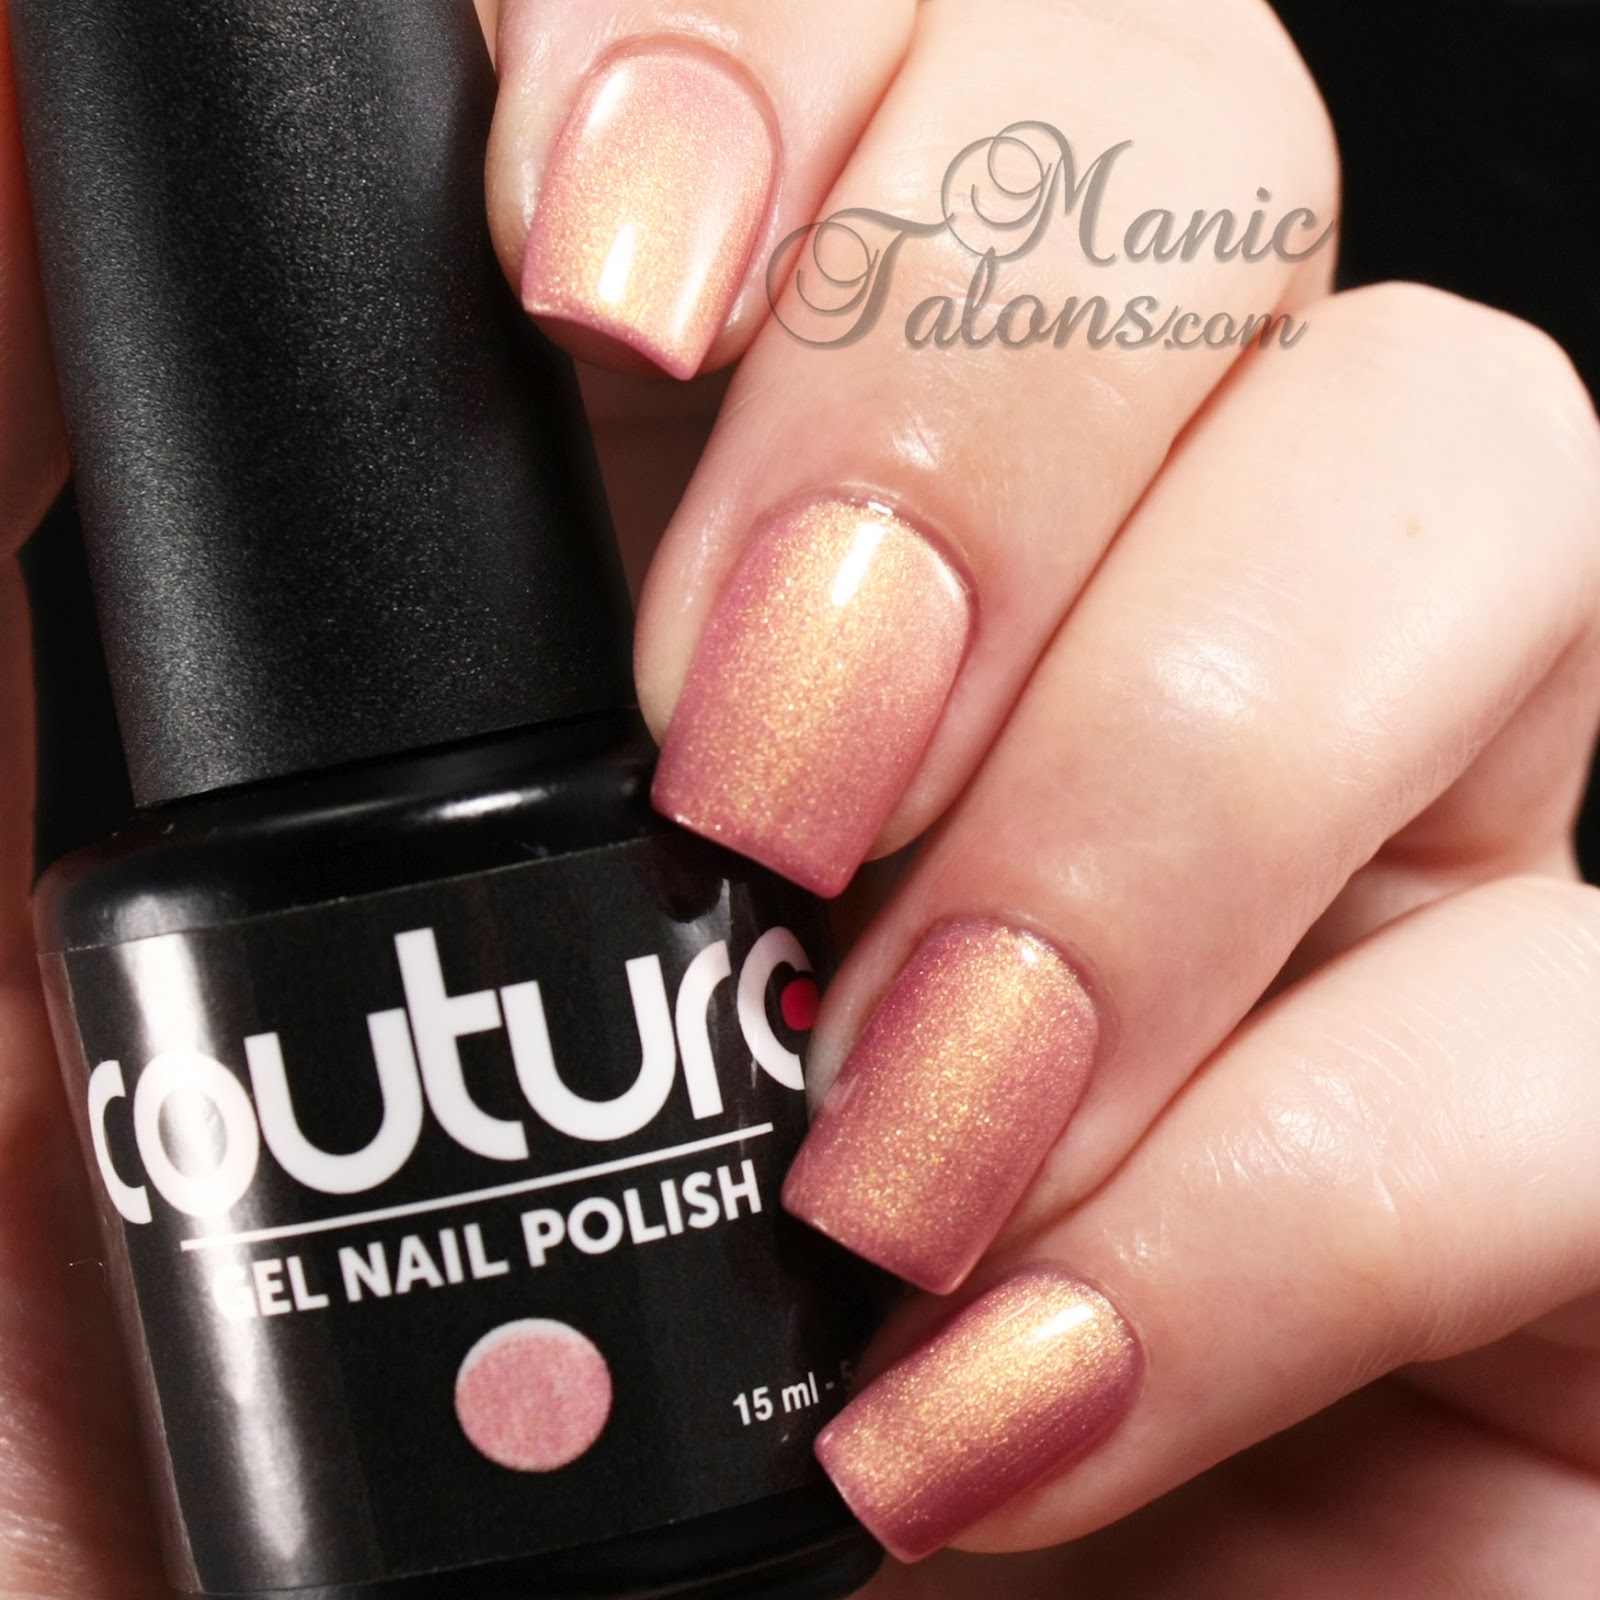
Hello Loves.  I have more Couture Gel Polish swatches to show you today.  I'm currently working on a large swatching project for Couture, so I have tons of swatches I have yet to share.  These are my favorites of the ones I have swatched most recently.  I love each of them for different reasons!

Cashmere is a medium, lilac cream.  Definitely not the color that comes to mind when I think of cashmere (I think soft grey), but beautiful none the less.  I really like the application on this one.  Like most Coutures, it is highly pigmented but applies smoothly with minimal streaking.
Couture Gel Polish Cashmere Swatch

Mardi Gras is just awesome!  This shimmery purple toned pink has so much dimension it's almost impossible to appreciate from a photo.  The shimmer is a bit chunkier than your usual shimmer, which makes the it easily opaque in three coats despite the jelly base.
Couture Gel Polish Mardi Gras Swatch

Million $ Tweet is a beautiful minty blue that is also packed with shimmer.  I didn't do a very good job of capturing it in this one though.  The highly pigmented base makes it completely opaque but tones down the shimmer a little.  If you click on the picture to view it a little larger, the shimmer is easier to see.
Couture Gel Polish Million $ Tweet swatch

Sheer Beauty is an incredible coral polish with a golden shimmer and a pink shift.  This one completely surprised me!  I was expecting a sheer polish, not a shifter.  It is simply stunning in person.  It was also easy to apply without getting streaks that are so common with shifty polishes.
Couture Gel Polish Sheer Beauty Swatch

Trend Setter is another shifty polish.  This blue frost really stands out and gets attention.  I received so many complements when I wore it I actually lost count.  This one was a bit tricky to apply and avoid streaks due to the frosty finish, but a very thin third layer always does the trick.
Couture Gel Polish Trend Setter Swatch

Finally, Who's That Girl is another awesome shifty polish.  This is a soft, coppery nude frost with a golden shimmer.   Definitely a must have if you prefer muted colors but want a little excitement too.  Like Trend Setter, it was a little tricky to apply due to the frosty finish, but the same thin 3rd coat evened everything out nicely.
Couture Gel Polish Who's That Girl Swatch

Which of these gorgeous shades is your favorite? 

~Michelle

*The polishes featured in this post were provided by Couture Gel Nail Polish for my honest review.

Read more ...

Monday, April 21, 2014

Romantic Stripes and Roses with IBD Just Gel Polish

Affiliate Links Purchased by Me

Hello Loves.  I hope everyone had a wonderful Easter weekend!  I have these sweet and romantic stripes and roses to show you today using IBD Just Gel Polish.  I love the feel of this one!  This is what I was going for with my last rose mani, but I clearly missed the mark before.  This is much better and I couldn't be happier with the end result.
Stripes and Roses manicure, IBD Just Gel, Nail Art

For this mani, I started with a base of IBD Just Gel Juliet.  Juliet is a soft, blue toned pink cream that is just fabulous.  I almost didn't want to add the art on top!
IBD Just Gel Polish Juliet Swatch

I then added stripes with IBD Just Gel Carte Blanche from the Haute Frosts collection.  I have a swatch photo of Carte Blanche here.  The stripes aren't very straight, but I don't think it matters much with the roses on top.  I forgot to snap a picture of just the stripes.  Sorry about that!

The roses are dotted blobs of IBD Just Gel All Heart with Carte Blanche accents.  All Heart is one of the first IBDs I added to my collection, and I still love it.  The dark pink base with the blue flash to the shimmer is just incredible.  So much depth!
IBD Just Gel All Heart Swatch

Finally, I added the leaves with a small brush using Couture Aloe Very.  This is the only non-IBD colors in the entire manicure.  Can you believe I don't own an IBD green?  I'll have to fix that soon!  If you know of an IBD Just Gel green that is a must have, please let me know in the comments!  Here's the standard closeup of the final mani.
Stripes and Roses manicure, IBD Just Gel, Nail Art

What do you think of this style of nail art?  It is far from original, but I just love it!  It feels so soft and girly, which is a huge plus as the mother of two boys! ;)

~Michelle

*This post uses Amazon Affiliate Links.  Purchases made through these links provide financial support for this site.
Read more ...

Friday, April 18, 2014

Happy Easter Everyone!

Press Sample Affiliate Links Purchased by Me

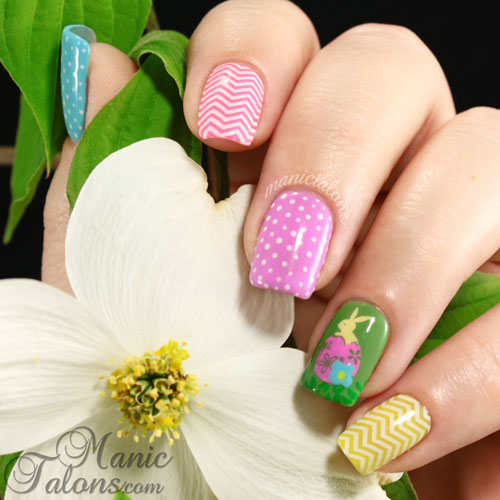
Hello Loves.  This is my last post before Easter, so I thought I would show you my official Easter mani for 2014.  Believe it or not, this is also my first ever skittle!  Crazy, right?
Easter Nail Art, Couture Gel Polish, Stamping Nail Art, Mundo de Unas

There is a lot going on with this one!  I started with a skittle base using Couture Gel Nail Polish.  The colors from left to right are Couture Spring Fling, Couture Come On Barbie!, Couture Glam Squad, Couture Big Spender, and Couture Tres Chic.  The colors are slightly off due to the art, but each of the names above will link to the previous posts with swatch pictures.  The only one I haven't shown you before is Spring Fling, but no worries.  I have a swatch to share of that one too.

Spring Fling is a beautiful bright blue cream.  It is very similar to Couture Milano but without the shimmer.  As you can see, it was the perfect color to use in my Easter skittle.
Couture Spring Fling Swatch, gel polish

Onto the Art:  I used a small dotting tool and Couture Ooh La La French to add the dots to the thumb and middle nails.  The chevrons on the index and pinkie nails are stamped in Mundo de Unas White using the chevron image from Bundle Monster 201.

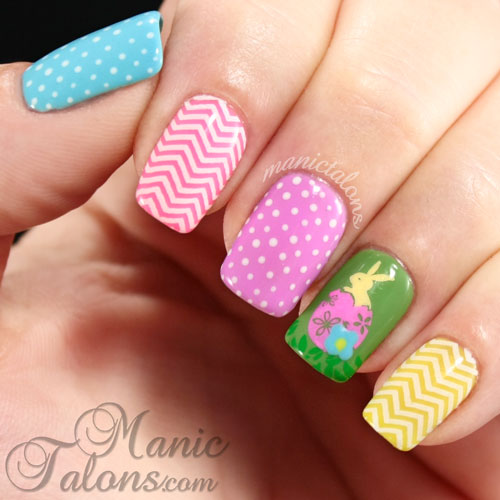
Here's another shot of the complete mani where you can see the bunny a little better. 
Easter Nail Art, Couture Gel Polish, Stamping Nail Art, Mundo de Unas
The bunny image is from Bundle Monster 302, and it is stamped in Mundo de Unas Pink, Pastel Yellow and Green.  I applied all three stamping polishes to parts of the image at the same time.  I then carefully scraped and the result is this cute, multi color stamp.  The green did mix into the pink just a tad at the bottom of the image, but it was easy enough to touch up with the pink and a dotting tool.  I then used a dotting tool to fill in the open flower area in the stamp with Spring Fling and Tres Chic.  The flower turned out a little wonky, but that's ok with me.  Flowers are rarely perfect in nature anyway.  ;)

I hope everyone has a wonderful Easter!  I'm looking forward to hunting Easter Eggs and watching my boys light up as they go through their baskets this year.  Such joy for the little ones.  This will be my youngest son's first chocolate bunny experience, and you can bet my camera and I will be ready!

If you don't celebrate, I hope you have a wonderful weekend as well!

~Michelle

*The gel polishes used in the post were supplied by Couture Gel Nail Polish for my honest review.  All other products were purchased by me.  This post uses Amazon Affiliate links.  All non-Amazon links are not affiliate links and I receive no compensation for purchases through them.
Read more ...
Wednesday, April 16, 2014

Delicate Floral Manicure with Gelaze Frostbite and White on White

Affiliate Links

Hello Loves.  I have a delicate little freehand mani to show you today using Gelaze Frostbite and White on White.  I am so in love with both the gels and the design on this one!
Floral Manicure, Gelaze Frostbite, Gelaze White on White, Gel Polish

I have been looking for a small detail brush for a while now, and I just happened to be in Hobby Lobby the other day when it hit me.  Model cars have small details!  Sure enough, I found a pack of detail brushes with the model car paint that are perfect.  Score!  Naturally, I had to try them out.  This mani is the result.

For this mani, I started with a base of Gelaze Frostbite.  I have been searching for a blue like this for years.  I love the frosty shimmer and incredible royal blue depth.  I can also say that this one didn't give me any application issues at all after a good shake in my Robart shaker.  I didn't even have to pop it in the freezer.
Gelaze Frostbite Swatch, Gelaze Gel Polish, Gel Polish, Soak Off Gel, Blue Gel Polish

I then freehand the petal outlines with Gelaze White on White.  I am very impressed with this white.  I gave this one a good shake too and had to flash cure the first layer to deal with a little shrinking at the free edge, but I love that it isn't chalky like a lot of white gels.  It applies smooth as silk.
Gelaze White on White Swatch, Gel Polish, Soak Off Gel, White Gel Polish

Here's another shot of the final mani.  White on White is opaque enough to do nail art with one coat, so that's another bonus!
Floral Manicure, Gelaze Frostbite, Gelaze White on White, Gel Polish

Do you have a favorite white for nail art?  This one is now tied with my go-to white, Couture Ooh La La French.   

~Michelle

*This post uses Amazon Affiliate Links.  Purchase through these links provide financial support for this site.
Read more ...
Monday, April 14, 2014

Cute Little Dot Bunnies with OPI GelColor (Updated)

Affiliate Links

Hello Loves.  I decided to revisit OPI GelColor now that I have a Robart Paint Shaker to see if I like the formula better once really shaken.  So I borrowed a few colors from a friend and gave them a whirl for this Easter mani.
OPI GelColor, Gel Polish, Dot Bunnies, Easer Manicure

To create this mani, I started with a base of OPI GelColor Funny Bunny and added large dots of Suzi Says Feng Shui and Strawberry Margarita.  I then used a smaller dotting tool to drag the color up from the dots to form the ears.  Once the bunny shapes were cured, I used my small dotting tool again to add two smaller dots under the heads for the bow ties and pulled the corners down to form slightly triangular shapes.  So simple, but the result is adorable.  The other dots are, well, random dots with the smaller dotting tool. 

So back to my new-found appreciation for OPI GelColor.  I can honestly say that the Robart Paint Shaker made all the difference in the world in these polishes.  In the past, I have found OPI to be very difficult to apply with major shrinkage even after shaking them well by hand.  After a minute in the Robart, they went on much smoother, and I think I actually like the brand now!  Want to see the swatches of the polishes I used for this mani?

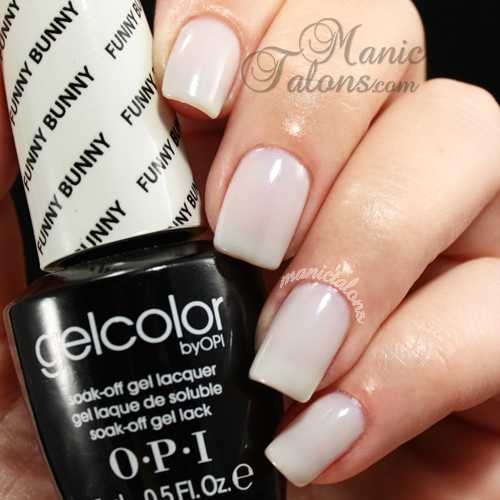
The base is OPI GelColor Funny Bunny.  Funny Bunny is a milky white with a blue pearlescent sheen that I couldn't capture to save my life.  It is very pretty, but subtle.
 OPI GelColor Funny Bunny Swatch, Gel Polish, Soak Off Gel

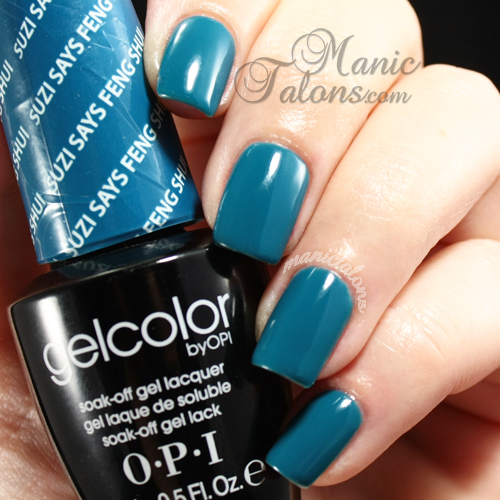
The blue dots and bunnies are OPI GelColor Suzi Says Feng Shui.  This is a teal leaning blue cream that is right up my ally.
 OPI GelColor Suzi Says Feng Shui Swatch, gel polish, soak off gel

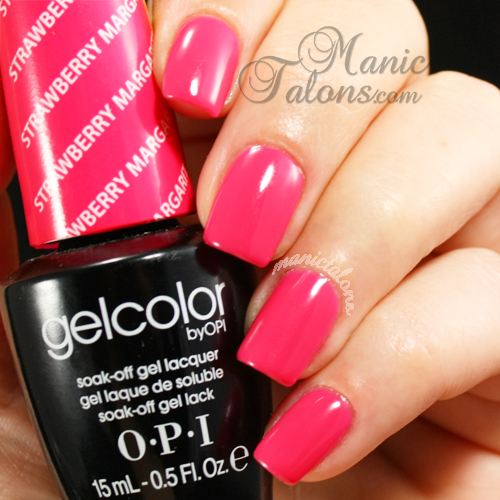
Finally, the pink dots and bunnies are OPI GelColor Strawberry Margarita.  This is a classic, medium pink cream.
 OPI GelColor Strawberry Margarita Swatch, gel polish, soak off gel

So, I now retract my previous comments that I am not a fan of OPI GelColor.  If you have any that you find to be a pain, shake the life out of them and see if you change your mind too.  Oh, and I am completely in love with my Robart.  It makes a world of difference with Gelaze too!  While made for hobby paint, it works really well on polish and was highly recommended by several of my online friends who also use gel polish.  I'm so glad I finally broke down and ordered it!  My previous polish shaker, aka my husband, was starting to complain.  ;)

Edited to Add:

By request, here's the video of the polish shaker in action that I shared on Instagram :)


~Michelle

*This post uses Amazon Affiliate Links.

Read more ...
Friday, April 11, 2014

Gradient Stamped Blue Chevrons with Messy Mansion MM12

Affiliate Links

Hello Loves.  I have another blue mani for Autism Awareness to share with you today.  I am completely in love with how this gradient stamped design turned out!  It has a very western feel to me.
Blue Gradient Stamped Chevrons with Messy Mansion MM12 and Mundo de Unas

I started with a base of Couture Ooh La La French.  I then stamped with a gradient of Mundo de Unas 6 Pastel Blue, 5 Turquoise and 4 Blue.  Check out her new online store for ease of ordering!  I finished off the design with two different sized silver studs on each nail.  I honestly can't remember where I picked these up, but there just your average nail art studs.  :)

The image is from Messy Mansion MM12, aka The Chevron Plate.  I adore this image for the detail and uniqueness!
Messy Mansion MM12 Chevron Plate

Here's my standard closeup.  You can see the shade difference between Mundo de Unas 5 Turquoise and 4 Blue much better on the thumb nail in this shot.
Blue Gradient Stamped Chevrons with Messy Mansion MM12 and Mundo de Unas

I just realized I have mentioned Couture Ooh La La French a lot in previous posts but have never shared my swatch.  It was taken before I shorted my nails, so excuse the variation in length.  This is my perfect bright white!  Flawless coverage in my usual three thin coats.
Couture Gel Polish Ooh La La French Swatch

Finally, don't forget to check out these other lovely blue manicures for Autism Awareness. In case you missed it, here's my first Autism Awareness mani for 2014 where I shared why this cause means so much to me personally.


~Michelle

*This post uses Amazon Affiliate links.
Read more ...

Wednesday, April 9, 2014

Pastel Dots for Spring with LeChat Perfect Match

Affiliate Links

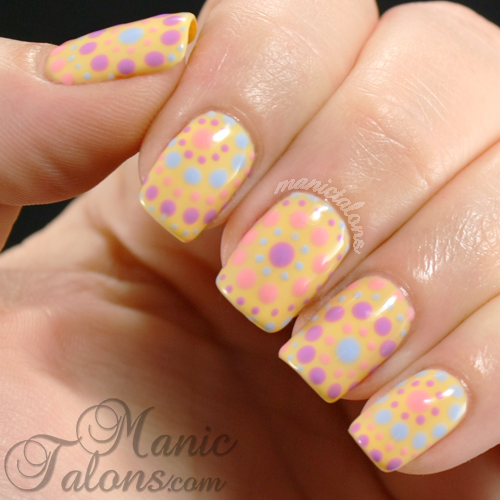
Hello Loves!  It officially feels like spring in GA.  The air is warm, the flowers are blooming, and the world has a nice, yellow powder film on every surface.   Welcome to pollen season in the South.  With Easter right around the corner, I couldn’t resist breaking out a few of my pastel Lechats and my dotting tools.
pastel dot manicure with LeChat gel polish

I know I have been on a dot kick lately, but I just can’t help myself.  I do love doticures.  They’re so simple yet look so fun when completed.  For this doticure, I used four LeChat Perfect Match colors:  Happily Ever After, Butterflies, Angel from Above, and Pink Lady.

The colors freaked out my camera just a little when they are all in the same picture, so please note that they aren’t quite right in these shots of the complete manicure.  The photo above was taken in direct sunlight with my iphone and is strangely closer to accurate.  The photo below was taken in my light box with my Canon.  My husband was playing around with my camera the other day and I suspect he changed a few settings that I failed to notice when I took these photos.  I apologize for the weirdness.  Same goes for the crazy skin tone in the swatch pictures, but the colors are right on my screen in those.
pastel dot manicure with LeChat gel polish


Now for the pure swatches.  Happily Ever After is my perfect pastel yellow cream.  I was asking around in a few facebook groups for yellow recommendations when a friend saw my question and knew this would be the right one for me.  Thank you, Lynda!  You were right!
LeChat Perfect Match Gel Polish Swatch Happily Ever After

Butterflies has been on my wish list forever it seems.  I’m not sure why I never ordered it myself, but Kerri saw it on my list and sent it to me completely out of the blue (or purple, as the case may be).  Butterflies is an incredibly pretty, red leaning purple cream.  Thanks Kerri!
LeChat Perfect Match Gel Polish Swatch Butterflies

This next color holds a very special place in my heart.  Angel From Above is a lavender leaning blue cream, and one of the few bottles of polish I have completely used up.  I almost didn’t have enough left to swatch!  I wore this color almost non-stop while I was pregnant with my youngest son.  I was high risk and never knew when it would be “time” so I kept my nails blue for over a month.  He turned 1 year old yesterday.  :)
LeChat Perfect Match Gel Polish Swatch Angel from Above

Finally, Pink Lady is a peachy pink cream that I picked up on a recommendation by Kim at Ten Little Canvases.  Kim has never steered me wrong when it comes to colors!
LeChat Perfect Match Gel Polish Swatch Pink Lady

Finally, one last freaked out picture of the complete mani.  Again, I apologize for the photos that are not up to my usual quality standards.  I almost didn't share them, but I love this mani too much to keep it to myself!
pastel dot manicure with LeChat gel polish

Looking for inspiration? Check out these gorgeous spring and Easter manicures as well :)


~Michelle

*This post uses Amazon Affiliate links. 
Read more ...

Monday, April 7, 2014

Blue on Blue for Autism Awareness

Press Sample

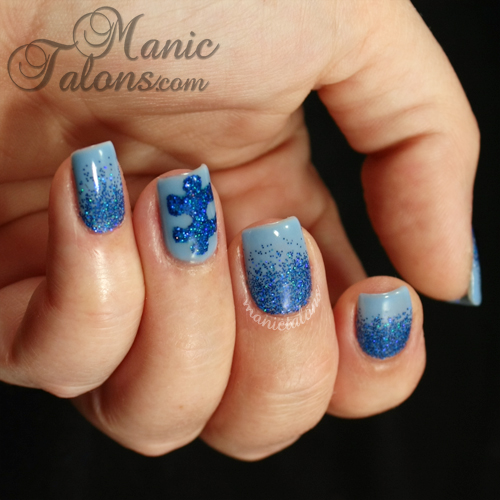
Hello Loves.  April is Autism Awareness Month, and this is a cause very near to my heart.  Naturally, I had to do a little nail art to show my support.
blue autism awareness manicure couture gel polish

Before we get to the details of the nails, I want to tell you a little about why Autism Awareness is important to me.  Her name is Leanne and she is a vital part of every holiday memory I cherish.  Leanne is my cousin and she is autistic.  As a grown woman, she has the mental capacity of a young child.  Leanne is a very affectionate woman with fondness for necklaces, purses, baby dolls.  Any time you see her, you can almost bet she'll be wearing at least one string of beads, a pocket book thrown over her shoulder, and a baby doll hanging out of the pocket of her shorts. 

Life for Leanne is challenging.  Not only does she struggle with communicating her thoughts and feelings, but others who are not familiar with the various levels of autism are often unsure how to act around her.  Some even forget their manners completely.  Oh the times I have wanted to punch people for their rude comments in public, but I digress.  Autism impacts people in varying degrees.  You can take one look at Leanne and see that she has a disability.  For others, it is not so obvious.  Yet every form of autism has challenges, both for the autistic people and those who love them. 

You may be wondering what you could possibly do to help the lives of those impacted by autism.  There are a tons of ideas in the link below, but there is one thing you can do that is powerful and won't cost a single dime.  When you encounter an autistic person in public, take a moment to catch her eye or her caregiver's eye and smile.  Just a simple smile from one person can easily outweigh any negative remarks or actions from another.  Everyone can afford to spare a warm smile, right?  I encourage you to take a few moments to learn more about autism and how you can help.

I could go on and on about Leanne, and believe me, I am tempted!  But you're here for the nails, so let's get back to that.  Here's a closer shot.
blue autism awareness manicure couture gel polish

I started with a base of Couture Naughty-Cal.  I then scrubbed Artsy Fartsy Crafts Ultrafine Blue Holographic glitter into the tacky layer at the cuticle and used a nail art brush to drag the glitter down the nail to create the fade. I should have pulled the glitter down a little farther on the index nail, but no one is perfect. For the accent nail, I mixed the blue holo glitter in with a drop of top coat to make a semi-thick paste. I then dotted it onto the nail in the shape of the puzzle piece. Once I had the general shape, I used a cleanup brush to push any stray glitter into place and cured for 30 seconds in my LED lamp. This is the same technique I showed in my Holiday Glitter Ruffian tutorial

Here's the swatch picture of Couture Naughty-Cal.  This is one of my favorite light blue creams.
Couture gel polish Naughty-cal swatch

Be sure to check out some of these other amazing blue manicures for Autism Awareness


Finally, I have a few discount codes to share with you.  Couture Gel Polish has graciously given me a discount code for 10% to pass along to you!  Enter "ManicTalons" at checkout to claim your discount.

Additionally, ArtsyFartsy Crafts also has given me a discount code to share.  Enter "MANICTALONS" at checkout for 10% off.  Oh, and stay tuned for an ArtsyFartsy Crafts glitter giveaway later this month!

~Michelle

*The polishes featured in this post were provided by Couture Gel Nail Polish for my honest review.
Read more ...

Friday, April 4, 2014

Simple Spring Roses

Press Sample

Hello Loves.  Today's mani is one that I consider a bit of a fail.  I love the design, but I'm not really happy with the color combination.  Before we get to the mani, I'm happy to announce that Couture Gel Nail Polish has set up a discount code just for you!  Enter "ManicTalons" at checkout for 10% off!

Ok, so onto the nails.  I was going for soft and subtle, but I think I went a little too soft on the base color and definitely too soft on the leaves.  As usual, details to follow.
freehand rose nail art with Couture Gel Polish

I started with a base of Couture Francais.  Francais is a gorgeous, creamy nude pink that is the perfect base for a classic french manicure.
Couture Gel Polish Francais swatch

I added some nice blobs with a dotting tool using Couture Lavender Lace.  Lavender Lace is a sweet lavender cream.
Couture Gel Polish Lavender Lace Swatch

I then added petal details with Couture Ooh La La French and leaves with Couture Silky Sea Foam.  Finally, I brushed Couture French Affair over the roses to give them a touch of shimmer.  These colors are in my swatch gallery if you missed the original posts.  Want to see a closer shot?
freehand rose nail art with Couture Gel Polish

What do you think?  Keeper or fail?

~Michelle

*The polishes used in this post were provided by Couture Gel Nail Polish for my honest review.
Read more ...

Wednesday, April 2, 2014

A Whole Lot of Dots with Daisy DUO

Press Sample Affiliate Links

Hello Loves.  When I swatched the last three Daisy DUO colors from Esther's Nail Center, I threatened to try them as a color block.  I still think they would make a gorgeous color block manicure, but that's not what I have to show you today.  I did attempt the color block, and I'm happy to report that I have conquered my fear of tape manicures.  Now I absolutely loathe them.  Hats off to those of you who do them and do them well!

We all have our "thing" when it comes to nail art, and my thing is dots.  So I combined a Daisy DUO Purple Pride base with Bright Maroon and Gulf Stream dots to create this fun and funky doticure.  Check out last week's swatch post to see the colors on their own.  Note that I only used two coats of Purple Pride for this manicure, so when viewed directly beside the other colors the purple appears a bit lighter than it did in the swatch with three coats.
Daisy DUO Gel Polish

Excuse the staining around my cuticles.  I was playing with a few stamping designs before doing this one.  I thought I had removed all the polish from my skin, but apparently my camera can see what my eyes cannot.  Here are a few more shots.
Daisy Duo Gel Polish
Daisy DUO Gel Polish

Before I started writing this blog, I would frequently get questions about how I do my multi-color doticures.  I find that the trick is to use a two-way dotting tool so you can simply rotate the tool to easily switch colors.  In this case, I used the tool from this set with the same size tip on both ends.

So, it's not a tape mani or a color block, but I'm really happy with how it turned out. :)

~Michelle

*The polishes used in this post were supplied by Esther's Nail Center for my honest review.  This post also uses Amazon Affiliate links.
Read more ...