Monday, March 31, 2014

Simple Mani: Couture Velvet Rope with Stars

Press Sample

Hello Loves.  I have a simple mani to show you today.  I've been wearing so much nail art lately that something simple actually feels elaborate!  Funny how that happens.
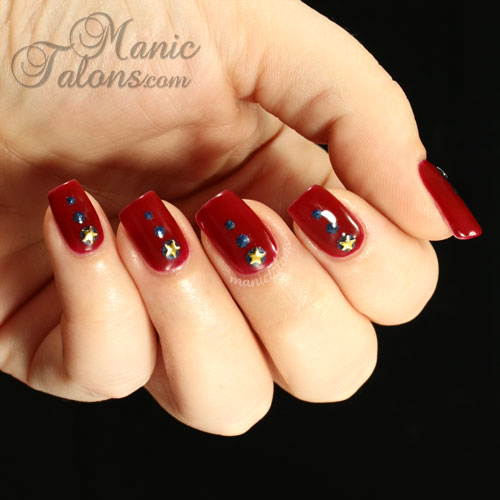
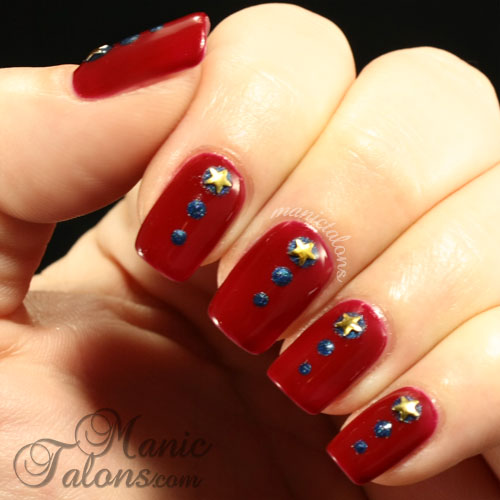
Couture Velvet Rope with Gold Stars

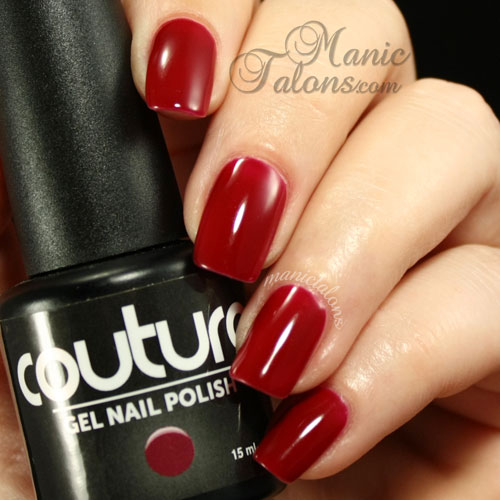
I started with a base of Couture Gel Polish Velvet Rope.  I love this blue toned dark red cream!  It applies smoothly, which is a huge plus.  I have found that dark creams generally want to streak, but this one didn't give me any issues at all.  I then added dots of Couture After Midnight and topped it off with these little gold star studs that I found in a set at Five Below.

Here's the swatch picture of Couture Velvet Rope.
Couture Gel Polish Velvet Rope Swatch

What is your favorite red gel?  Do you prefer shimmers or creams?  Orange tones or blue?

~Michelle

*Couture Velvet Rope was provided by Couture Gel Nail Polish for my honest review.  All other products used, including Couture After Midnight, were purchased by me.
Read more ...

Friday, March 28, 2014

Fun Summer Shades from Daisy DUO

Press Sample

Daisy Duo Swatches and Review

Hello Loves!  I have three fun Daisy DUO creams from Esther’s Nail Center to show you today.  I’m not sure exactly why, but seeing these three together makes me feel very happy.  I think I’m desperate for summer!

I usually try to post colors in order of my least favorite to most favorite, but I really can’t choose with these.  I love them all so much!  So here they are in no special order.  Be sure to check out my Daisy Duo wear and removal test if you missed it a few weeks ago.

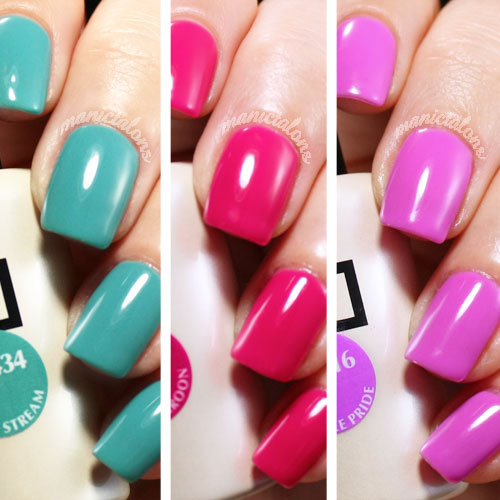
Gulf Stream is a beautiful, slightly muted blue cream.  Application was fine, but I should note that this one needed a really good shake to help blend the pigments.  Otherwise I could see little specks of darker pigment, which seems to be common with blue creams.
Daisy Duo Gulf Stream Swatch, gel polish, soak off gel

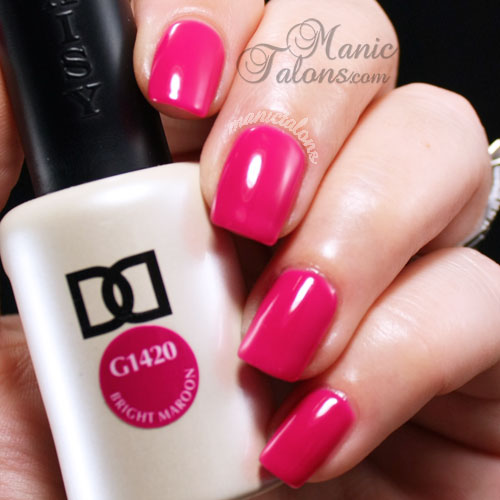
Bright Maroon is a medium berry pink.  I’m not seeing much maroon, but I do love the color.  It is almost a classic hot pink, but a little more to the red side.  Application on this one was flawless.  It went on smooth as silk.
Daisy Duo Bright Maroon Swatch, gel polish, soak off gel

Purple Pride is a bright, pink leaning purple.  I have a lot of purples across many different brands, and this one is unique to the rest of my collection.  I can’t really put it into words, so I’ll let the picture do the talking.  Application was great on this one as well.
Daisy Duo Purple Pride Swatch, gel polish, soak off gel

I really love these three colors and think they would look incredible together in a mani.  My mind originally screamed “Color Block!”  Then I remembered I have horrible luck with tape manicures.  I might give it a shot anyway this weekend.  :)

I also used the Daisy DUO Top Gel in these swatches.  Since its hard to photograph just a top coat, I don’t have a swatch to show.
Daisy Duo Top Gel Review
However, I can share my thoughts.  The top gel is quite thick, which makes it a great top coat for use over crystals, glitter, or art pieces that need a little smoothing.  Due to the thickness, it does take a few seconds to fully level, but major points for no pooling!  As for shine, it doesn’t blow me away (not many do), but it is comparable to most gel top coats.  I can’t tell a difference in the shine between the Daisy and my Gelish Top It Off, for example.  I should also note that it the tacky layer left behind feels a little thicker than the other top coats I have tried.  I can usually remove the tacky layer on 5 fingers with one lint free wipe, but I found I had to use two with this top coat.

Finally, the “Duo” in “Daisy DUO” refers to the matching nail polish (RNP) that comes with the gel.  I remembered to take comparison pictures this time.  Do they match?  They’re very close.  The gel colors are slightly lighter to the naked eye, but not enough that anyone would notice.  My camera certainly didn't pick up the difference. :)
Daisy Duo swatch

Which of these gorgeous Daisy colors is your favorite?  I'm leaning toward Bright Maroon today, but ask me again tomorrow and I will likely have a different answer.  They are all such fun shades!

~Michelle

*The polishes featured in this post were provided by Esther's Nail Center for my honest review.
Read more ...

Wednesday, March 26, 2014

Inspired by a Scentsy Fragrance: Apple Press Mani

Press Sample Gift

Hello Loves.  I have a little nail art to show you today.  This time, I found a bit of inspiration in a fragrance.  I walked into the kitchen the other day to find that my husband had switched our Scentsy warmer over to Apple Press.  Such a yummy scent!  Since I had apples on the brain, I decided to try my hand at an apple mani.
Apples with Couture Gel Polish In the Spotlight

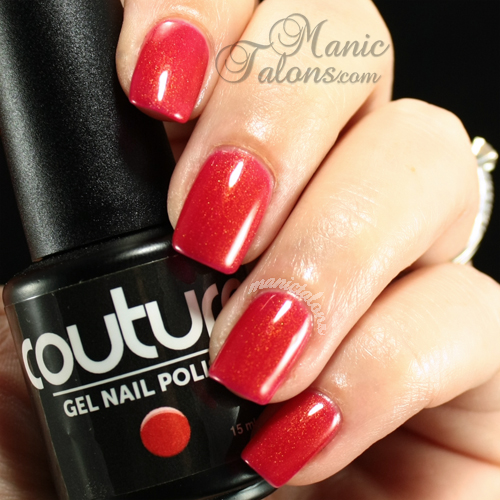
I started with a base of Couture In The Spotlight and Dance Til Dawn.  I have swatched Dance til Dawn before (see my swatch gallery), but here’s a shot of In The Spotlight.  In The Spotlight is a gorgeous blue toned red with a golden shimmer.  The shimmer is awesome!
Couture Gel Polish In The Spotlight Swatch

I then stamped the two apples in Konad White over the Dance til Dawn nails.  The apples come from a Salon Express plate SE18.  Once they dried, I used a thin brush to go over the apples with In the Spotlight for the apple bodies and Couture Aloe Very for the stems and leaves.

So, back to the fragrance…I usually try not to go off topic, but occasionally I find a product that is really worth sharing.  I am a huge fan of candles.  With 4 dogs, they’re kind of a must.  Especially when three of the dogs are Boston Terriers, a breed known for being a bit on the gassy side.  But with two young kids in the house, I can’t really burn my candles.  The 11 month old is pulling up on everything these days and the 3 year old is obsessed with blowing candles out. :(

I was talking to a fellow gel user a few weeks ago, and it just so happens she’s a Scentsy Director.  Anelisa convinced me to purchase a warmer and sent me three scents to try out.  I think it was this line from the brochure that got me “Distinctive Scentsy Warmers melt specially formulated wax with the heat of a low-watt light bulb or heating element, enhancing your home with more than 80 Scentsy fragrances safely, with no flame, smoke, or soot.”

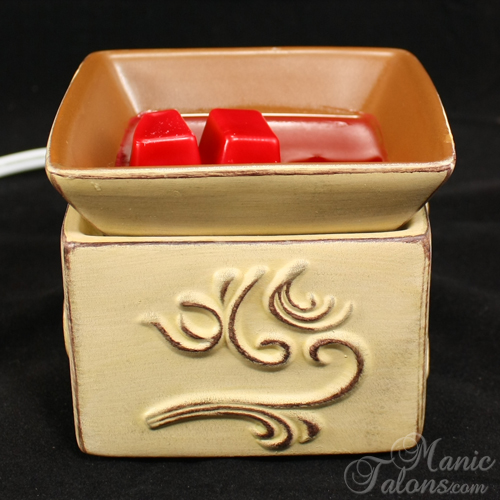
I have to admit, I was skeptical.  But, then again, there are only so many times you can be fumigated by a Boston Terrier before you're willing to give almost anything a try.  So I ordered this adorable little warmer called Sandstone from the Element collection.  I chose this style because it is closed so that the light doesn't show.  Less visible light means less to attract curious little hands.
Scentsy Elements Sandstone Burner

I’m sold.  Not only are these some of the most powerful and long lasting tarts I’ve ever tried (and trust me, I’ve tried at least a dozen brands), but they are paraffin wax so they melt at a lower temperature than many other wax tarts.  The electric warmer doesn’t even get hot.  Seriously, I can stick my hand in the melted wax and it is warm to the touch but not hot. This is HUGE when I have to worry about the kids bumping it.  I’m confident that while they can certainly make a mess if they tip over the warmer, they won’t get burned by the wax.  Score!
Warm Scentsy Wax Demonstration

If you’re a fan of candles or tart burners and have small children, I highly recommend a Scentsy Warmer.  Heck, even if you don’t have children, I still recommend one.  :)  Feel free to check out Anelisa's website if you don't have an Independent Consultant of your own.  I'm sure she'll be happy to help create another Scentsy addict.  ;)

~Michelle

*The polishes used in this post were provided by Couture Gel Nail Polish for my honest review. The Scentsy burner was purchased by me and the fragrance shown was provided by Anelisa as a gift. I have chosen to review the Scentsy product without incentive from Scentsy or Anelisa as a Scentsy representative.
Read more ...

Monday, March 24, 2014

Check out my RNP Sandwich guest post on KBShimmer!

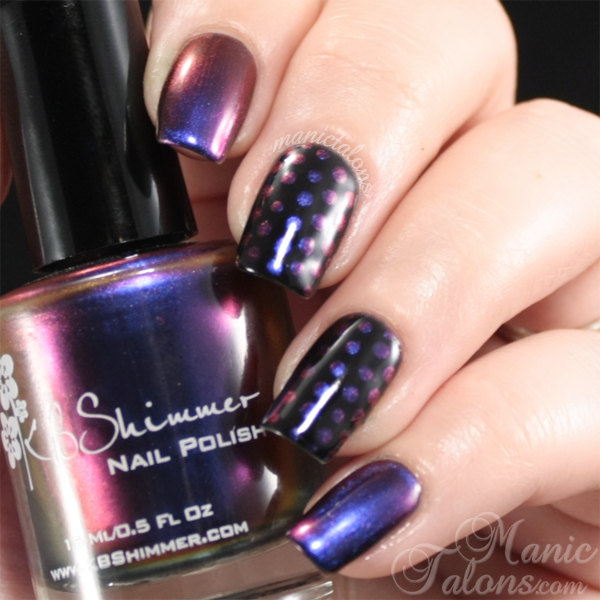
Hello Loves!  Just a quick off-schedule post to excitedly announce that I have written a guest post on the blog at KBShimmer!  Swing by and check it out to see the details for this mani and a few more. :)  Don't forget to check out the amazing KBShimmer polishes while you're there!  They pair really well with gel polish!

KBShimmer Pigment of My Imagination


~Michelle
Read more ...

A Comparison: Couture Gel Polish Pink Creams

Press Sample

Hello Loves.  As you may know, I'm currently working my way through swatching Couture Gel Polish's entire collection.  I still have a ways to go, but I did manage to swatch them all on swatch sticks this weekend.  Couture has a lot of different pinks to offer, so I thought I would show you a quick comparison of the pure cream pinks.

First, a little house keeping.  I have traditionally posted on a Sunday, Tuesday and Thursday schedule.  In an attempt spend a little less time working on blog stuff on the weekends and more time with my family, I am going to change my schedule to Monday, Wednesday and Friday.  :)

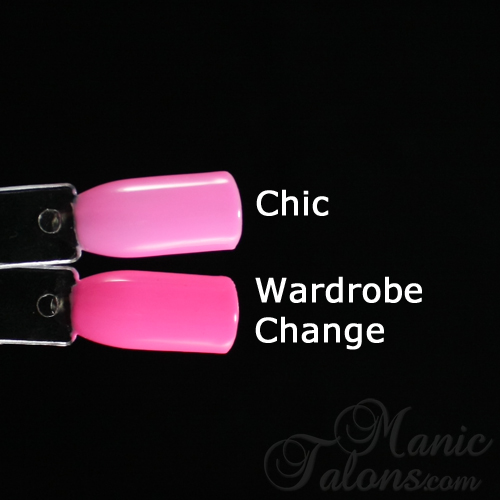
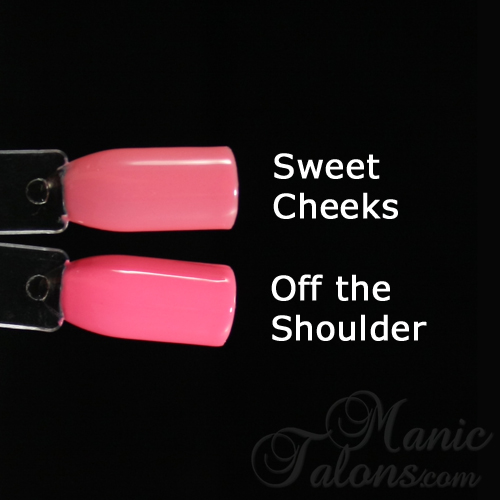
For today's comparison, I have lined up and photographed Chic, Wardrobe Change, Strut Your Stuff, Come On Barbie!, Fashionista, Sweet Cheeks and Off the Shoulder.  These all appear a little brighter on the hand than they do on the clear swatch stick with the black background, but I think this shows the difference between them a little better than the dots on Couture's page.
Couture Gel Polish Pink Cream Comparison Swatches, Chic, Wardrobe Change,Strutt Your Stuff, Come on Barbie, Fashionista, Sweet Cheeks, Off the Shoulder

Since these fall into what I would call light pinks, bright pinks and muted pinks, I broke them down into separate shots.  First, the lighter pinks.
Couture Gel Polish Pink Cream Comparison Swatches, Sweet Cheeks, Off the Shoulder

Now the brighter pinks.  All three of these appear much brighter on the hand than they do in this picture.  There's a shot of Come On Barbie on my nails in the swatch gallery.
Couture Gel Polish Pink Cream Comparison Swatches, Strutt Your Stuff, Come on Barbie, Fashionista

And finally, the muted pink creams.  These are very close in color, with Sweet Cheeks being just slightly more muted than Off the Shoulder.  There are swatches of both of these colors on my nails in the swatch gallery as well.
Couture Gel Polish Pink Cream Comparison Swatches

So, there they are - the Couture Gel Polish pink creams.  I didn't include Francais or the darker pink creams in this in this comparison - mostly because I consider Francais more of a white and the darker in my mind are a category of their own.

Are there any other Couture color families and/or finishes you would like to see compared side by side this way?  I definitely plan to show the pink shimmers as some of those are very close to each other.

~Michelle

*With the exception of Sweet Cheeks and Off the Shoulder, the polishes shown above were provided by Couture Gel Nail Polish for my honest review.  Sweet Cheeks and Off the Shoulder were obtained as part of Couture's referral program and a contest prize respectively.
Read more ...

Thursday, March 20, 2014

More Gelaze by China Glaze Swatches

Purchased by Me Affiliate Links

Hello Loves!  As promised, I have more Gelaze by China Glaze swatches to show you today from my Sally Beauty haul.  As a reminder, Gelaze is BOGO at Sally Beauty Supply for the entire month of March, so if you’re thinking about trying it now is the time!

First up, Gelaze Awakening.  This beauty is everything I wanted IBD Just Gel Road to Paris to be but wasn’t.  It is a bit on the sheer side but has a gorgeous rose base with a golden shimmer.  Soft and subtle but shifty too.  You can see the shift in the difference between my index nail and pinkie nail.
China Glaze Gelaze Gel Polish Awakening Swatch

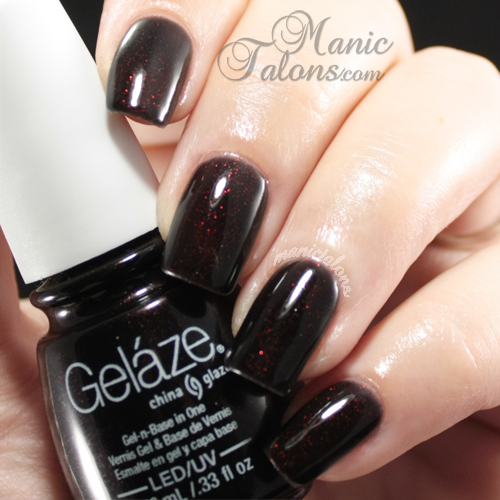
Lubu Heels is an awesome black jelly base with red shimmer.  I love it!  It’s dark and vampy but with a flirty pop.  This one was a tad difficult to apply.  It wanted to shrink no matter what I did, so I ended up having to flash cure the first layer.  (Note: All of the Gelaze polishes will shrink if the gel is warm.  It likes to be cool – even cold.  If you have problems with shrinking or pooling, pop the bottle in the freezer for 3-5 minutes and you’ll notice a world of difference in the application.)
China Glaze Gelaze Gel Polish Lubu Heels Swatch

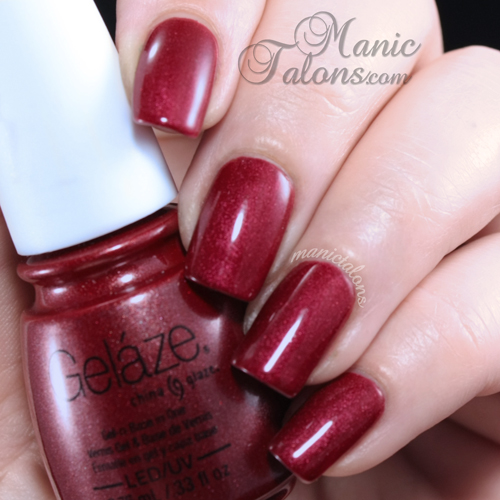
Long Kiss is a classic shimmery dark red.  It looks almost metallic in certain light.  I think most gel polish lines have a red in a similar shade and finish.  I know I have several from different brands, yet I still ended up bringing this one home.  I think it’s safe to say I really like this color!
China Glaze Gelaze Gel Polish Long Kiss Swatch

Re-Fresh Mint is a soft, pastel green cream.  It is very much a mint shade and reminds me of the mint chocolate chip ice cream I loved as a child.  Sadly it is not the best color for my skin tone, but that’s never stopped me from wearing a color before.
China Glaze Gelaze Gel Polish Re-Fresh Mint Swatch

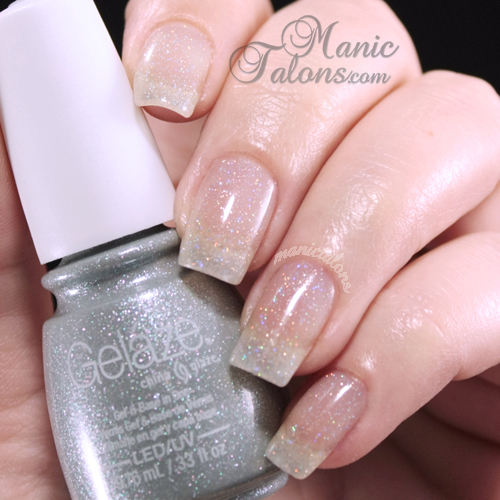
Finally, you know I couldn’t resist picking up Fairy Dust.  This scattered holographic topper is very similar to Gelish Vegas Nights, but it seems a little more sparkly to me and I believe the particles may be a tad smaller as well.  It’s a gorgeous topper!  As usual, I have swatched it here as three coats over a nude nail to show that the base is clear.
China Glaze Gelaze Gel Polish Fairy Dust Swatch

I then layered it as one coat of Re-Fresh Mint.  Note that Re-Fresh Mint looks a bit darker in this picture than it actually is.  I killed one of my lights and soft focused the picture a tad to capture the sparkle.
Gelaze by China Glaze Fairy Dust over Re-Freshment

I have one more Gelaze in my current stash, but no pictures of it yet.  Flip Flop Fantasy has become my new nemesis.  Such a gorgeous, neon orange leaning coral, but my camera is not cooperating in capturing it!  Cameras really don't like to capture neons shades.  A quick Google image search shows me that I am not alone, but I’m not ready to give up yet.  I still have a few tricks up my sleeve. ;)

~Michelle

*This post uses Amazon Affiliate Links.  Purchases through these links provide financial support for this site.
Read more ...

Tuesday, March 18, 2014

Dark Shimmers from Couture Gel Polish

Press Sample

Hello Loves!  I have a few Couture swatches to show you today.  I know I’ve been showing bright and springy colors lately.  Living in the southern US, it tends to get warm here sooner than other places.  Since many of my readers are still seeing snow and cold weather or gearing up for Fall, I thought I would show you a few of the darker offerings from Couture Gel Nail Polish.  

Before I get to the swatches, congratulations to Stella R. on winning the Couture Starter Kit giveaway!

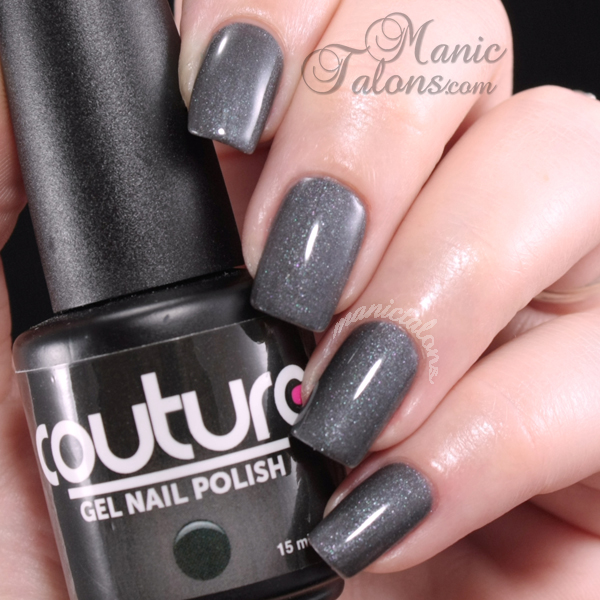
Ok, so Fishnet Stockings isn’t super dark, but this medium grey shimmer is perfect for cooler weather.  This one offers flawless coverage in two coats, but I swatched three for consistency.
Couture Gel Polish Fishnet Stockings Swatch
 
Skinny Jeans is a fun, dark wash denim kind of color – a super dark, navy blue with an almost greenish shimmer.  This one is also covers flawlessly in two coats even though I swatched three.
Couture Gel Polish Skinny Jeans Swatch

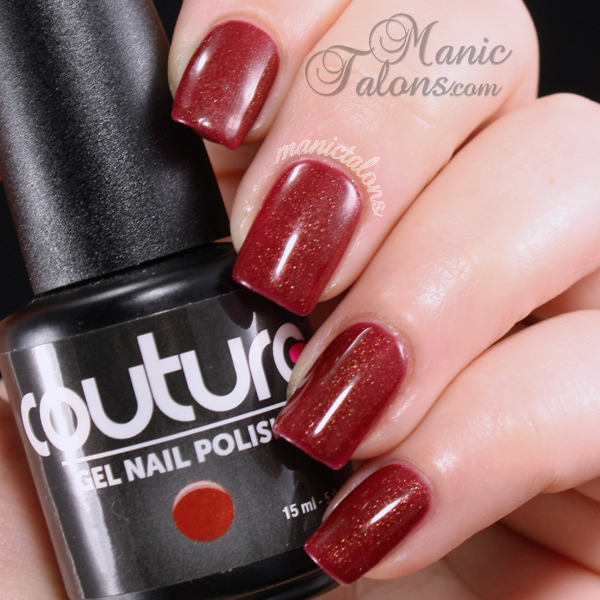
Finally, Mademoiselle is a gorgeous, shimmery maroon that leans a tad more to the brown side than the red.  This one did require three coats, keeping in mind that my coats are thinner than those applied by the average gel user.
Couture Gel Polish Mademoiselle Swatch

So there you have it, colors for my cold weather friends.  ;)  I apologize for the short post today.  I realized yesterday that my swatch page loads a bit slow, so I’m working on improving that this evening.

Check back Thursday for those Gelaze swatches I promised!

~Michelle
*The polishes shown in this post were provided by Couture Gel Nail Polish for my honest review.
Read more ...

Sunday, March 16, 2014

China Glaze Gelaze Swatches and Remover Review

Gift Affiliate Links

Hello Loves.  After publishing my review of Gelaze by China Glaze, I received an email from their PR Director asking if they could send me a gift to say "Thank you" for the review.  Naturally I accepted, so I have more swatches to share with you as well as my thoughts on Gelaze Remove.  Of course, since Gelaze colors are buy one get one free at Sally Beauty Supply this month, I have since purchased a few more Gelaze colors as well.  Be on the lookout for swatches of those later this week.  ;)

The first color I was sent is the ever popular For Audrey.  This is a gorgeous, slightly muted Tiffany blue cream.  I can see why it is a crowd favorite and the color so many people have been waiting for in soak off gel.
China Glaze Gelaze Gel Polish For Audrey Swatch

The next color I have to show you is Turned Up Turquoise.  This is an absolutely gorgeous, frosty turquoise blue, but I found it to be a bit on the sheer side.  I will definitely layer it over undies in the future.  Also, since it is a frost it can be tricky to apply without streaks in the finish.
China Glaze Gelaze Gel Polish Turned Up Turquoise Swatch


The final color for today is this hot pink beauty called Purple Panic.  This is probably my favorite of the three, which is surprising since I do tend to favor blues and teals.  While the base is most definitely pink, it has this awesome purple shimmer that gives it a very shifty appearance.  If you click on the picture below to pull up the full size photo, you can see the shimmer much better.  
China Glaze Gelaze Gel Polish Purple Panic Swatch

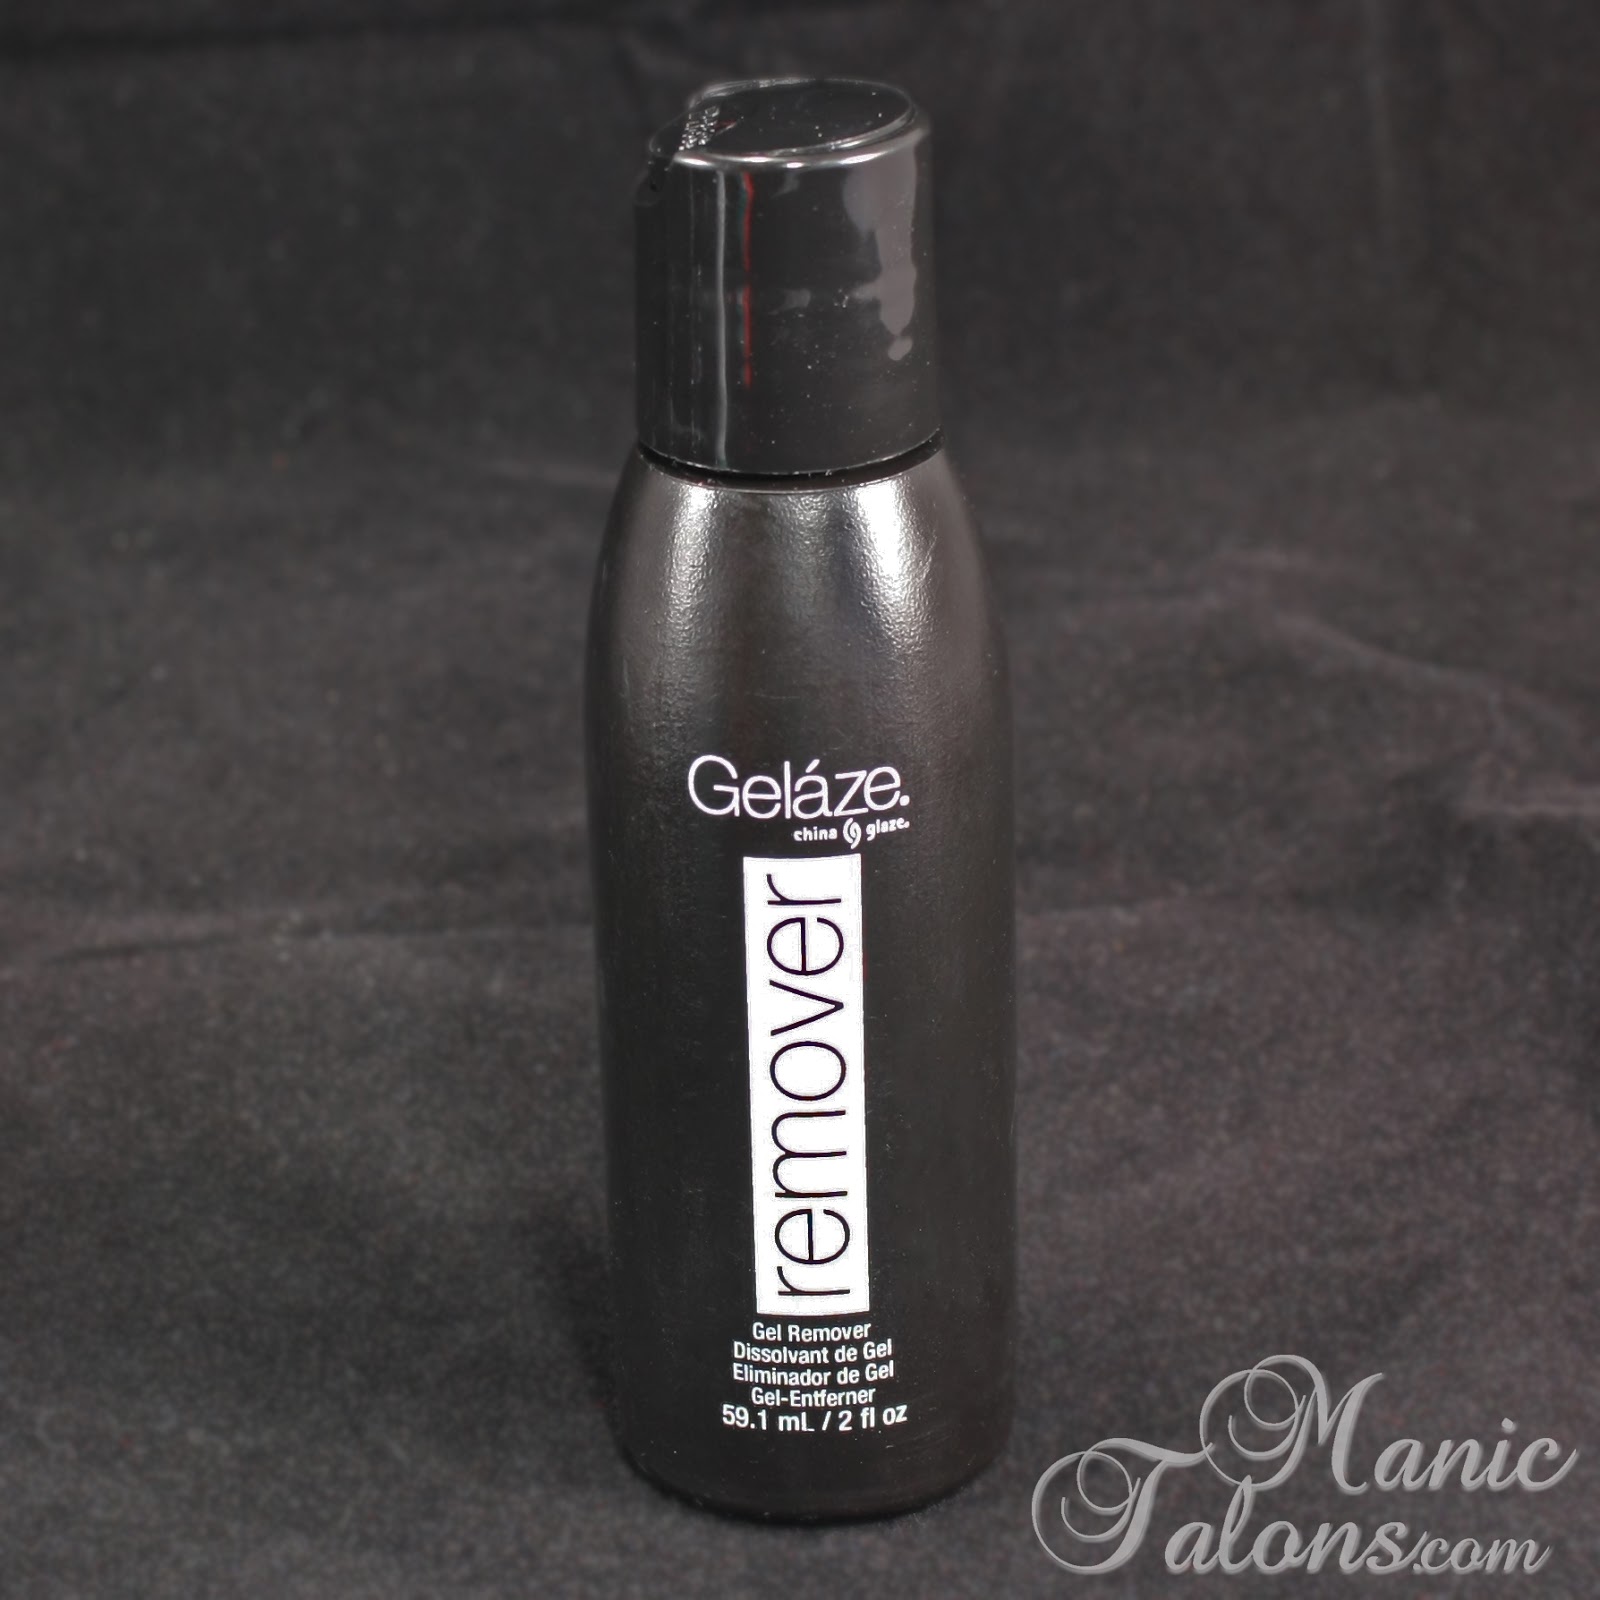
Last but not least, this small bottle of Gelaze Remover was included in my gift.  This product is only available to professionals at this time.
Gelaze Soak Off Gel Polish Remover

So, how does it stack up?  Well, it smells like acetone and it removes almost as quickly as pure acetone.  Complete soak off with pure acetone took 10 minutes for me.  I also timed this soak off at 10 minutes, but the gel didn't push off of the nail quite as easily.  I was still able to push it off with gently with my thumb nail, but I believe another minute would have made the ease of removal equal to the pure acetone soak I tested in my previous Gelaze review.  With that said, this one didn't turn my fingers white and ashy like acetone.  I believe this is thanks to the added ingredient Isopropyl Palmilate, which is a palm oil based moisturizer.  But is it worth the additional cost?  I honestly believe that would depend on your skin.  My skin tends to lean toward the dry side, so acetone really does a number on my cuticles.  The added moisturizers in Gelaze Remove are a definitely plus in my book, making it superior to pure acetone in my opinion.

I'll leave you with an off topic question.  I spend a crazy amount of time on photography and editing - I take anywhere from 20-50 shots of each color (sometimes 100 or more if it happens to be a tricky color), and once I select the photos to use, each picture takes approximately 30 minutes to process.  In order to spend a little less time playing photographer and a little more time with my family, I'm toying with the idea of going back to one shot for swatch pictures like I have in this post.  What are your thoughts?  Is one photo sufficient?  Or do you prefer multiple shots?

~Michelle

*The products featured in this post were sent to me as a gift by Gelaze to show their gratitude for the previous review. This post uses Amazon Affiliate links.  Purchases through these links help support this site.
Read more ...

Thursday, March 13, 2014

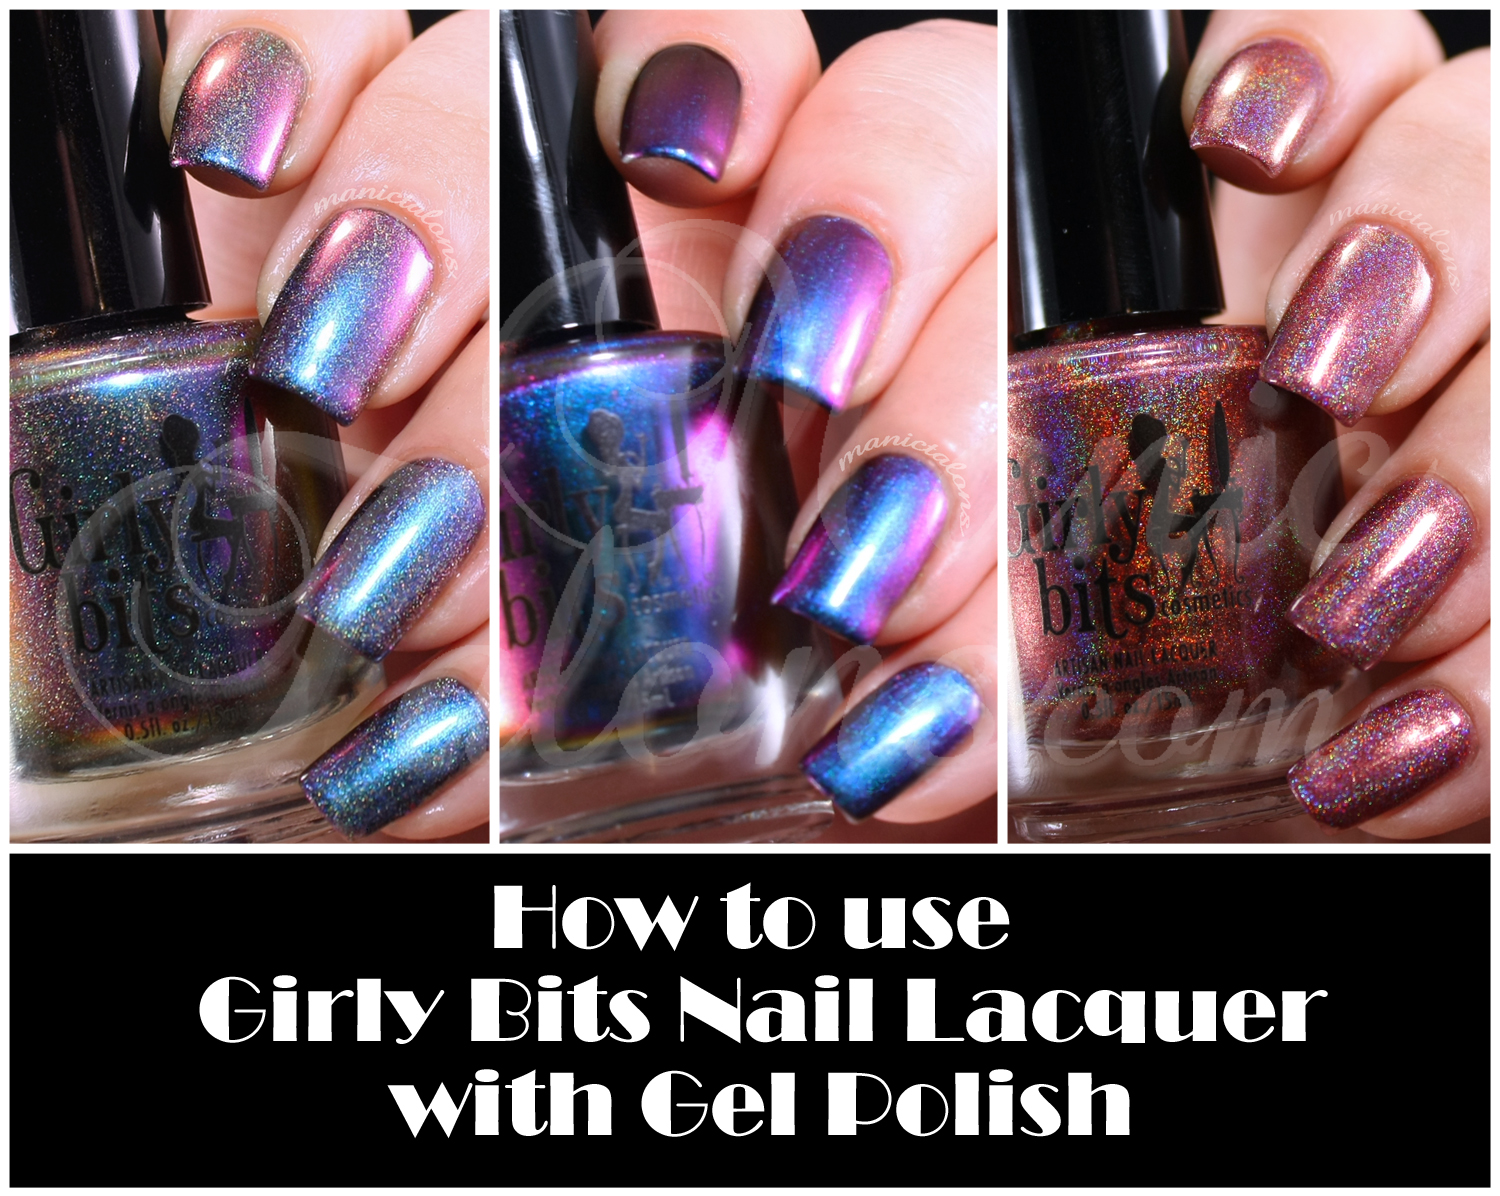
A Perfect Pair: Girly Bits Nail Lacquer and Gel Polish

Press Sample


Hello loves!  As you know, gel polish is seriously lacking in some of the fun finishes that are currently being produced by Indie makers.  Thankfully, we can combine traditional lacquer with gel polish to calm that craving!  When Pam from Girly BitsCosmetics asked me to do a post on combining Soak Off Gel and Girly Bits Nail Lacquer, I ran into a huge problem – choosing which of these gorgeous polishes to show you!  Gah!  I did manage to narrow it down, so today I’m going to show you two ways to combine Girly Bits polish with your favorite gel polish brand (in this case, I’m using Couture). 

Let’s start with the easiest method, shall we?  

Polish on Top of a Gel Manicure

The first way to combine traditional polish with gel polish is to do a complete gel manicure and polish on top of it.  In this case, I did a complete gel manicure in black.  Once I removed the tacky layer from the top coat, I applied 1 coat of this amazing holographic multi-chrome called Go and Shake a Tower.  I then topped it off with a coat of fast dry top coat.  One great thing about this polish is it was designed to be opaque in 3 coats on its own but can also be layered over black without impacting the color.   So you can just as easily apply three coats of Go and Shake a Tower over a clear gel manicure if you don’t want to use black as the base.
Girly Bits Go and Shake a Tower swatch over black get polish

Layering polish over a soak of gel manicure with this method is awesome for two reasons.  First, polish wears like iron over soak off gel so it will likely last over a week.  Second, if you get tired of the color, you can easily remove it with non-acetone polish remover without damaging the gel manicure underneath!   

Want to see another shot of this beauty?  Yeah, I thought so.  Excuse the excess cuticle oil.  I got a little carried away.
Girly Bits Go and Shake a Tower swatch over black gel polish

The RNP Sandwich

The second way to combine gel polish with regular nail polish (RNP) is to sandwich the regular polish between layers of gel.  There are a few tricks to successfully sandwiching RNP between layers of gel.  The most important trick is patience!  As gel users, we are not accustomed to waiting for polish to dry.  This will be your biggest hurdle when it comes to RNP sandwiches.  ;)

Before I get into the technical stuff, how about a little eye candy?  This is a RNP sandwich mani using a black gel polish mani for the base and one thin coat of this amazing multi-chrome beauty called Wave the Sails.  As you know, I’m a sucker for a multi-chrome, and this one absolutely blows my mind.
Girly Bits Wave the Sails Swatch over Black Gel Polish

You have to see it from all angles to fully appreciate the gorgeousness.  I have been wearing this combo on my right hand for the past week.  Fair warning: this polish is not a safe choice for driving in cloudy weather!  It is extremely hard to keep your eyes on the road and off of your fingers.
Girly Bits Wave the Sails Swatch over Black Gel Polish
 Girly Bits Wave the Sails Swatch over Black Gel Polish

Ok, ok…so back to the process.  I’ll break it down in steps with pointers.

Step 1: Apply your base/foundation gel, being sure to fully wrap the free edge of the nail.  I usually let mine overflow to the underside of the tip.  This allows a margin of gel for the final top coat layer to grab so that the RNP layer is fully encased in gel.  If your nails aren’t long enough to wrap the gel that far, wrap it as much as you can without getting the gel on the skin under the nail.  Cure as usual. (Check out this post for more info and a photo of how I wrap my tips.)

Step 2: If you are wearing a coordinating base color under the RNP, apply it now and wrap it under the nail the same way you did the base in step 1.  Cure as usual and repeat for a second coat if necessary.

Step 3: Apply your gel top coat, again wrapping the tip as described in Step 1.  Cure and remove the tacky layer.  Do not oil your cuticles yet!

Step 4: Apply a thin coat of RNP on top of the gel manicure.  Cover the free edge, but try not to let the polish overflow onto the underside of the nail (remember, you want that gel on the underside free of RNP so that the top coat can grab it).  If you need another coat of RNP, allow the first coat to dry before applying the second coat.

Step 5: (option):  Apply a fast dry top coat to speed things along, again being careful to leave that gel margin under the tip of the nail clear

Step 6: Now we wait.  I’m serious.  Wait.  The RNP has to be COMPLETELY dry before you can apply the gel top coat.  Do Not Rush This Step!  If the RNP isn’t completely dry, it will cause the top coat to chip off in less than a day.  Or worse, the RNP can wrinkle under the gel top coat, and there’s no fixing it when that happens.  If you used only 1 thin coat of polish, 2-3 hours should be sufficient to ensure the RNP is dry.  If you used two or more coats, better make it 4-6 hours.

Step 7: Now that your RNP is completely dry, quickly wash your hands with an oil fighting soap (I use dish detergent) to remove any oil from the nail that you may have picked up while waiting.  This step is important!  You likely picked up oils from your skin or hair during the wait, so if you skip this step the top coat will chip.

Step 8: Dry your hands completely and wait 5-10 minutes to be sure they’re dry.  Don’t touch your skin or hair during this time.  ;)

Step 9:  Apply a layer of gel top coat, being sure to wrap the tips as described in step one so the top coat bonds to the exposed gel under the tip of the nail.  Cure as usual.  You may choose to do another layer of gel top coat at this point.  I usually do, but it is completely optional.  Remove the tacky layer and enjoy your longer lasting RNP mani with a gel shine!

I usually get anywhere from 7 to 10 days wear from RNP sandwich manicures.  I could likely get even longer wear, but I'm usually tired of a manicure and ready for a change after 10 days, so I haven't tried to go longer.  One other thing to note - when soaking off a sandwich mani, you may encounter staining from the RNP. 

Want to see another RNP sandwich mani?  This wine colored holographic beauty is GirlyBits Auld Langs Wyne.  I opted to use a clear soak off gel base for this one.  My soak of gel base consisted of one layer of base gel and two layers of top coat (for added strength).  I then applied 3 thin layers of Auld Langs Wyne and waited 5 hours for it to completely dry before adding 2 layers of soak off gel top coat.
Girly Bits Auld Langs Wyne Swatch between gel polish layers

Since I had some time to kill while waiting, I snagged a shot of this incredible polish without the gel top coat.  Look at the fire in that holo!
Girly Bits Auld Langs Wyne Swatch without top coat

Finally, here’s a similar shot after adding the gel top coat.  The angle is a bit off, but you can see on the thumb nail that adding the gel top coat doesn’t impact the holographic shift as much as most RNP top coats.  There’s still a considerable amount of fire in this one!
Girly Bits Auld Langs Wyne Swatch between gel polish layers

Ok, so now you’re probably wondering where you can get your hands on these beautiful polishes, right?  Don’t worry, I have you covered there too.   Girly Bits Nail Lacquer is available through several authorized distributors around the world.  Click here to find the GirlyBits Distributor closest to you. 

Also, be sure to follow Girly Bits Cosmetics on Facebook and @girlybitscosmetics on Instagram to see more gorgeous swatches and learn of new collections. 

Oh, and did I mention these polishes are hand blended, hand poured, B3 free and cruelty free?    Whoo Hoo!

Ok, ok, I’ll stop rambling now and go stare at my hands again.  :)  But before I do, I have one more picture to show you.  Check out Wave the Sails stamped over Couture Little Black Dress!  Yes, my stamping friends, you NEED this polish!  The image is from Messy Mansion MM04.
Stamping with Girly Bits Wave the Sails

Do you love Girly Bits Lacquer?  Which is your absolute favorite?  I think I need a few more of these beauties in my collection!

~Michelle

*The polishes featured in this post were provided by Girly Bits Cosmetics for the purpose of this tutorial.  All descriptive statements and general reviews are my honest, unsolicited opinions of the products.
Read more ...

Tuesday, March 11, 2014

St. Patrick's Day Shamrocks


Hello Loves.  With St. Patrick's Day only a week away, I have a fun little Shamrock mani to show you today.  As usual, details to follow.
St. Patrick's Day Shamrock Gel Polish Manicure

Base: Couture Ooh La La French, Couture Big Spender, Couture High Roller, Couture Aloe Very
Stamping Color: Mundo de Unas Green mixed with Mundo de Unas Bronze
Stamping Image: Messy Mansion MM04

Ok, so there's a lot going on in the base for this one.  I started with a solid white base with Ooh La La French.  I then used a stiff round brush to dab on a layer of High Roller using a stippling technique.  I cured that and then repeated the process with Big Spender.  Cured again and repeated the process one more time with Aloe Very.  The result is an interesting Jade effect.  You can see swatches of the greens I used here.

For the stamping polish, I simply mixed two parts green to one part bronze to get a green with a shimmery gold effect.  You can see the detail in the base and stamping polish a little better in this picture.
St. Patrick's Day Shamrock Gel Polish Manicure

I really like this one, even though it makes my fingers look dead.  Though it does make me wonder why I am so drawn to colors that look absolutely horrid on me.  Must be my luck. ;)

~Michelle
Read more ...

Sunday, March 9, 2014

Bright and Fun colors from Couture Gel Nail Polish

Press Sample

Hello loves.  As I was reorganizing my swatch page the other day, I realized it was sadly void of bright, happy colors.  Since I certainly have bright colors in my stash, I decided today is a great day to show you a few of my brighter shades from Couture Gel Nail Polish.

Before I do, I am happy to announce that a winner has been selected for my Couture Starter Kit giveaway.  Check your emails and be sure to check your spam filters too just in case.  The winner has 48 hours to respond or another winner will be chosen.  ;)

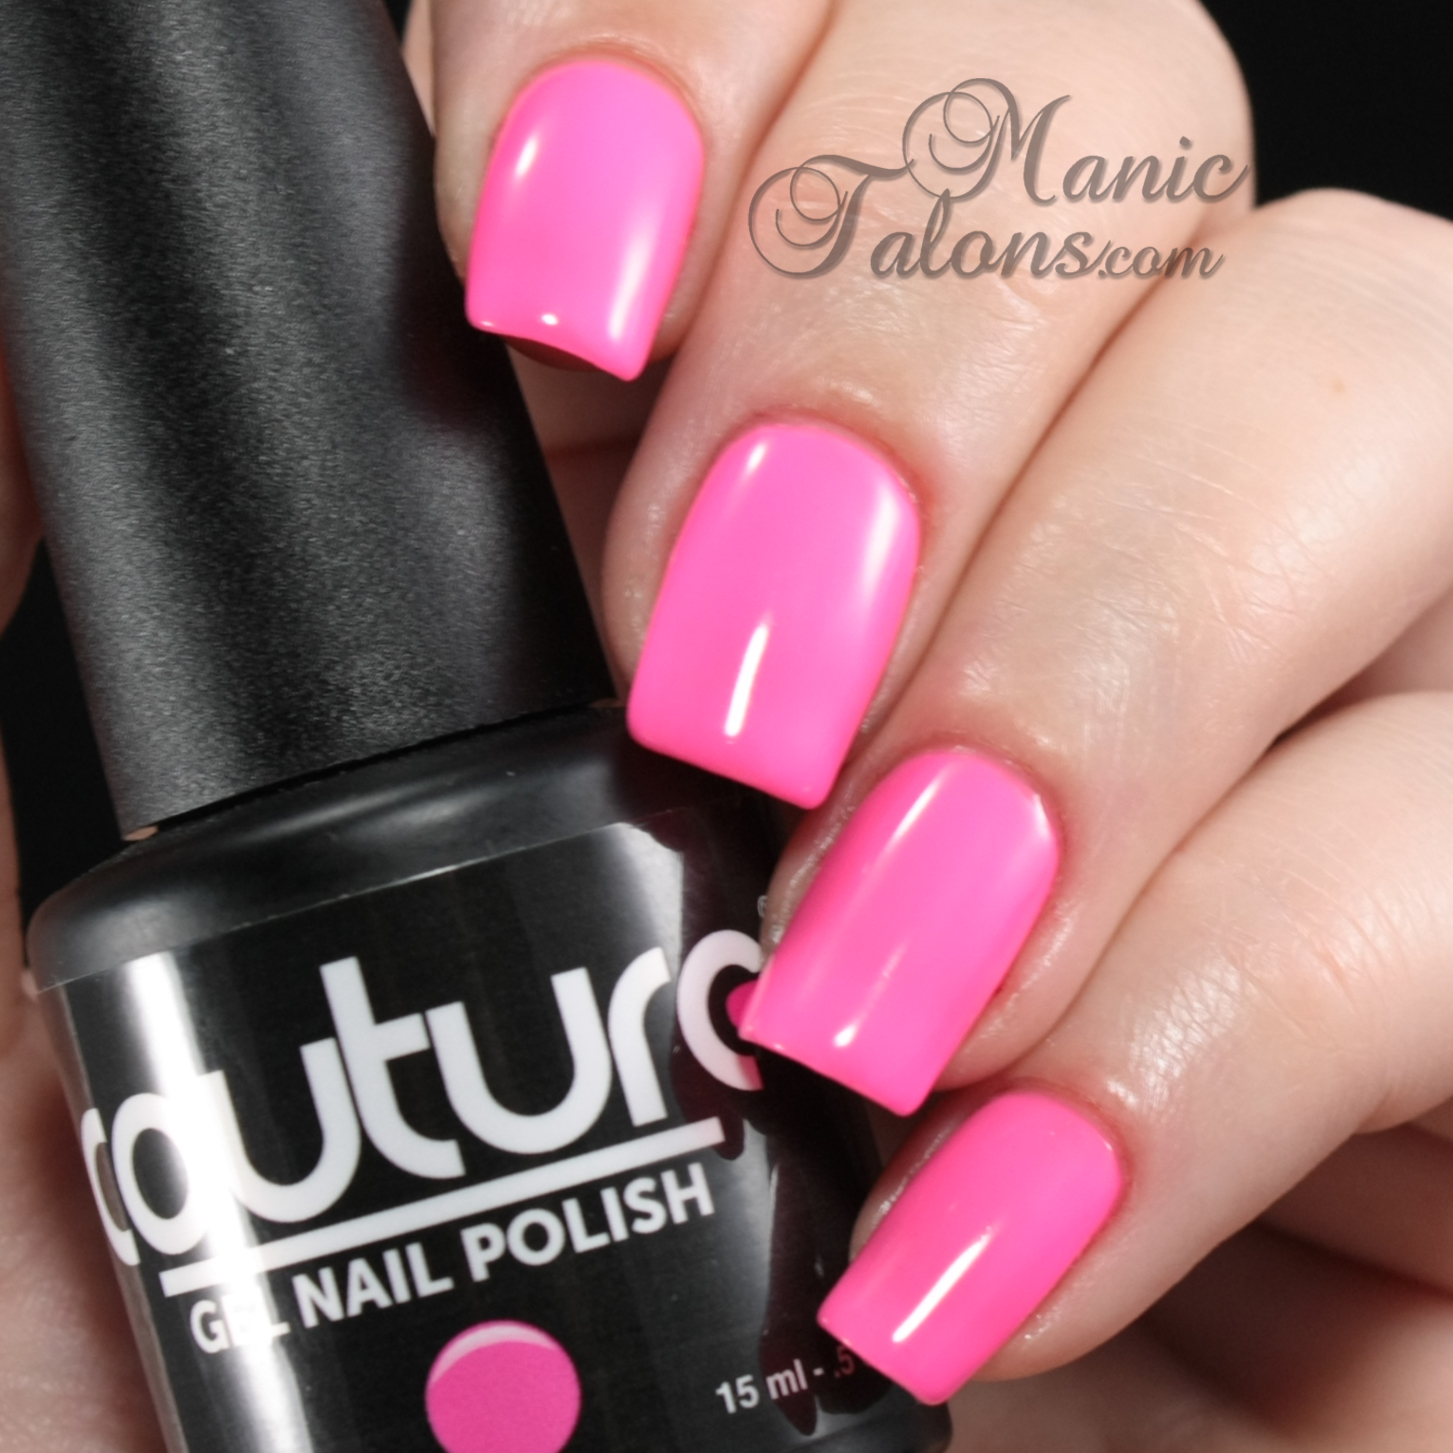
Onto the swatches.  The first color I chose to show you today is Come On Barbie!  Come On Barbie! is a beautiful, almost neon, bright pink cream.
Couture Gel Polish Come On Barbie Swatch
 Couture Gel Polish Come On Barbie Swatch

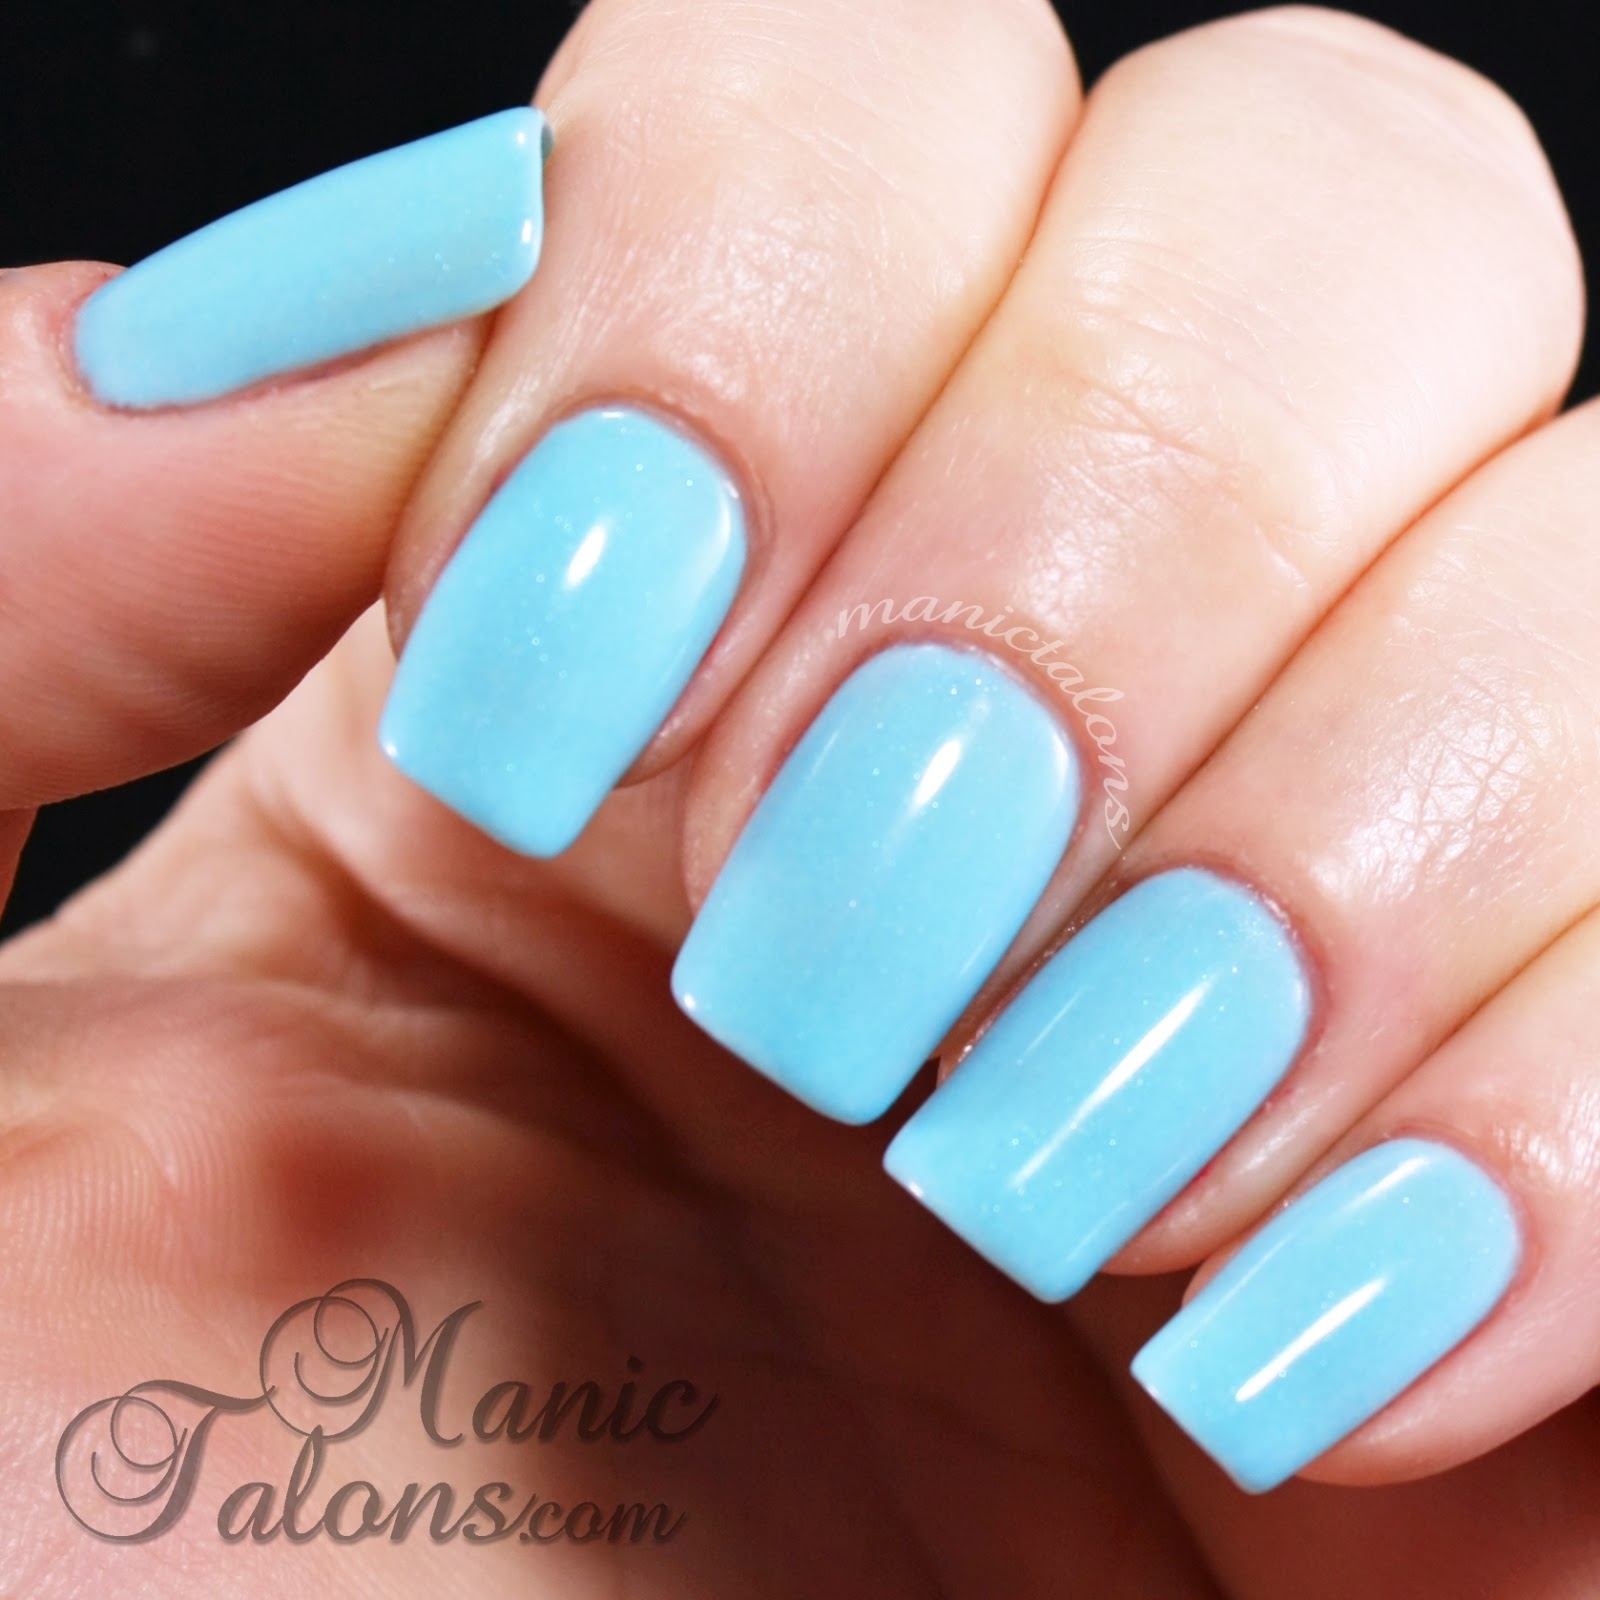
Milano is a gorgeous sky blue with a very subtle shimmer.  I'm not sure if this one is more of a spring or summer color, but I certainly wear it year round!
Couture Gel Polish Milano Swatch
 Couture Gel Polish Milano Swatch
I apologize for the way my hand looks in the above photos.  In order to get the color accurate for the polish, I had to shoot in a picture mode that does little for skin tone.

Up next is Elegant Finish.  This may be what I consider the perfect coral cream.  It leans a bit to the orange side, which is nice since many corals tend to lean more pink.
Couture Gel Polish Elegant Finish Swatch
 Couture Gel Polish Elegant Finish Swatch

Tres Chic is very much a bright, summery yellow.  It reminds me a bit of a highlighter pen, but is opaque and a breeze to apply.
Couture Gel Polish Tres Chic Swatch
 Couture Gel Polish Tres Chic Swatch

Finally, Glam Squad is the softest of the brights I chose to show you today.  Glam Squad is what I would call a lovely, lilac cream.
Couture Gel Polish Glam Squad Swatch
 Couture Gel Polish Glam Squad Swatch

Couture continues to blow me away with their gel polish formula.  All of the colors featured today apply beautifully, cure fully, and have amazing depth.  Of course, these are just a sampling of the bright colors that Couture has to offer.  Check out www.couturegelnailpolish.com for more colors.  ;)

~Michelle

*The polishes shown in this post were provided by Couture Gel Nail Polish for my honest review.
Read more ...