Showing posts with label Acrylic Paint. Show all posts

Friday, October 16, 2015

Monster Madam Glam Swatch Post!

Press Sample

New Madam Glam Gel Polish Swatches

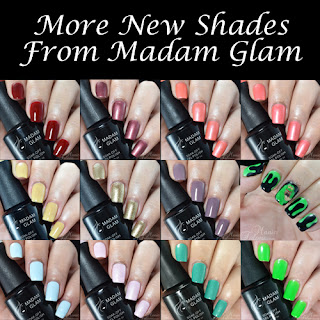
Hello Loves!  If you follow Madam Glam, you probably know they just added a ton of new colors to their gel polish line.  I have 11 of them to show you today.  Ready to see them?  Of course you are.

First up is this gorgeous dark red cream with brown undertones called Very Chic.  It is opaque in two coats but has an almost jelly finish that would be perfect for sandwiching.
Madam Glam Very Chic Swatch

Carmine Pink is a peachy pink with a frosty silver shimmer.  She is also opaque in two coats, though I found a very thin third coat helps even out the brush strokes in the shimmer.
Madam Glam Carmine Pink Swatch

If you like Carmine Pink but prefer a pinker tone, True Story is your color!  They are very similar in finish with True Story being just a tad frostier.  True Story is also opaque in two.
Madam Glam True Story Swatch

Clean Slate is a gorgeous blue leaning teal with an ultrafine silver shimmer.  Yep, you guessed it...another two coater.  I ended up taking these photos with my phone to get the color right, so I apologize for the lower quality images.
Madam Glam Clean Slate Swatch

Flawless is, well, flawless!  This soft baby pink has a subtle silver shimmer that adds a super romantic flare.  I did find that I needed three thin coats for full coverage with this one.
Madam Glam Flawless Swatch

Did someone say full coverage gold glitter?  It's Not you, It's Me is exactly that.  The glitter in this polish is super fine - almost a shimmer - and it offers full coverage in two to three coats.  This is an amazing accent color for fall!
Madam Glam Its Not You Its Me Swatch

Hello bright and beautiful Neon Lime Green!  This super vibrant neon green is opaque in two to three coats and really pops.  I had to use my cell phone to capture it, and I couldn't bring myself to take it off when I swatched it!  So be sure to check out my nail art using this color at the end of the post in case you missed it on facebook or instagram. 
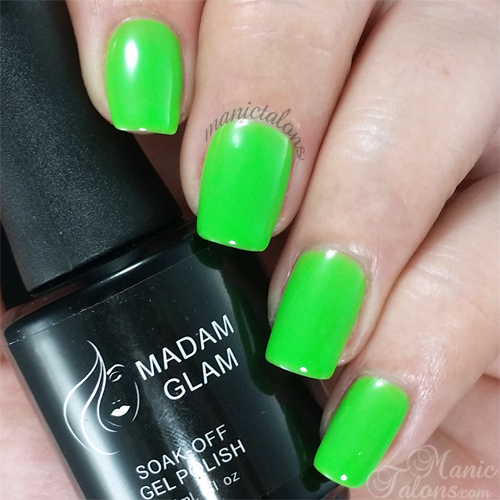
Madam Glam Neon Lime Green Swatch

Pure Cloud is a soft, pastel blue cream with awesome coverage in two coats.  This is the color I think of when I think baby boy. 
Madam Glam Pure Cloud Swatch

Sparkly Topaz is one of my absolute favorites in this group of swatches.  This wine toned shimmer almost has a metallic shine and is perfect for fall.  In some lighting it appears more red and in others it has a purple tone.  Gorgeous!
Madam Glam Sparkly Topaz Swatch

That Thin Line is what I would call a caramel latte shade.  It appears more yellow on my skin tone but is more beige in the bottle.  I'm not a huge fan of this one simply because it doesn't look very nice on me, but the coverage is awesome in two coats and it would be beautiful on someone with a different skin tone.
Madam Glam That Thin Line Swatch

Finally, Twilight Lilac is a dusty lilac purple cream.  Yep, she's opaque in two coats.  I didn't think I would like this one as much when I saw it in the bottle, but I find that I really love it on my nails.  Its like nude meets purple but with color.  (And yes, I know that made absolutely no sense at all...but I'm sure you get what I mean.  lol)
Madam Glam Twilight Lilac Swatch

Ok, so as I mentioned above, I just couldn't get past Neon Lime Green.  You see, we watched the Ghost Busters movies the other night and Slimer apparently decided to haunt me.  And you have to admit that this green is perfect for slime!  So I broke out my Wildflowers Nail Art Paints and added the black to create slime drips.  I thin thinned my white and added a few accents to the resulting slime areas.  Slimer is freehand with acrylic paints and I then added Neon Lime Green accents to bring him back up to the brightness of the other nails.  Finally, I used my Akzentz Lights Out to add some glow in the dark action over Slimer and the Neon Lime Green Drips.  The glow made Slimer look a little fuzzy, but I still adore how he turned out!
Ghostbusters Slimer Nail Art with Madam Glam Neon Lime Green

Here's a glow shot.  Pretty fun, right?  Sadly, I didn't get to wear it for long.  The glow action freaked out the Two Foot Terrorist (aka my 2 year old son) in the middle of the night.  Such a shame.  But at least I have pictures!  lol
Glow in the dark Ghostbusters Slimer Nail Art with Akzentz Lights Out

That wraps up my new Madam Glam swatches!  I also learned the Madam Glam has polish matches for several of their gel polish colors.  I have a few of the polishes to play with and will show you those soon.  :)  As always, you can pick up these colors and many more at www.MadamGlam.com.

~Michelle

*The Madam Glam Gel Polishes featured in this post were provided by Madam Glam for my honest review.  All links within this post are courtesy links and do not benefit ManicTalons.com.
 

Read more ...

Wednesday, October 15, 2014

The Great Pumkin - Then and Now


Hello Loves!  There are few things more humbling than a nail art fail.  Today's nail art is certainly a fail.  Last year, I created a mani based on It's The Great Pumpkin Charlie Brown.  Ah, such a great Halloween special and one that we watch non stop during October. We're pretty big Peanuts fans around here.  So...I decided to try it again this year.  First, let's take a look at the mani from October 2013.  Not bad for my first real attempt with acrylic paints.  Pose is a little awkward, but the art is solid.


Now let's talk about this year's attempt.  Ok, I admit it...I was feeling pretty confident.  My skills have surely improved over the past year, right?  So instead of replicating the design from last year, I decided I would try and improve it.  Oh yeah, I'll do the entire scene this time.  All in acrylic paints over a black gel polish base.  It's going to be epic.  *Sigh*  It certainly is epic...an epic fail.  I know, it doesn't look too bad in the collage above.  Let me show it to you a little larger.


Ok, so I was off to a pretty good start.  The base looks good.  Moon is nice and round-ish.  Pumpkins and grass were shaping up ok.  Even the general shape of Linus and Sally are pretty close.  Then things turned south.  Poor Snoopy.  Someone clearly stepped on his nose, turning his pretty round head into a football.

But it fell apart even worse from there.  How?  Fine detailing.  Yep.  That pumpkin patch went from being the "most sincere" to rotting.  And Linus...apparently he has gout in his left arm.  But the real kicker is Sally.  Poor little Sally.  She clearly picked up a heavy drug habit somewhere along the way.  Don't believe me?  Let's take an even closer look.


See, sweet little Sally turned into Crackhead Sally with the stroke of a brush.  Charles Schulz would surely turn over in his if he saw how bad I butchered his beloved characters.  lol

So, there you have it.  The Great Pumpkin Mani for 2014.  To be forever known as the Crackhead Sally mani.  ;)

~Michelle

Read more ...

Saturday, August 30, 2014

One Year Blogiversary and Boston Terrier Nail Art

Affiliate Links


Hello Loves.  Today is a very special day!  Manic Talons is officially 1 year old!  When I first started this little blog, I only half expected to keep it up.  And I certainly didn't expect to have so many readers.  I am truly honored.  I admit, I'm a stats junkie.  I watch to see how many of you read my posts, and watching that number climb over the past year has really inspired me to keep pushing myself to improve my art.  Thank You!  Thank You!  Thank You!  Sometimes I need a gentle kick in the tail, and you have been here to give me one (and yes, this might be the only time anyone ever thanks you for kicking her).

Before I show you what YOU have inspired, I should probably point out that I am celebrating by giving back.  Yes, you read that right.  I have a number of giveaways planned for September, including a full Couture Gel Polish Kit, a gift certificate to Girly Bits Cosmetics, ArstyFartsy Crafts Glitter, DIY Hard Nails, and more!  Trust me, you don't want to miss them.  The giveaways will be posted off schedule (not my my regular posting days), so be sure you're following through one of my many social media channels so you don't miss them.  :)  Hint:  The first will start next week.  

Ok, so enough about what's coming up.  Here's what I have to show you today.  As I've mentioned a few times in the past, I have a love for Boston Terriers.  Before starting our family, my husband and I volunteered with the Boston Terrier Rescue of East TN as fosters.  We have had many of these bouncing balls of energy in our home over the years and continue to be ruled by three Bostons and a Chow mix.

I know it's horrible to pick favorites, but everyone has that one dog who touches your heart.  Annie Belle is my heart dog.  She has been there for me through thick and thin, joy and sorrow, the births of my sons, the loss of loved ones...for 8 years she has been my rock.  She is my little clown, my confidant, my snorting little angel.  She also puts up with my special kind of crazy.  This is an old photo, but she has painted piggies so I can't resist sharing it!
Annie Belle the Boston Terrier

When I first decided to attempt nail art other than basic glitter and dots in 2012, I naturally decided to do an "Annie Mani".  Want to see it? 
Simple Boston Terrier Nail Art Design

I was so proud of this bug-eyed version of a Boston Terrier, I forced it on anyone and everyone I could get to look.  lol  I'm pretty sure a few of my facebook friends thought I had lost my mind.  I probably lost a few that day too.  I don't even remember which gels I used for the Boston, but I do remember that the base was IBD Just Gel Indian Sari (it's a horribly inaccurate photo though).  When I started thinking about what to do for my first blogiversary, it just seemed natural that I would recreate the "Annie Mani."

I started with a base of IBD Just Gel Indian Sari.  Then I broke out my acrylic paints and got to work.  I'm tickled pink with how it turned out.  See, thanks to your encouragement, my nail art skills have come a LONG way! 
Boston Terrier Nail Art

Here's a shot with my inspiration picture.  Bless her heart, Annie is such a gentle soul.  She has been putting up with my shenanigans for years.  lol  She walked around with those stickers on her face for hours that night.
Boston Terrier Nail Art

I think I captured her soulful eyes quite well.  What do you think? 
Boston Terrier Nail Art

Of course, it looks much better from a distance than it does up close.  Here's the proof.  I'm still super pleased with it, though.  My only regret is not using a peel off base coat so I could save it forever.  (Yes, I know I'm a freak.  lol)
Boston Terrier Nail Art

Again, Thank You to each and every one of you who read my blog and give me that kick in the tail I need to keep improving my art.  Stay tuned for the giveaways!  I promise, they're coming and they will be awesome.  A few will be US only due to sponsor restrictions, but others will be open internationally.  :)

~Michelle

*This post uses Amazon Affiliate Links.  Purchases through these links generate commissions that help fund this site.
Read more ...

Monday, April 28, 2014

Purple One Stroke Flowers

Affiliate Links

Hello Loves!  I'm super excited to show you my first successful attempt at one stroke flowers!  I've been fighting with this technique for months now and finally figured it out.  While I certainly need more practice, I'm pretty pleased with how this mani turned out.
One stroke flowers, Couture gel polish, French affair

I started with a base of Couture French Affair.  I swatched French Affair in this post if you would like to see it on it's own.  For this mani, I only used one coat for a softer shimmer.  After top coating and removing the tacky layer, I broke out my acrylic paint set and got to work.  While I'm sure there are better acrylic paints out there, I picked up a basic 12 color set and have been happy with it so far.

I sponged pink acrylic paint on the tips first.  Then I used the white and purple for the one stroke flower petals.  The leaves are a dark green with a lighter green layered over it for highlighting since I couldn't quite figure out the one stroke leaves.  Baby steps, right?  I finished by dabbing a little black in the centers of the flowers and added a few purple dots around the edges. 

I'm so excited to have finally produced a semi-decent one stroke flower, I even took a macro shot.  It doesn't look very smooth in macro, but I'm still tickled pink.
One stroke flowers, Couture gel polish, French affair

If you're reading this and have mastered one stroke nail art, I'm sure you're laughing at me right now.  Heck, I'm laughing at myself!  We'll all just laugh together.  I feel a little like a child who just figured out how to clap.  Such a simple accomplishment, but it completely made my day.  lol

As a side note, when using acrylic paints with gel polish, it is crucial that you wrap the tips really well with your base and top coats to fully seal the acrylic paint.  If you don't, water can penetrate the layers and turn the acrylic paint into a mushy mess.  It's a mani wrecker for sure.  I learned this lesson the hard way with my Great Pumpkin mani last Halloween.  I was heartbroken when it only lasted a few days.

Finally, here's the standard closeup. 
One stroke flowers, Couture gel polish, French affair
 
Have you mastered one stroke flowers?  Do you have any tips to share?  Can you recommend a good brush?  I feel like my brush is one of my biggest issues.

~Michelle

*This post uses Amazon Affiliate links.  Purchases through these links generate commissions that help support this blog.
 
Read more ...

Thursday, January 30, 2014

Not One Stroke Flower Nail Art

Purchased by Me

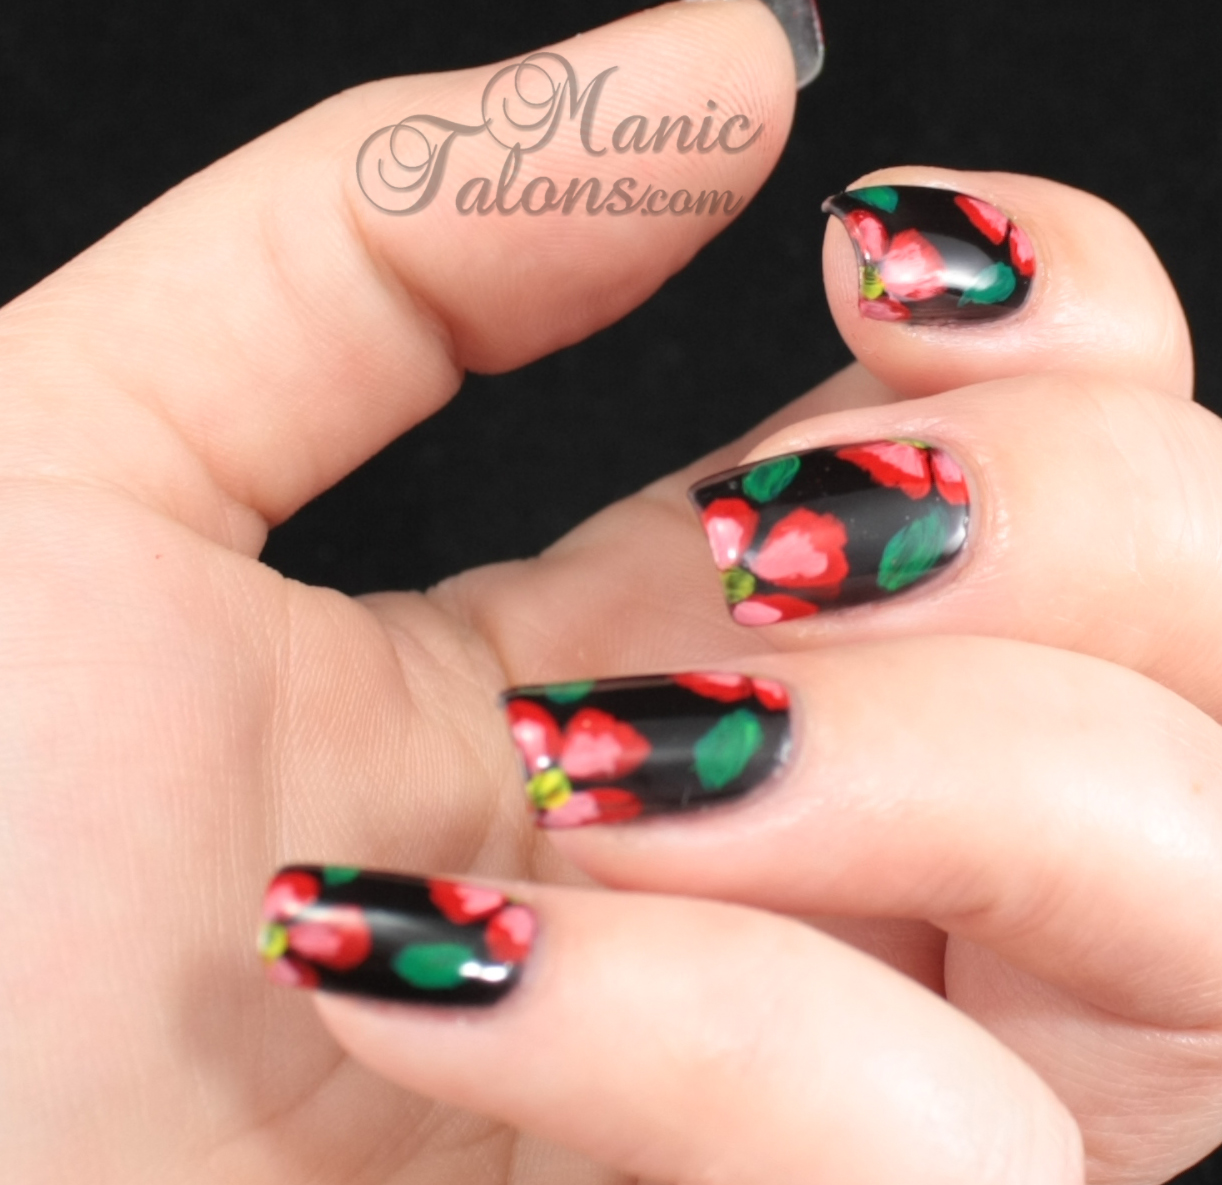
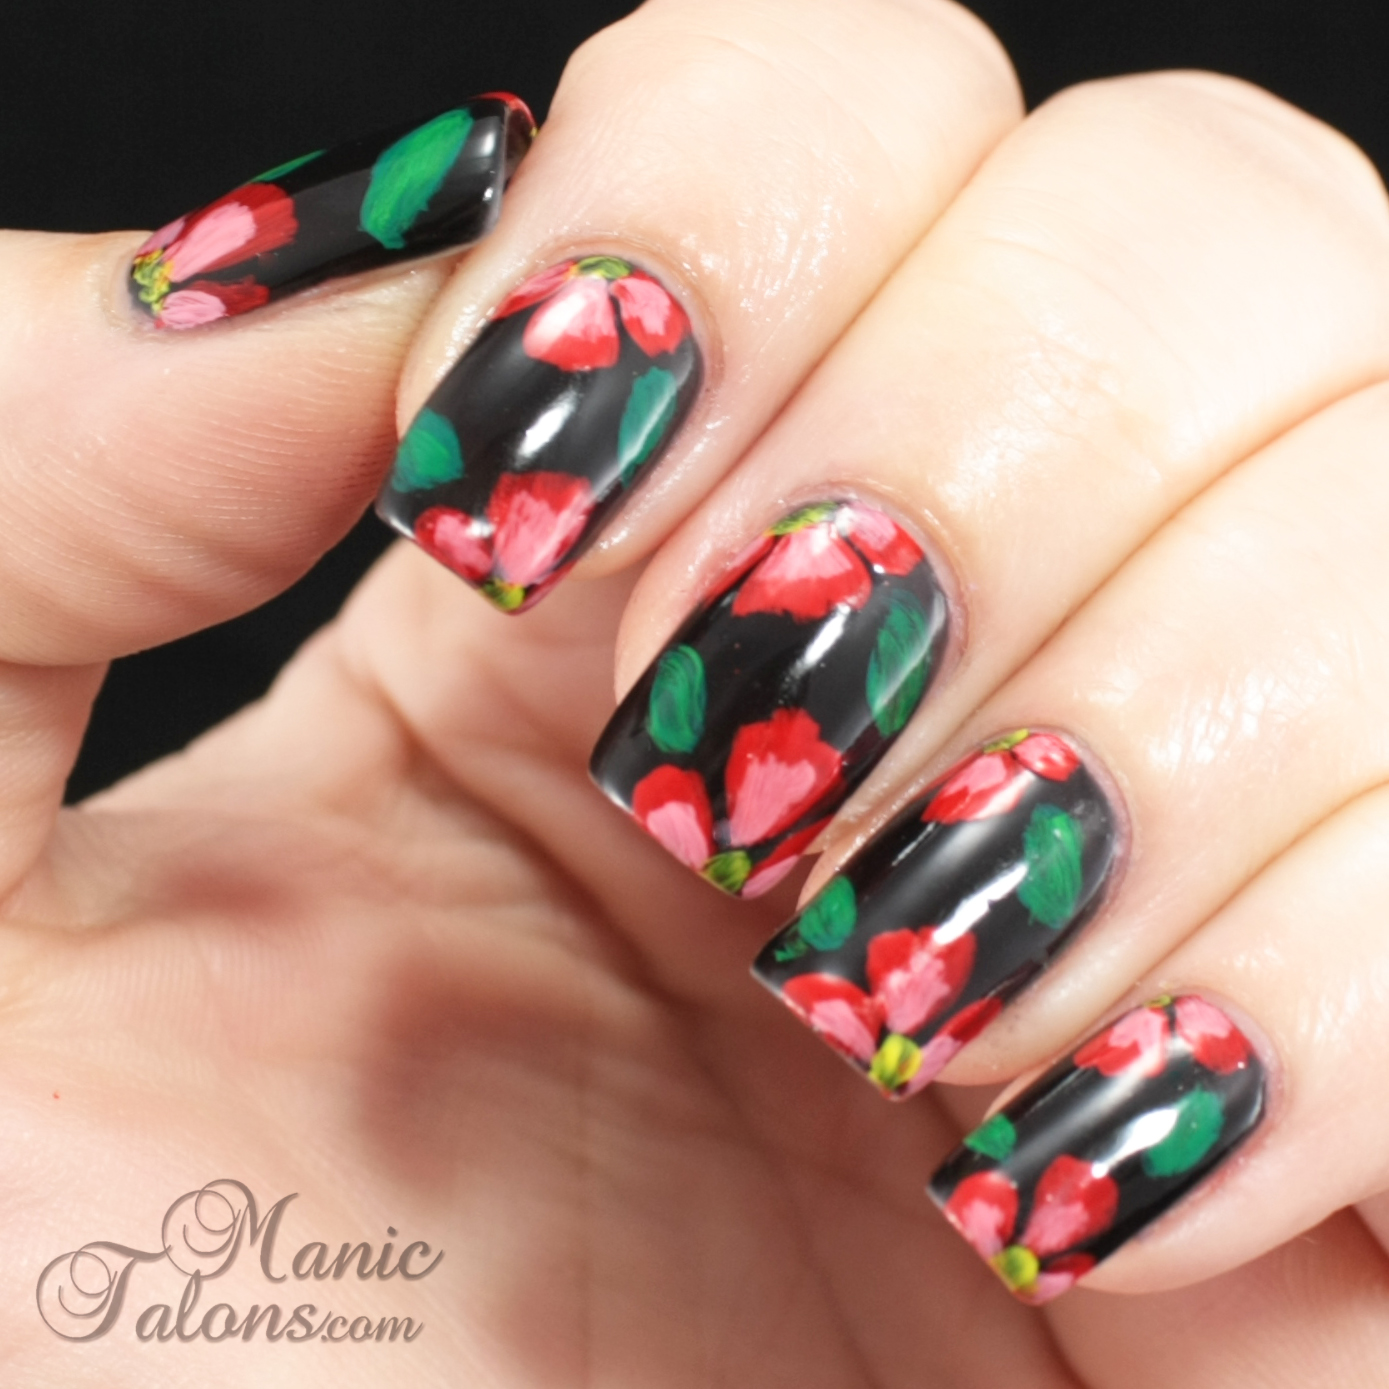
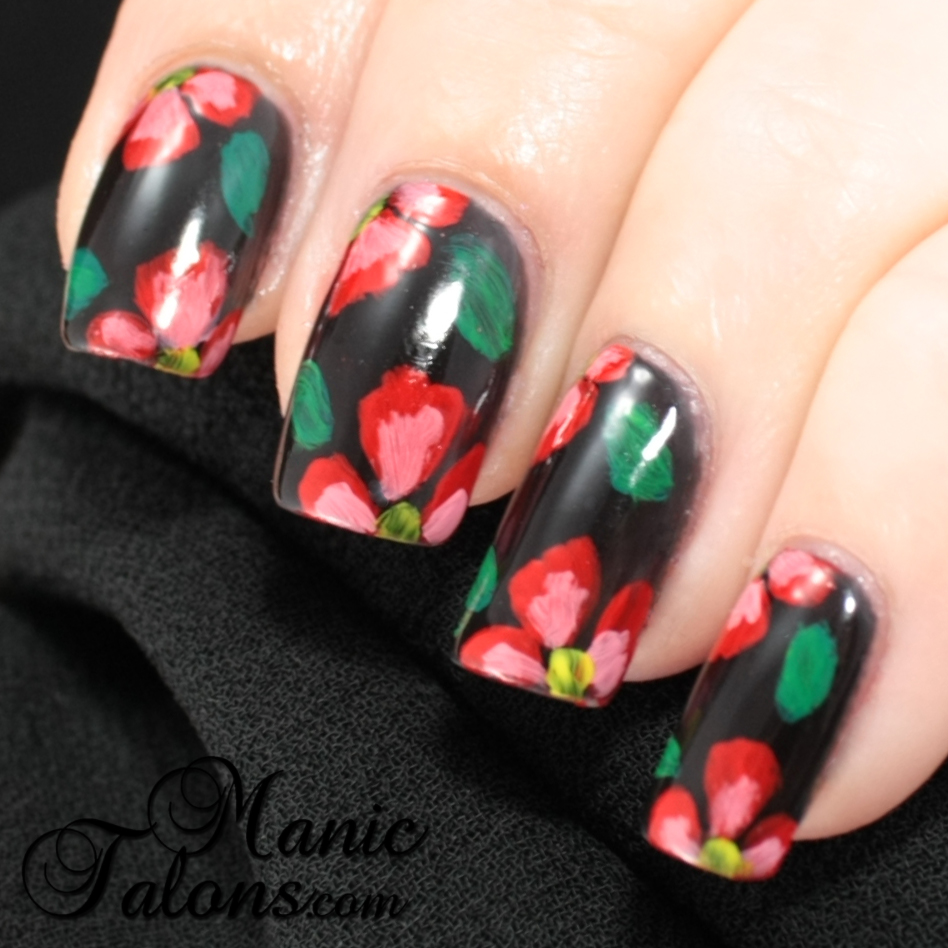
Hello Loves.  So I got the bright idea that I would do a one-stroke flower manicure.  I have tried this technique a few times before and failed, but I was feeling brave so...yeah, I failed again.  I'm convinced after watching a million youtube tutorials that my brush is to blame.  After getting frustrated and almost throwing the brush across the room, I decided to say the heck with it and go back to what I know: layered flowers.  I absolutely love how this one turned out.
Freehand Acrylic Flowers Nail Art

For this mani, I started with a base of Couture Gel Nail Polish Little Black Dress.  This is my go-to black gel.  I love the depth of the polish and that it is completely opaque in three thin coats.  I have swatched this one before, but since it was before my new lighting setup, I snapped another picture. :)
Couture Gel Nail Polish Soak Off Gel Polish Little Black Dress Swatch

I then used a thin nail art brush and acrylic paint to freehand the flowers.  I started with the red petals and then went back and added the pink to the inner portions and dabbed a little yellow on for the center of the flowers.  The leaves are a dark green acrylic paint with a lighter green layered on top to highlight parts.  Simple, yet so pretty.  :)
Freehand Acrylic Flowers Nail Art

This mani is NOT topped off with a gel top coat.  I used Oh So Wet regular polish top coat instead.  It is a big of a an experiment.  The last time I did a manicure with acrylic paint sealed with a gel top coat ended up being a disaster.  Once the gel started to wear thin on the tips, water was able to penetrate the layers and the acrylic paint turned to mush.  The mani only lasted a few days before the top layer lifted and chipped off.  Since I have found that RNP wears like iron over a complete SOG mani, I'm hoping this one will last without the gel top coat over it all.  I've been wearing this one for 5 days now and so far it still looks perfect!  I did apply a gel top coat over the black base before the art work.

Here are a few closer shots.  :)
Freehand Acrylic Flowers Nail Art

~Michelle

Read more ...

Saturday, October 5, 2013

Weekly Mani: It's the Great Pumpkin, Charlie Brown

Purchased by Me

It's that time of year when pumpkin patches are open and all the kids are getting ready for Halloween.  But most importantly, it's the time of year for "It's the Great Pumpkin, Charlie Brown"!  My favorite Halloween special.  In all honesty, we watch it year round in my house.

Naturally, my first Halloween themed mani of the year just has to the Great Pumpkin!

I started with a base of Couture Vintage Denim - the perfect stary sky base.  Vintage Denim is a navy jelly base with awesome, dense blue shimmer. 
Couture Gel Nail Polish


I then used acrylic paint to freehand my favorite Great Pumpkin scene.
It's the Great Pumpkin Charlie Brown


This is my first attempt at using acrylics with gel, and it has definitely been a learning experience.  It's super important you make sure to encase all of the acrylic paint in gel when you top coat.  If you don't, water will penetrate the paint and cause bubbling.  I had to redo a few fingers thanks to that.  :(

Be sure to check back in a few days for swatches of the two glitters from the IBD Tinsel Town collection.  And I have a few OPI Gelcolor swatches to share this week too. 

I hope everyone has a great Halloween Season! 

~Michelle
Read more ...