Monday, September 30, 2013

IBD Just Gel Calligraffiti Collection Glitters

Purchased by Me

I'll start this post by saying this:  chunky glitter polish completely whoops my butt.  With that said, I picked up the two glitter toppers from the IBD Just Gel Calligraffiti Collection last week.  St. Avant Garde and Paint Riot.

Both are chunky glitter in a clear base, and the glitters settle quickly to the bottoms of the bottles.  I had to shake them like crazy and leave them upside down for a bit before swatching.

First up:  Paint Riot.  This is my favorite of the two.  It has various sizes and shapes of black and gold glitter in a clear base.  As usual, I swatched three coats.  Excuse the huge clump of black strip glitter on the index finger.  As I said before, chunky glitters defeat me.  
IBD Just Gel

Up next: St. Avant Garde.  This one is various sizes of white hexes and black strips in a clear base.  Again, 3 coats swatched. 
IBD Just Gel
In case you're wondering, here's a comparison between St. Avant Garde and the ever popular Ninja Polish Sticks 'n Stones (regular nail polish).  I was hoping for smaller glitter in St. Avant Garde like is found in Sticks 'n Stones.  The pictures of the bottle and those stupid online dots had me optimistic, but clearly that's not the case.
Just for fun, I did one coat of each over a base of Jupiter Blue (an older Just Gel color).  

Finally, here's Jupiter Blue (the base color from the first picture) on it's own.  Excuse the index finger.  I had a little staining from my last mani and it shows through a bit. 
IBD Just Gel Polish

~Michelle


Read more ...

Sunday, September 29, 2013

Weekly Mani: Racking up the Mommy Points with TMNT

After my son's reaction to my manicure last week, I made the mistake of telling him he could pick the theme for this week.  I should have known better.  He is absolutely, 110% obsessed with Teenage Mutant Ninja Turtles.  But I am a Mom of my word, so this week's mani is TMNT themed.

I tried a few different designs and quickly realized I do not have the talent necessary to free hand Ninja Turtles on my own nails.  So I cheated.  I found these awesome, old school Ninja Turtle water slide decals from RLR Creations.  This was my first attempt at using this type of decal, and I wish I had chosen a lighter colored base, but I'm overall pleased with how it turned out. 
Base: Orly Gel FX Mirror Mirror topped with IBD Just Gel Pretty in Pewter
Stamping Color: Color Club Halo Hues Beyond
Stamping Image: MJ XX
Decals: RLR Creations

Here's a quick swatch of Orly GelFX Mirror Mirror.  


I then added a coat of IBD Just Gel Pretty in Pewter to add depth and shimmer, but completely forgot to take a picture before stamping and adding the decals.  I'll swatch that one on its own soon.  It's gorgeous!

~Michelle
Read more ...

Wednesday, September 25, 2013

Jewel Tones for Autumn

Fall is in the air, and I find myself craving jewel tones.  Thankfully, Couture Gel Nail Polish has just the colors I had in mind.

First up, Amethyst Crush.  This is the color I used as the base for my mani this week.  And I have no clue how to describe it.  Maybe a purple leaning wine?  And once again, my light box picture doesn't capture the full effect of the incredible shimmer.

Up next is Aloe Very.  This is my all time favorite green.  It has a shimmer that causes it to look like different shades of green depending on the light.  Plus it is extremely pigmented, which makes it a great green for free-hand leaves.
Couture Gel Nail Polish

Last, but certainly not least, is After Midnight.  This deep, shimmery blue just screams Sapphires to me.  I wanted to wear it this week, but I've been stuck on blue for months now and didn't feel like I should do yet another blue mani.
Couture Gel Nail Polish

All three of these colors are extremely pigmented and opaque in two coats, but I swatched three anyway just to be consistent.  The picture of the swatches below are held at an angle to capture the shimmer. 

I really love Couture.  Not only is there a huge selection of colors, but it is also the only DIY brand that I know of with full size bottles.   

~Michelle

Read more ...

Sunday, September 22, 2013

I won the Red Carpet Manicure Nail Art Sweepstakes!

Press Sample

You can only image how excited I was when I got an email last week from Julie at Red Carpet Manicure telling me I won the Red Carpet Manicure Nail Art Sweepstakes from August.  Red Carpet Manicure is a brand that is under-represented in my gel polish collection simply because my town doesn't have an Ulta yet (one is opening here soon...and I've been stalking the location weekly).  I only have a dozen RCMs in my collection, and most of those are limited edition colors that friends have been kind enough to pick up for me.

But enough rambling and onto the prize: three of Red Carpet Manicure's most popular colors.  The colors I received are Ooo La Liscious, Paparazzied, and Glitz & Glamorous.  I don't know why I never asked someone to pick these up for me.  It's easy to see why they are the most popular.  Naturally, I just had to swatch them for you right away. 

First up, Ooh La Liscious is a gorgeous orange leaning coral in a cream finish. This is one that screams both summer and fall to me.  Definitely a versatile coral.  I plan to use it in my Halloween manicure this year.  I spent 15 minutes holding my hand up to my computer screen trying to determine if this picture is color accurate.  I think it is, but it's so hard to tell with orange corals.  My eyes start playing tricks on me. 

Paparazzied is a glossy, medium pink cream.  I would call it a classic pink.  While it isn't a color I will personally wear often, it is definitely one you need in your collection if you're a pink person.  

And finally my favorite of the three.  Glitz & Glamorous is a deep red shimmer.  I don't even know what to say about this one other than wow.  The red shimmer in a red base makes it appear to glow from within. 

The above picture does NOT do this color justice.  Light box pictures always fail to capture the brilliance of polishes with shimmer.  Below is a picture of my swatch stick held at an angle so that the light reflects off the shimmer. See that internal glow? 

A huge, heartfelt Thank You! to Red Carpet Manicure for holding so many contests and for selecting me as a winner.  Be sure to like the Red Carpet Manicure Facebook Page for details on future promotions and contests.  Maybe you can win a few of these beauties too.  :)

~Michelle


Read more ...

Friday, September 20, 2013

Tips and Tricks: XL Squishy Stamper - Prepping the Pad

As I mentioned in a previous post, stamping completely escaped me before discovering the XL Squishy Stamper.  Smaller, harder stampers simply do not work well for my nails.  With that said, the XL Squishy comes with its own challenges.  For one, the stamping head constantly falls out of the holder.  Check out this post for my solution to that issue.  The even more frustrating issue is that it doesn’t pick up the image right out of the package.  I have seven of them, 2 from Wistonia and 5 from Ali Express.  None of them have worked without a little prep. 

So, enough talk and more tutorial, right?  Here’s how I prep my XL Squishy Stamper head to get it to pick up the images. 

This is an AliExpress XL Squishy stamper that is straight out of the package.  You’ll notice that the head is shiny and may feel a little slick. 

That’s a problem.   So go ahead and pop the head out of the holder and give that baby a bath.  I reach for my trusty Dawn dish detergent.  If it will cut grease, it will easily remove the substance the manufacturer used to grease the mold when making the heads.  Any soap that is made to cut grease and is void of added moisturizers will work. 

Once the head is dry again, you’ll notice it feels stickier, but still has a shine.  It may pick up some of the image, but the polish beads up.  We’re getting closer, but still not there. 

Now, let’s rough up the surface of the pad.  Starting at the center of the pad, lightly run a 400 grit file over the surface toward the edge.  Turn the head and repeat until the entire surface looks dull.  You may see a small amount of dust forming on the top of the stamper head.  Remember, the key word here is “lightly”.  If you file too hard, you might rip the stamper pad. 

Even filing lightly, you’ll have to smoosh the pad a little. 

Remove the dust by “stamping” the head onto a lint roller or piece of tape several times. 

Test the stamper head again and see if how it picks up.  If you notice bald spots in your stamped image, you may need to file a little more in that area.  Getting better, but not quite there yet. 

Finally, a shine free, ready to use stamper.

There are several factors that may impact how well the stamper picks up the image.  After the stamper has been prepped and the shine is completely removed from the stamper head, technique is the next biggest pitfall.  I have the best results when I roll the stamper onto the image using a light touch.  Since the head “squishes” easily, too much pressure will cause the stamping head to force the polish out of the etched image and cause bald spots.

The rolling technique picks up a clean image. 
The plate I used for this tutorial is MJ XX.  I love this plate and often use it to test polishes and stampers because I know the plate is excellent.  You can purchase this and other MJ plates at MyOnline Shop or at Ninja Polish.


I hope this helps!  Please let me know in the comments if this helps you.  And if it doesn't, please let me know that too.  I may have a few more suggestions you can try. ;)

~Michelle


Read more ...

Wednesday, September 18, 2013

OT: Manic Talons Editor-in-Chief

Just a quick off topic post.  If you happen to notice a typo in one of my posts, this is why: I blog one handed so as not to disturb my Editor-in-Chief (who often falls asleep on the job).  

That is all.  We will now return to our regularly scheduled programing.  :)

~Michelle
Read more ...

Tuesday, September 17, 2013

Tips and Tricks: Wear Undies

You know that polish that you opened the bottle and fell in love with the color inside, only to be horribly disappointed once you put it on?  That polish that is absolutely gorgeous until you realize that it just isn't opaque?  I have quite a few like that.  Heart breakers. 

For example, Ink Sultry Sailor.  These pictures don't do it justice.  I tried but just couldn't capture the shimmer.  Sultry Sailor is a light navy jelly base with a very dense green and gold shimmer.  This is three coats.  See the visible nail line?  I hate that!

Rather than toss this one into a box of disappointments, there is a simple solution.  Wear Undies!  Layer your disappointingly sheer but gorgeous colors over a cream in a matching color.  One coat of Ink Blue Ice is all it takes to make Sultry Sailor lovable once again. This is one coat of Blue Ice and two coats of Sultry Sailor.  See the difference?  

To really make lighter colors and brights pop, try using a bright white as Undies.  Ink Glacier is my personal favorite.  :)

Since I'm in love with this color and my swatch above didn't fully capture the amazing shimmer, check out this close up.  Gorgeous!


~Michelle


Read more ...

Sunday, September 15, 2013

Ink American, Ink Diamond Snow, and the Weekly Mani

I have a few Ink swatches by request to show you today.  First up, Ink American.  American is a classic pink cream. As usual, this is 3 thin coats.
Ink Soak Off Gel Polish

I also swatched Ink Diamond Snow this week.  Diamond Snow is a gorgeous golden shimmer topper.  It forced me to abandon my light box and move outdoors to capture the full effect.  First up, 3 coats of Diamond Snow on it's own.
Ink Soak Off Gel Polish

And one coat of Diamond Snow over American*.  This is one of my favorite toppers.  The shimmer is just unstoppable. 
Ink Diamond Snow
*American is slightly washed out in the picture above.  Please refer to the first picture in this post for a true representation of American.

Finally, this week's Adventures in Stamping challenge is "Inspired by Your Favorite Song."  This was an easy choice for me.  One of my all time favorite songs is Delta Dawn.  I have fond memories of riding around in Daddy's old Chevy as a child and singing along when Delta Dawn came on the radio.

I was going for a old, faded rose look, so I started with a base of Couture Little Black dress and stamped with Sally Hansen Instadri in Lively Lilac and the rose image from Bundle Monster plate 323. 

Here's the swatch of Couture Little Black Dress.  This is my all time favorite black.  It applies like a breeze and is completely opaque in three thin coats.  I tend to apply my coats thinner than the average person, which is why I always swatch three.  For most people, it would be opaque in two. 
Couture Gel Nail Polish

~Michelle
Read more ...

Thursday, September 12, 2013

Tips and Tricks: Preventing Lifting and Chipping

It seems that most people encounter one of two issues with Soak Off Gel.  Either it doesn’t bond to the nail and they experience premature chipping and/or lifting, or it bonds so well that removal becomes a nightmare.  Thankfully, there are tricks to combat both of these issues!  I’ll tackle soak off issues in another blog post.  Today, let’s focus on preventing lifting and chipping. 

What causes lifting and chipping?  If you have not completely removed the cuticle from the nail, you are more likely to experience lifting.  If you have oily to normal nail beds, you are more likely to experience lifting.  If there are flaws in your application process, you are more likely to experience lifting.  If you are using the wrong base gel for your nail type, you are more likely to experience lifting.  There are a lot of factors that can lead to lifting and chipping. 
 
Cuticle Removal
If you haven’t been doing cuticle work, the cuticle can extend down the nail plate, and it often blends into the nail so that you can’t really tell it is there.  When you apply gel polish over the cuticle, it can’t bond and results in lifting.  There is a common misconception about where the cuticle is located on the nail.  The cuticle is NOT the skin around the base of the nail.  That is the eponychium.  The cuticle is dead skin tissue that grows down onto the nail.  Rather than try to recreate the wheel and go into the “how to” of cuticle removal, I’ll direct you to the pro.  Check out this FingerNailFixer Cuticule Work Video.

I prefer Sally Hansen Instant Cuticle Remover and a spoon style cuticle pusher. 

Oily Nail Beds
Natural oils on the nail will create bonding issues for any base gel.  Most systems come with a bottle of prep, cleanser or dehydrator that is designed to remove oils from the nail.  However, for those with oily skin and nails, these products alone simply don’t get the job done.  It is crucial that you remove all oils from the nail before applying your base gel.  My secret weapon?  A grease fighting dish detergent.  Not one of the formulas that has moisturizers built in.  Simply one of the original formulas that is made for dishes, not hands.  I use the classic blue Dawn.  This is a trick I stumbled upon by accident by doing a manicure shortly after washing dishes.  It was the first time I got more than a week of wear!  So now it has become a part of my manicure routine.  After completing my cuticle work and shaping my nails, I grab my Dawn dish detergent and a nail brush and give my nails a quick wash and scrub to remove any residual oil. Which reminds me, I need to pick up another bottle of Dawn. 

You can also use an oil fighting soap, but I have found most of those leave behind added moisturizers that can interfere with the gel’s bond to the nail.  Be sure to keep it quick, though.  You don’t want your nails to absorb too much moisture from the wash.  I scrub and rinse both hands in less than 1 minute.  Give your hands time to dry completely before proceeding with your manicure, being careful not to touch your skin and pick up additional oils. If you use this trick, be sure to moisturize well when you're finished with your manicure.  If you've ever washed a sink full of dishes by hand, you know that dish detergent can cause dry skin.
 
Application
There are two application mistakes that generally lead to lifting.  Polish on the skin around the nail and failure to properly cap the free edge of the nail. 

1) Neat and tidy application isn’t just about the look of the final result.  When gel polish overlaps the skin around the nail, it will cause lifting.  Stop your polish just shy of the skin around the nail.  And if you mess up, clean it up before you cure.  I use a stiff concealer brush and 91% isopropyl alcohol to clean up any mistakes before curing. 

The brush I prefer is the Elf Concealer Brush that can be found at Target for $1.  Elf makes two concealer brushes.  This white one, and a black one.  I love the black one for pigment work, but it's not as good for clean up.  This is what the white one looks like in the package:

You can use any stiff, short bristled brush.  You can also use the cleanser that came with your gel starter kit instead of isopropyl alcohol, but the isopropyl alcohol is cheaper and works great.  Just be sure you get 91% or higher.  Dip your brush in the alcohol, blot any excess on a lint-free wipe or paper towel, and carefully run it along the edge of the nail near the skin.  Be sure to frequently wipe and redip the brush as you clean to avoid spreading the polish around. 

Clean up every coat of gel before you cure.  Base coat, color coats, and top coat. 

2) You must cap the free edge of the nail with every coat of gel you apply, from your base coat to your color coats and finally your top coat.  Think about how you use your hands on a daily basis.  When you have an itch, you scratch with the free edge of your nail.  When you turn a page in a book, the free edge of your nail may drag along the page.  When you pull on your pants, the free edge rubs against the fabric.  When you type, the free edge of your nails may hit the keys.  If you stop the gel at the top of the free edge, all of the friction from day to day life will peel the gel back.  So cap that free edge with every coat!  When looking straight down on the tips of your nails, you should not be able to see natural nail. I'm using Ink Glacier on top of my current mani to demonstrate in the following pictures.

By the way, there is NO way to take a flattering picture of the tips of your nails.  Hello fat fingers!

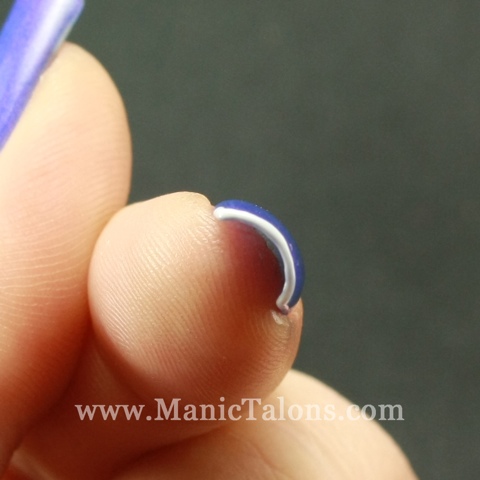
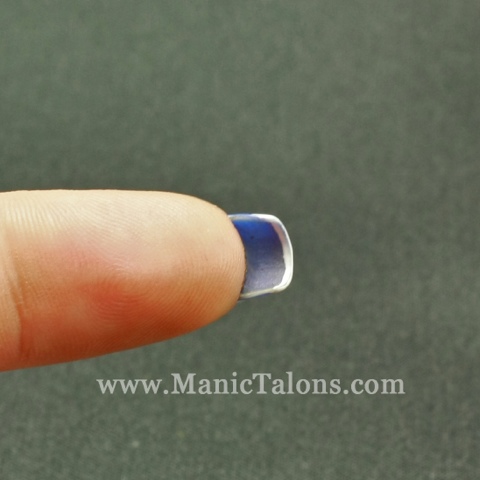
I’ve had a few people ask how to cap the free edge without getting polish all over the skin under the nail.  When you hear people say to “cap the free edge”, what they really mean is apply gel to the very edge of the tip of the nail so that it overflows very slightly onto the underside of the nail.  If you look at the underside of my nails, you will see approximately 1 mm of polish overflow along the tip. 

I always cap the free edge before applying the gel to the surface of the nail rather than capping at the end.  This prevents pooling at the tip of the nail.  Here’s how I do it:
  1. Wipe the brush against the inside of the bottle neck to remove excess polish.  Your brush should not have a drop of polish at the end like you will when you polish the surface of the nail.  The bristles will hold enough to effectively cap the tip when the polish has been wiped from both sides of the brush.  If you have just finished applying color to a previous nail, you can use what is left on the brush to cap the next nail before you reload the brush to polish the nail surface. 
  2. Holding the brush perpendicular to the tip of the nail, place the side of the brush on the outside corner (for square nails) or outside edge (for round nails).  Use the side of the brush and run it along the tip from the edge to the center.  Repeat from the opposite corner/side of the nail.  If you have shorter nails, use your thumb (or finger if you're polishing your thumb) to gently pull back the skin on the tip of the finger.
  3. Polish the top of the nail as usual.
  4. If you had too much polish on the brush when you capped the nail, it may have pooled on the underside or touched the skin.  Use your clean up brush to take care of that before you cure the layer. 
Base Gel and Bonder
If you have tried the above tips and are still seeing lifting or chipping, you may be using a base gel that is not formulated for your nail type.  Of the seven that I have tried, I found that some work better for oily nails and some 
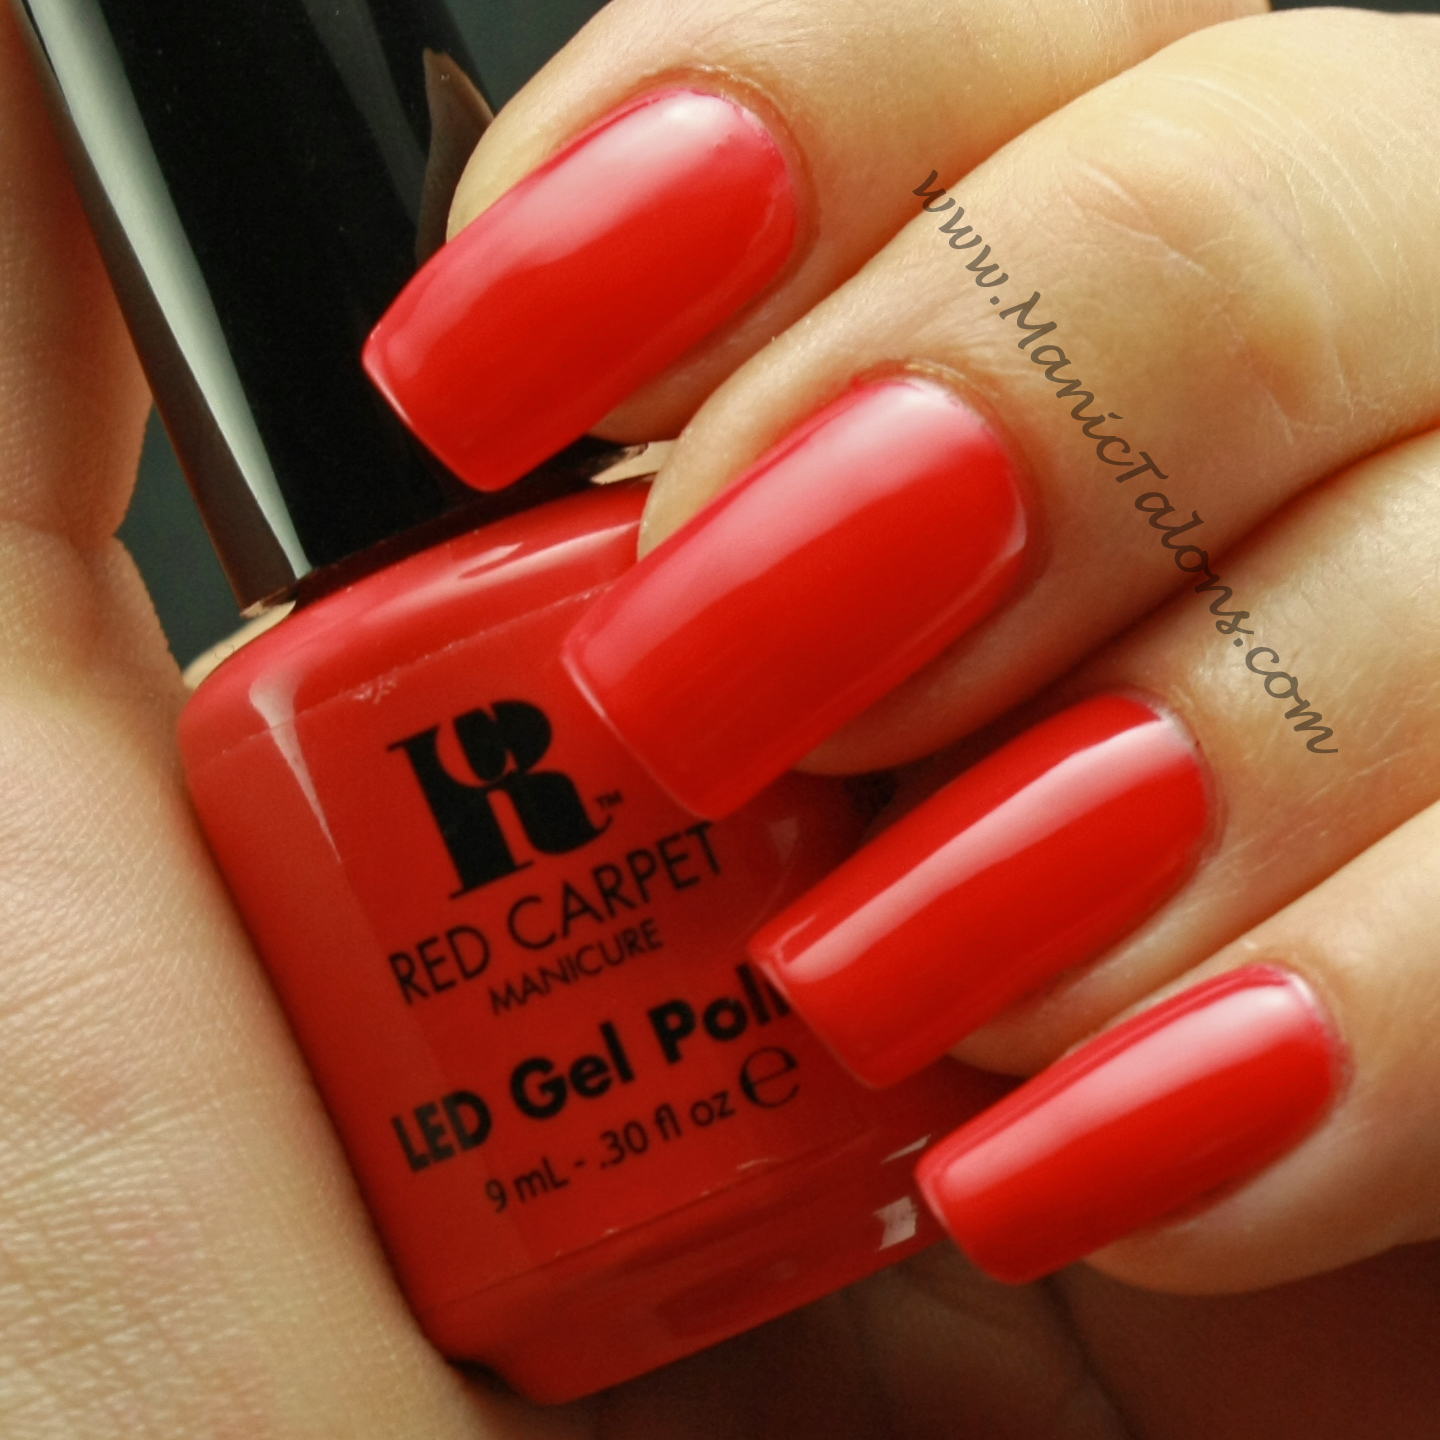
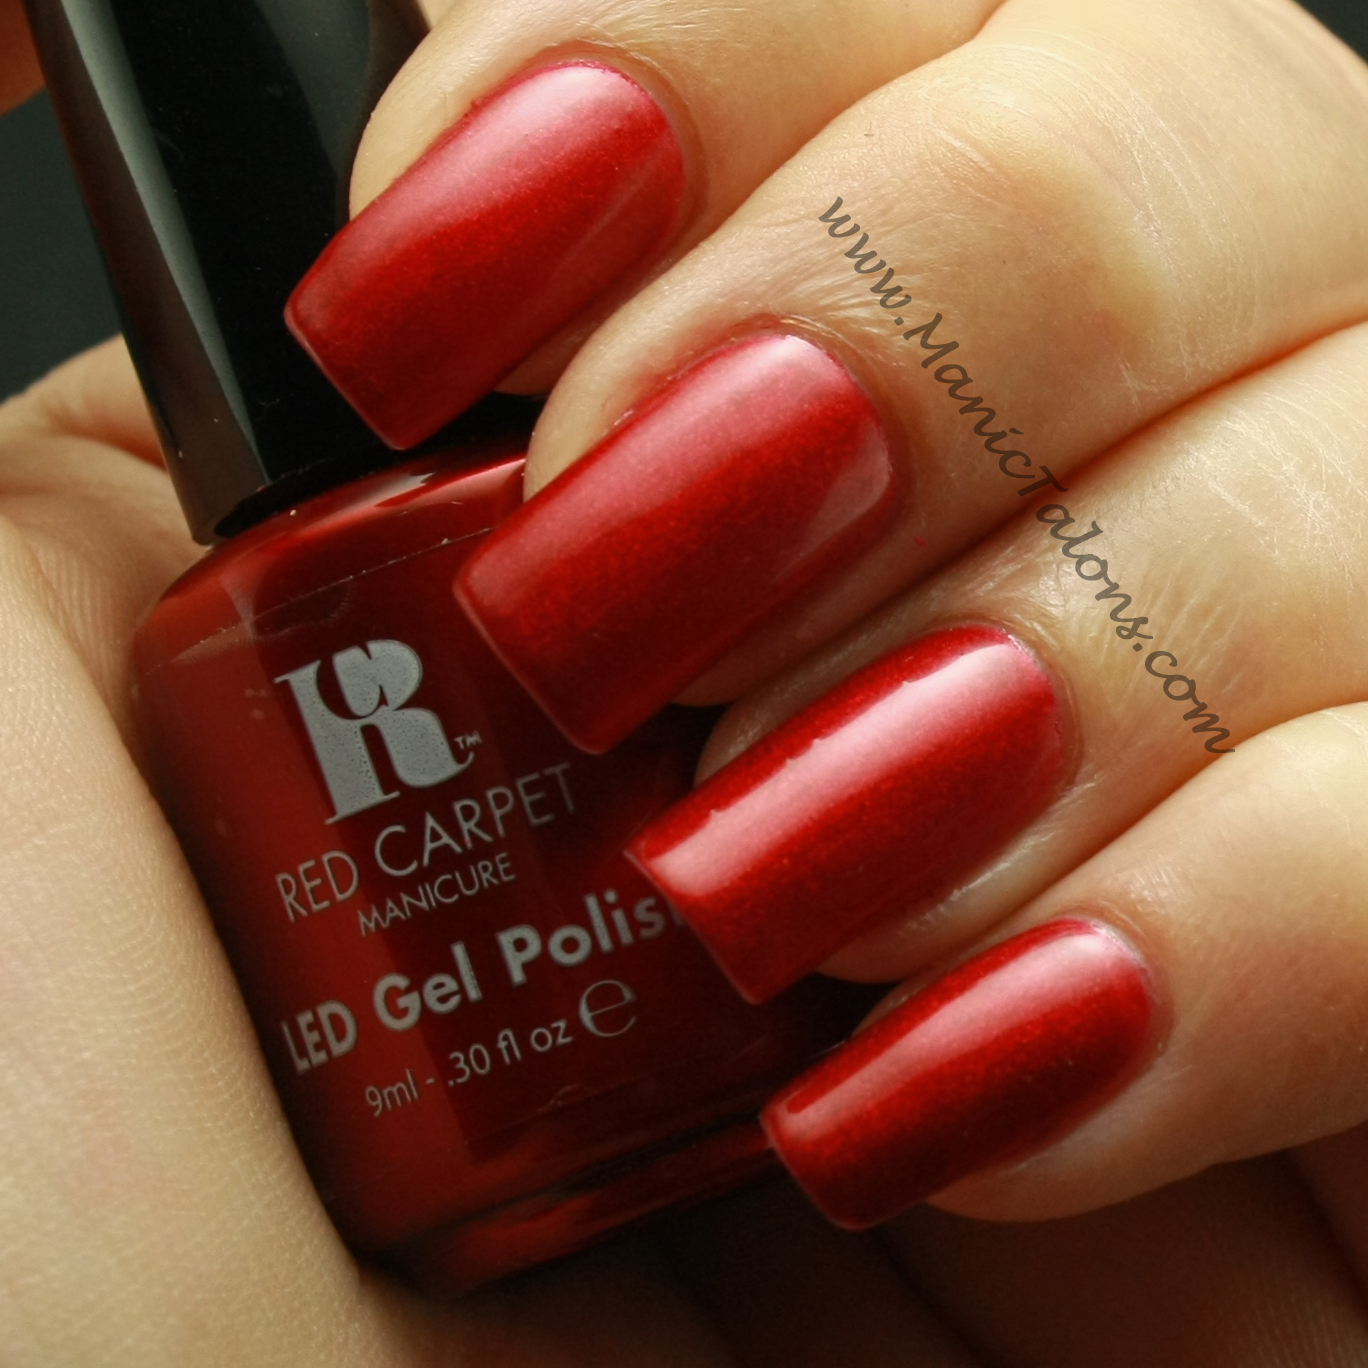
work better for dry nails.  For example, Gelish Foundation and Red Carpet Manicure Structure Base Gel tend to work very well with oily nails but will bond so well with dry nails that removal becomes extremely difficult.  Ink Base and Couture Base tend be more likely to lift on oily nails but work very well with normal to dry nails.  I personally use Kiss Base Gel.  It is the perfect balance of staying power and easy removal for my nail type.  So if you are still experiencing lifting after correcting the issues I mentioned above, one option is to try a different base. 

Another option is to use a bonder.  Bonder is a thin liquid that is applied to the very tip and free edge of the nail before applying your base gel.  It leaves behind a sticky layer that allows the gel to really grab the nail.  There are several bonders for soak off gel polish on the market, but this becomes very tricky territory.  For example, Gelish PH Bond is not a bonder.  It is a dehydrator and pH balancer.  OPI BondAid is also a dehydrator and pH balancer.  Sensationail kits come with “Gel Primer”.  This is a bonder.  FingerPaints Gel Polish Chip-Free Bonder is also bonder.   Then there are also products labeled as bonders that are intended for use with hard gel or acrylics.  Those will make soak off difficult.  See, confusing.  So be careful ordering a bonder online.  I have personally used both the Sensationail Gel Primer (available as part of the essentials kit at several drugs stores and large retail stores) and Fingerpaints Chip-Free Bonder (available at Sally Beauty Supply) with great results.

I hope this helps!

~Michelle
Read more ...

Tips and Tricks: XL Squishy Stamper - How to keep the head in the holder


The XL Squishy stamper is awesome for longer nails with deep curves.  I couldn't stamp full nail images to save my life before I bought one.  But, if you have an XL Squishy you have likely already discovered that the head pops out, making it a complete pain to stamp with.  The diameter of the opening in the holder is simply too large for the stamping head.  I've tried a few things to fix this problem, and I've destroyed a few stampers in the process.  

There are some great solutions to this problem floating around the internet, including gluing the head into the holder or cramming the stamping head into a smaller konad or fauxnad holder.  Neither of these solutions really worked for me.  I need to be able to remove the stamping head so that I can stretch smaller images to fit my nails, so gluing it in isn't a good option.  And I found that cramming it into a smaller holder caused tears along the side of the head over time.  Not to mention all the extra holders I had laying around.  So, I became obsessed with finding a solution.  And I finally found it.  Woo Hoo!

Items you'll need:
  • Your XL Squishy Stamper
  • A pair of old scissors or other sharp instrument
  • A hot glue gun

Step 1: Take the stamping head out of the holder.  That's easy, right?  It won't stay in anyway. 

Step 2: Use the scissors to score or scratch the inside of the holder.  The scratches allow the hot glue to adhere to the inside surface of the holder. 

Step 3: Run a line of hot glue all the way around the inside of the holder.
It should look like this the image below.  Now allow the glue to cool slightly so you don't burn your finger on the next step. 

Step 4: When the glue has cooled but is still pliable, use your finger to smooth it by pressing it against the inside edge of the holder.  It should only take about 30 seconds to cool to this point.  This step prevents the glue itself from ripping your stamping head. 

Step 5:  Once the glue has completely cooled and hardened, put the stamping head back in the stamper and  you're ready to start stamping. :)
As you can see, the hot glue decreased the diameter of the opening in the holder so that the head fits a little tighter and stays put :)
If you try it, let me know how it works for you!  I've been using my "fixed" stamper for about a week now and the head stays put even when I stamp the excess onto my super sticky lint roller.  :)

~Michelle
Read more ...