Press Sample
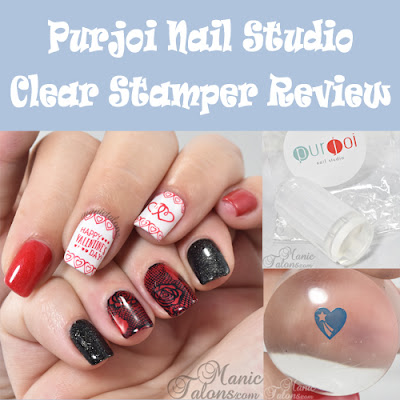
Hello Loves! I have a new stamper to show you today - the Clear Stamper from Purjoi Nail Studio! I admit, I was a little wary of clear stampers after hearing so many negative reviews in general, but when Joi offered to send me this one to try, I decided to give it a go. I'm super glad I did. No kidding, this thing has changed my world. I use it constantly in the salon (I've had it for a few weeks now), and it makes positioning stamps a breeze! Even french tip stamps, which I could never do before!
When Joi first released her stamper, I hadn't seen anything quite like it with the open back end and clear holder. There are a few others that have popped up since that appear to be similar. I don't have them to compare (sorry) and honestly don't feel the need to order one. This thing is my current fave and I see no need to seek an alternative. lol
I love this thing so much that I even did a video review. Y'all know that's a big deal right? I hate doing video reviews. Not only is it nearly impossible to find a quiet moment for filming, but I sound like a bumbling idiot on video. I'm not going to lie, this was take four hundred and fifty three. Ok, maybe not quite that bad, but I did have to start over several times thanks to my barking dog, my son coming home, my husband coming home, my father stopping by, my phone ringing, and general bloopers. My nails are a mess and the lighting is a little dark, but watch it anyway ok? Then skip to the end of this post to see some manicures I've created with this stamper.
For those who couldn't stand my rambling video, I'll also try to break it down in pictures. So how about we go into a little more detail? Let's take a look at the stamper.
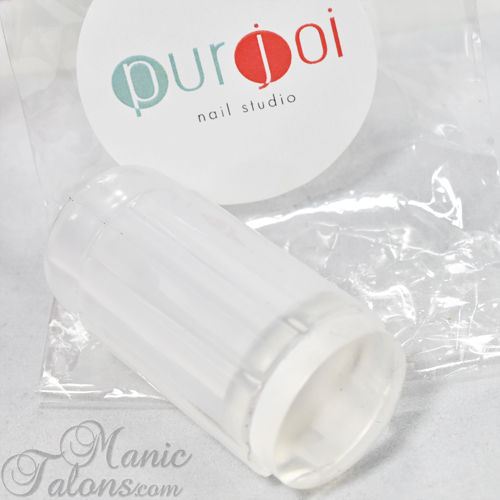
As you can see, it is clear. The stamping head is crystal clear. The holder is more like frosted glass. Or frosted plastic (it is made of plastic). Let's talk about the holder first. It is open on both ends, which allows you to look down the barrel for perfect stamp placement. Here's a few pictures. The first is a shot of the back end of the stamper that shows the open barrel.
The next shot is looking down the barrel of the stamper at an image I picked up on the stamper head. This is the underside of the image. As you can see, it would be extremely easy to position the stamp where you want it.
Let's take a look at that image from the front, shall we? I took the head out of the holder for this shot (I'm going to squish it in a second lol). As you can see, the image transferred nicely! I chose an image with a lot of open space because those tend to be more difficult to pick up. Excuse the lint all over the stamper head. My house is a little dusty right now since we're in the process of moving.
Ready to see it squished? The head is what I consider a medium-firm. It doesn't give as much as a squishy stamper, but it gives more than a traditional konad style. The top picture is the stamper with no pressure applied. The bottom is with moderate to firm pressure.
Let's take another look. This next photo is looking down the barrel of the stamper with the head squished against my nail. As you can see, it doesn't hug my nail perfectly. I can force it down so that the sides of my nail are touching the stamper head, but it takes a lot of pressure. This actually doesn't bother me. I found that you can push down and then rock the stamper side to side to get a perfect, full coverage image transfer.
Ok, so now you see that it works. And you see how soft/firm it is. You can see how easy it is to position a stamp. But let's talk about what you can't see. This stamper does have a few limitations. First, you can't use acetone, polish remover, or alcohol to clean the stamping head. It will degrade the head and make it cloudy. So you definitely want to use tape or a lint roller to remove leftover polish from the head. You also don't want to prime it with anything abrasive. A simple wash with soap and water is all you need. My stamper worked perfectly straight out of the package. With that said, it can be a little temperamental at times. I found that when using it with Mundo de Unas stamping polish, it stops working after a dozen or so stamps. This doesn't seem to be an issue with other polishes, but MdU seems to have an oily residue that builds up on the stamping head. No worries though, a quick bath restores it to full stamping glory.
Want to see my manicure? Do ya? Do ya? Ok...so I decided to go with a Valentine's Day/Anti-Valentine's Day theme. My left hand is a traditional Valentine's Day design. I started with a base of IBD Just Gel Enthralled and Purjoi French White. I then stamped using images from Bundle Monster BM-S222 and BM-S225 from the new Valentine's Day themed Occasions Collection. (I'll share a full review of that set in a few days). The red is Sally Hansen Insta-dri in Red-io Active. It's a discontinued color, so if you run across it, you better snatch it up!
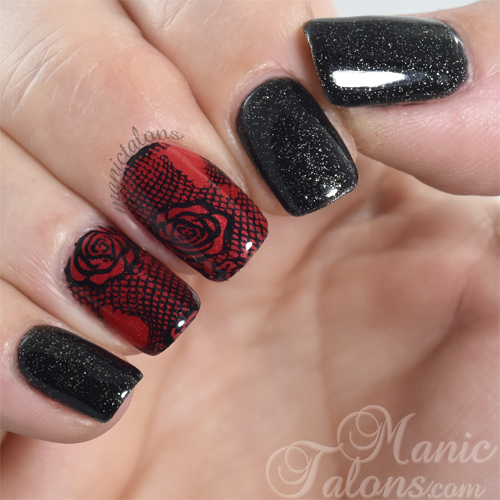
My right hand got the Anti-Valentine's Day design. I mean, it makes sense right? She's neglected and ugly and no one loves her. lol For this one, I started with a base of LeChat Obsession and IBD Just Gel Enthralled. I then stamped with Mundo de Unas Black and the ripped stockings image from BM-XL208 (The YaGala Plate).
I even took a few photos of them together. Trust me, it wasn't an easy task! Getting both hands in my light box and pushing the shutter button on my camera at the same time took a little bit of stretching and a whole lot of creative thinking!
But wait...I have more manicures to show you! These next three are client manicures that went so much quicker thanks to the Purjoi Clear Stamper. I honestly forgot to note the plates used. Sorry about that! Anyway, want to see them?
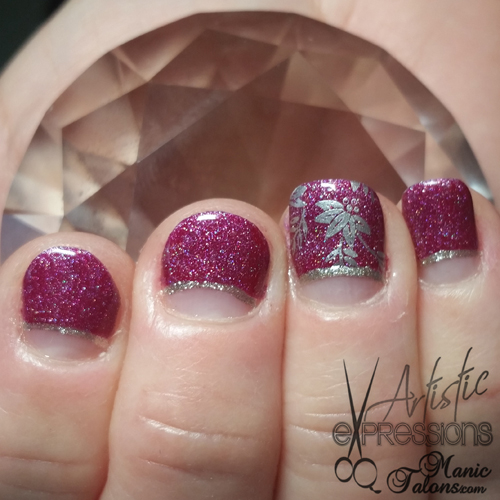
The stamped image in this manicure is one of those with the rounded end for french designs. I've never been able to use those before because I could never get them to line up quite right. So not a problem this time!
This next one is a combination of snowflakes from a variety of plates. The clear stamper allowed me to place them precisely on the nail. It almost looks like a full cover stamp! Sorry, I know it's a little blurry. Stupid cell phone.
Finally, this one was a narrow section of a buffet style plate. I didn't have much room for error and the clear stamper saved me from having to re-stamp a dozen times to get it to fit just right. :)
If you want to pick up a Purjoi Clear Stamper of your own, you can get one on the Purjoi Nail Studio website here. Joi also has replacement heads for a great price, so be sure to pick up a few of those too. :)
~Michelle
*The Purjoi Nail Studio Clear Stamper was provided by Purjoi Nail Studio for my honest review. All links within this post are courtesy links and do not benefit ManicTalons.com
Hello Loves! I have a new stamper to show you today - the Clear Stamper from Purjoi Nail Studio! I admit, I was a little wary of clear stampers after hearing so many negative reviews in general, but when Joi offered to send me this one to try, I decided to give it a go. I'm super glad I did. No kidding, this thing has changed my world. I use it constantly in the salon (I've had it for a few weeks now), and it makes positioning stamps a breeze! Even french tip stamps, which I could never do before!
When Joi first released her stamper, I hadn't seen anything quite like it with the open back end and clear holder. There are a few others that have popped up since that appear to be similar. I don't have them to compare (sorry) and honestly don't feel the need to order one. This thing is my current fave and I see no need to seek an alternative. lol
I love this thing so much that I even did a video review. Y'all know that's a big deal right? I hate doing video reviews. Not only is it nearly impossible to find a quiet moment for filming, but I sound like a bumbling idiot on video. I'm not going to lie, this was take four hundred and fifty three. Ok, maybe not quite that bad, but I did have to start over several times thanks to my barking dog, my son coming home, my husband coming home, my father stopping by, my phone ringing, and general bloopers. My nails are a mess and the lighting is a little dark, but watch it anyway ok? Then skip to the end of this post to see some manicures I've created with this stamper.
For those who couldn't stand my rambling video, I'll also try to break it down in pictures. So how about we go into a little more detail? Let's take a look at the stamper.
As you can see, it is clear. The stamping head is crystal clear. The holder is more like frosted glass. Or frosted plastic (it is made of plastic). Let's talk about the holder first. It is open on both ends, which allows you to look down the barrel for perfect stamp placement. Here's a few pictures. The first is a shot of the back end of the stamper that shows the open barrel.
Let's take a look at that image from the front, shall we? I took the head out of the holder for this shot (I'm going to squish it in a second lol). As you can see, the image transferred nicely! I chose an image with a lot of open space because those tend to be more difficult to pick up. Excuse the lint all over the stamper head. My house is a little dusty right now since we're in the process of moving.
Ready to see it squished? The head is what I consider a medium-firm. It doesn't give as much as a squishy stamper, but it gives more than a traditional konad style. The top picture is the stamper with no pressure applied. The bottom is with moderate to firm pressure.
Let's take another look. This next photo is looking down the barrel of the stamper with the head squished against my nail. As you can see, it doesn't hug my nail perfectly. I can force it down so that the sides of my nail are touching the stamper head, but it takes a lot of pressure. This actually doesn't bother me. I found that you can push down and then rock the stamper side to side to get a perfect, full coverage image transfer.
Ok, so now you see that it works. And you see how soft/firm it is. You can see how easy it is to position a stamp. But let's talk about what you can't see. This stamper does have a few limitations. First, you can't use acetone, polish remover, or alcohol to clean the stamping head. It will degrade the head and make it cloudy. So you definitely want to use tape or a lint roller to remove leftover polish from the head. You also don't want to prime it with anything abrasive. A simple wash with soap and water is all you need. My stamper worked perfectly straight out of the package. With that said, it can be a little temperamental at times. I found that when using it with Mundo de Unas stamping polish, it stops working after a dozen or so stamps. This doesn't seem to be an issue with other polishes, but MdU seems to have an oily residue that builds up on the stamping head. No worries though, a quick bath restores it to full stamping glory.
Want to see my manicure? Do ya? Do ya? Ok...so I decided to go with a Valentine's Day/Anti-Valentine's Day theme. My left hand is a traditional Valentine's Day design. I started with a base of IBD Just Gel Enthralled and Purjoi French White. I then stamped using images from Bundle Monster BM-S222 and BM-S225 from the new Valentine's Day themed Occasions Collection. (I'll share a full review of that set in a few days). The red is Sally Hansen Insta-dri in Red-io Active. It's a discontinued color, so if you run across it, you better snatch it up!
My right hand got the Anti-Valentine's Day design. I mean, it makes sense right? She's neglected and ugly and no one loves her. lol For this one, I started with a base of LeChat Obsession and IBD Just Gel Enthralled. I then stamped with Mundo de Unas Black and the ripped stockings image from BM-XL208 (The YaGala Plate).
I even took a few photos of them together. Trust me, it wasn't an easy task! Getting both hands in my light box and pushing the shutter button on my camera at the same time took a little bit of stretching and a whole lot of creative thinking!
But wait...I have more manicures to show you! These next three are client manicures that went so much quicker thanks to the Purjoi Clear Stamper. I honestly forgot to note the plates used. Sorry about that! Anyway, want to see them?
The stamped image in this manicure is one of those with the rounded end for french designs. I've never been able to use those before because I could never get them to line up quite right. So not a problem this time!
This next one is a combination of snowflakes from a variety of plates. The clear stamper allowed me to place them precisely on the nail. It almost looks like a full cover stamp! Sorry, I know it's a little blurry. Stupid cell phone.
Finally, this one was a narrow section of a buffet style plate. I didn't have much room for error and the clear stamper saved me from having to re-stamp a dozen times to get it to fit just right. :)
If you want to pick up a Purjoi Clear Stamper of your own, you can get one on the Purjoi Nail Studio website here. Joi also has replacement heads for a great price, so be sure to pick up a few of those too. :)
~Michelle
*The Purjoi Nail Studio Clear Stamper was provided by Purjoi Nail Studio for my honest review. All links within this post are courtesy links and do not benefit ManicTalons.com
Read more ...

