Hello Loves. I have a new mani to show you today and an update. Let's start with the mani. Then we'll get to the update.
I've seen so many smoke manicures lately. I'm really not sure who created this look originally, so please let me know in the comments if you know! All I know is that I've been wanting to try it for a while...with gel polish, of course. Since I haven't had much time to swatch, review or even write lately, I figured I should at least give this look a shot.
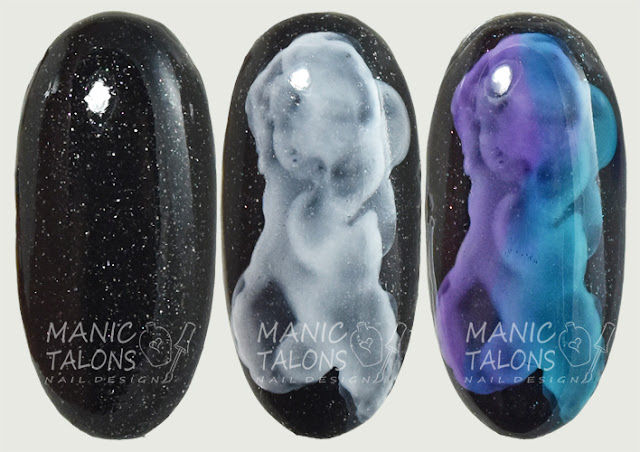
I started with a base of two coats of Bundle Monster Speed Gel in You're So Tragic. This is still one of my absolute favorite black gels. I adore the iridescent sparkles that give it depth and dimension. You can see my original swatch here. Here's a sample nail.
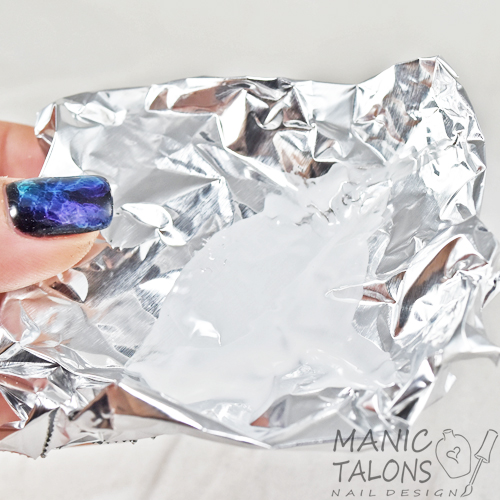
I then tried to do the smoke with white gel polish thinned with alcohol, but it didn't turn out quite like I wanted. So I scrapped that idea and Grabbed my Bundle Monster Stamping Polish in Angelic White. I put a drop on a piece of foil and mixed it with a few drops of acetone until it was runny. It needs to be very watery so that when the acetone evaporates, it leaves a ghostly image that allows the black to show through some. If the mix it too thick, it won't give the right effect. I tried to take a picture, but white on foil doesn't photograph well. Here's the shot anyway. The consistency is a little thinner than fat free milk.
Usually I would resist the urge to use acetone over gel polish without a top coat to protect the color coat first, but You're So Tragic is a One Step Gel so it has the top coat built it. So it really was the perfect base for this type of art. :) I used one of my Elf Concealer Brushes that I use for cleanup to dab the diluted polish onto the nail. As it evaporated, it left the perfect smeary, smokey white designs!
Now it's time for color! There are lots of sheer, jelly finish gel polishes popping up right now. Of course, I went with the Mosaic Glass gels from Bundle Monster. I brushed Sea You Clearly over parts of the nail and Locked In Secrets over other parts, blending slightly as I applied it. I did go back and add a second coat of each color in my manicure, but I only did one coat of color below.
Finally, add a top coat to seal the design and you have an awesome smokey look! Here are the three stages side by side.
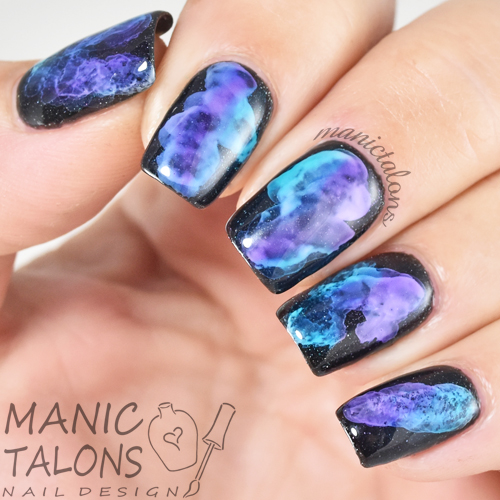
I absolute adore this look. Want to see another shot of my finished mani? Of course you do! One tip if you decide to give this design a try...don't over-do it with the white. Dab it on and leave it alone! If you mess with it too much, you'll end up losing the smoke effect like I did on my pinkie nail and a little on my ring finger. But hey, it was a first attempt and I'm pretty smitten with the results anyway! Oh, and the thinner the polish mixture, the more wispy the smoke...like on my thumb nail. ;)
If you love this look, you can find all of the items needed to recreate it on Bundle Monster's website here (minus the acetone and the brush...but any brand of those will do)! Or just click the links throughout the post to purchase these items through Amazon. :)
~~~~~~~~~~~~~~~~~~~~~~~~~~~~~~~~~~~~~~~~~~~~~
Ready for my update? So, a lot has happened in the month since I last posted...over a month ago. I know, I know. I keep going MIA on you. I promise, I'm not leaving you. I'm just having a bit of a time right now. I've been burning the candle at both ends lately and dealing with some health issues that have left me absolutely drained. Hopefully that part will be straightened out soon. I'm working with my doctor to adjust my medications to combat the fatigue. But, let's not dwell on the negatives. There is a lot of positive happening too!
As I mentioned in my last post, I made the difficult decision to leave Artistic Expressions Hair Salon. I miss my AE family so much! But it was a move I had to make for my family. And I'm happy to announce that I found the PERFECT spot for my little nail business. I'm now at Adam and Eve Hair Designers in Athens just a few miles from home. I couldn't have found a better fit. Seriously. Y'all know how obsessed I am with nails, right? The science. The products. The artistry. Nail health. Helping people feel good about themselves through my services. I love every bit of it. And I seriously found the hair match to my nail love at Adam and Eve. These guys (yes, guys...and a few gals) take hair to the next level. They live the science behind a good cut and color. Watching them work is like watching da Vinci paint the Mona Lisa. But at the same time, they know how to keep things relaxed and fun. Needless to say, I AM HOME.
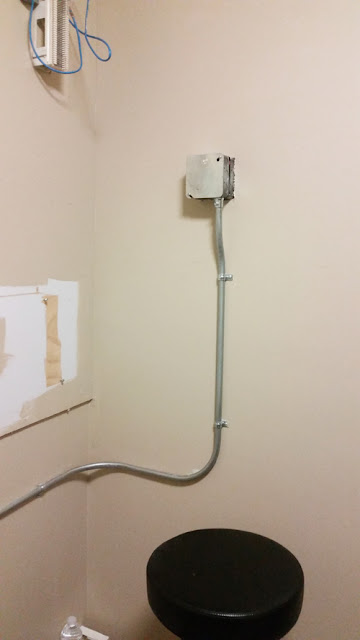
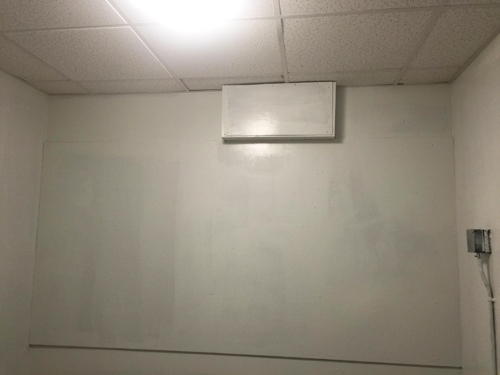
But...home is never easy. See, what had happened was...I was given a blank and mostly ugly room as my canvas. Grant (the salon owner), told me straight up that he has no clue how to set up a nail room and turned it over to me. Of course, I was thrilled that I could design my own little space, but there were also a few challenges. The salon was previously the office of web designer before Adam and Eve moved to this location, and well...I think my room was the server room. There were wires and conduit everywhere. Wanna see?
The room is 8ft x 8ft, so quite small. The mess you see in this picture started dead center of the wall that you see when you walk in the door.
Here's a shot that shows how it extends around the corner onto the neighboring wall. So a good portion of the room was a hot mess of wires and conduit. Not really an inviting space, right?
Well, have no fear. I have an amazing husband who is quite skilled with his hands. He managed to clean up all of those wires and built a box to cover what he couldn't remove. He also painted the room for me...white to brighten it up a bit. This is a photo he sent me before the second coat of paint to show his progress. So much cleaner!
Of course, then I had a little magic to work too. After dragging Keith to Ikea two weekends in a row and a few Amazon shopping sprees, my little nail room went from ugly to perfect! This is what you see now when you walk in the door. Disregard my purse on the desk. lol
This is the wall behind me that the client sees when sitting at my desk. I adore how my product displays turned out! Aren't they precious?
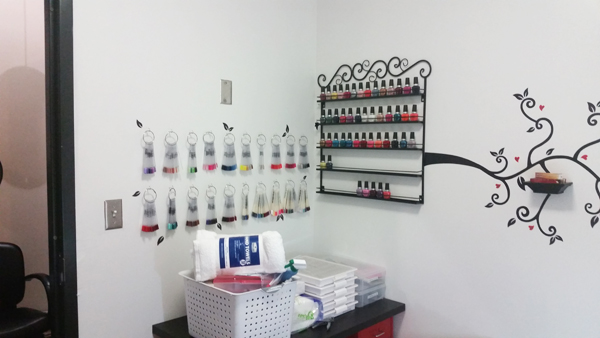
All of my gel polishes are in helmers that make up the base for a small table just inside the door. Of course, the 300 or so that I have at the salon are swatched and hanging on the wall. This will be changing soon...I need to add a cabinet on that wall to hold more supplies. Originally Grant didn't want to offer pedicure services. He has since changed his mind so I'm working on the setup for that now. Yes, I know...I don't really have room for a pedicure chair, but I'm creative and can make it work with a few mobile pieces. ;) Oh, and ignore the stuff on the side table. I was still putting things away when I took this picture.
Finally, my license and a clock are on the wall behind the client. :)
Since the room is so small, it was difficult to take photos that really show my setup. I'll do a video tour when I get my pedicure set up figured out. :)
So, that's all for now. Be sure to follow me on Instagram and Facebook (if you aren't already) to see my client work as I settle into my new space! I'll be back as soon as I can with some new swatches and product posts. I promise!
~Michelle
*The gel polishes used in this post were provided by Bundle Monster for my honest review. This post uses Amazon Affiliate links. Purchases through those links generate commissions that help fund this site.








Your work area looks terrific!
ReplyDeleteGreat job!
ReplyDelete