Hello Loves. I have a fun product to show you today from a company called Tuff Enuff Nails (T.E.N.). The product is Poly Polish and it is a gel that you can mix with regular polish, pigments, glitters, and even acrylic paints. That last part that grabbed my interest when a reader brought this product to my attention. Naturally, I reached out to Brenda and she sent me a few samples to try out.
Note: Poly Polish is not a soak off product and is not LED compatible.
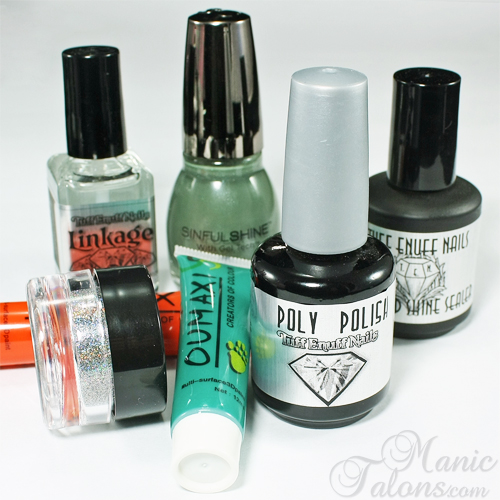
For my review, I decided to combine Poly Polish with regular polish for my base, glitter for accents, and finally acrylic paints for a little art. These are the products that went into my manicure in this post.
After prepping my nails, I started with a thin layer of T.E.N. Linkage. Linkage is an organic bonding agent that helps the gel adhere to the nail. It is not a primer and is not acid based. I then moved on to my Poly Polish and Lacquer base.
When mixing Poly Polish with regular lacquer, the mix should be 50/50. When mixed correctly (note that a drop of polish does not equal a drop of poly polish), I found that the mix is very similar to the lacquer on it's own in terms of opacity. Another interesting fact - the polish and Poly Polish mix did not dry on my pallet as I worked with it. It kept the same consistency, which really surprised me. I expected it to get thicker as the lacquer started to dry, but nope. The polish I used for my mix is Sinful Shine Man Hunt.
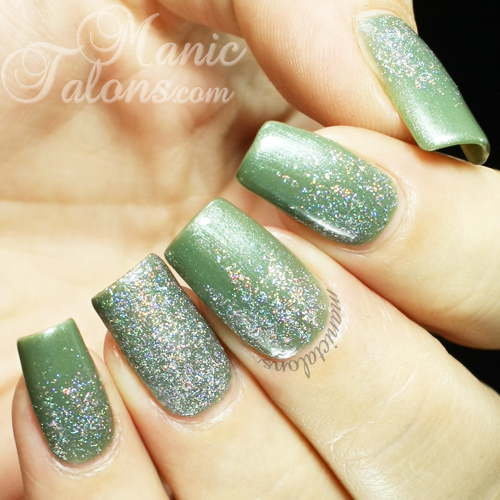
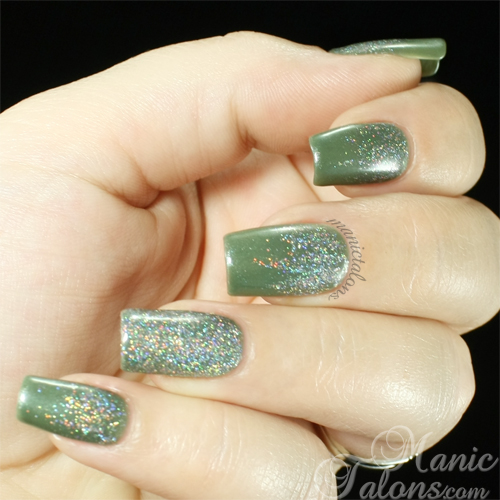
I didn't think to snap a picture before I added the glitter layer, so I'll move right on along into that. The glitter was also provided by T.E.N. and is quite impressive. This is the Holographic Glitter and I can't say for sure but it is either 0.004 or 0.002 in size. Either way it is very fine and can be mixed into top coats or gel polish. Glitters and Pigments can be mixed into Poly Polish at whatever ratio you need to get the desired look. I mixed it 50/50. Let's take a look. I created a fade with the mixture on 4 of my nails and added a full coverage accent nail on my ring finger. Finally, I applied a thin layer of T.E.N. Diamond Shine Sealer.
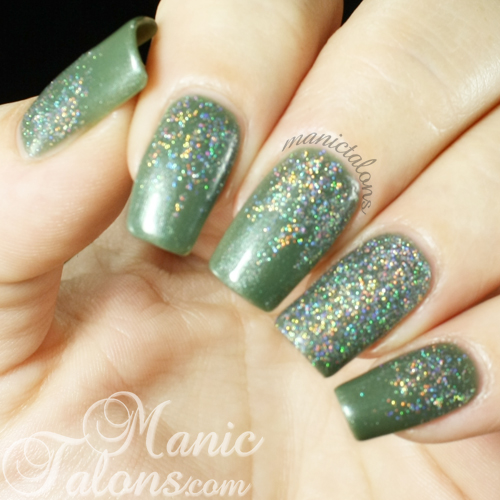
The photo above does NOT do this glitter justice, so how about a few more?
Here's a blurred shot to really show the holographic effect, but even this doesn't really do it. This glitter is GORGEOUS in person. Even if you're not a fan of hard gels, you need this glitter in your life.
To prove it, I prepared a swatch with black soak off gel polish and scrubbed a layer of TEN Holographic Glitter into the tacky layer. I topped it with a thick top coat. Of course, my camera wanted to go macro on me instead of capturing the colors, so I blurred the shots. Left is slightly blurred. Right is a stronger blur.
Let me back up for a second. I forgot to tell you how I applied the Poly Polish and Sinful Shine mix as well as the Poly Polish and Glitter mix. I applied the Sinful Shine mix with a #4 gel brush from T.E.N. This brush is my new best friend! Seriously, it is so easy to work with and the bristles are quite soft but not mop-like. I applied the glitter with a #2 T.E.N. brush that is just as fabulous as the #4 but gave me greater control for more precise placement.
Ok, moving on. You know I had to test out the acrylic paint and Poly Polish mix. This mix needs to be no more than 50% acrylic paint to avoid curing issues. I mixed it just shy of 50/50 and the result is a nice and opaque gel paint. I had planned to do two color roses and two color leaves, but when I started adding the roses to the nail I realized the paint mixture allowed me to create depth with just one color. Oh yes, this just changed my nail art life. Seriously, instant gel paints in any color you can mix? Yes please! I don't even care that it is a hard gel while I usually prefer soak off. For art, I suspect it can be layered over a soak off gel base since I file the top coat off my soak off gels anyway. I haven't tested it yet to see how such a combo will wear, but you can bet that I will!
Speaking of wear, let's talk a little about that. I didn't do a full wear test on my T.E.N. mani. Why? Because I forgot to do the art for my collaboration post from last week before applying this mani on my left hand. So I had to cut the test a little short. I wore the base and glitter for 4 days before adding the roses, which I wore for another 4 days. My nails felt quite strong - way stronger than with soak off gel - and it wore perfectly. No tip wear as is common with soak off gels.
I have to be honest - the removal scared me a little. I don't work with hard gel very often, so filing it off made me nervous. I just knew I was going to over-file and hit my natural nail. Turns out I was worried about nothing. Brenda told me her gels are easy to remove, and she was right. I was able to file it down to a very thin layer and then use a buffer to remove the rest without damaging my nails. They are just as long and strong as they were before removing my Poly Polish mani. :)
So there you have it - Poly Polish is a very versatile product that can be used to expand your nail art arsenal by combining it with other products you already have on hand. I have a few more T.E.N. products to show you in the near future, so keep an eye out for those!
~Michelle
*The products featured in this post were supplied by T.E.N. Tuff Enuff Nails for my honest review.


No comments:
Post a Comment