Showing posts with label How To. Show all posts

Tuesday, January 28, 2014

Tutorial: Simple Dry Marble Technique

Purchased by Me


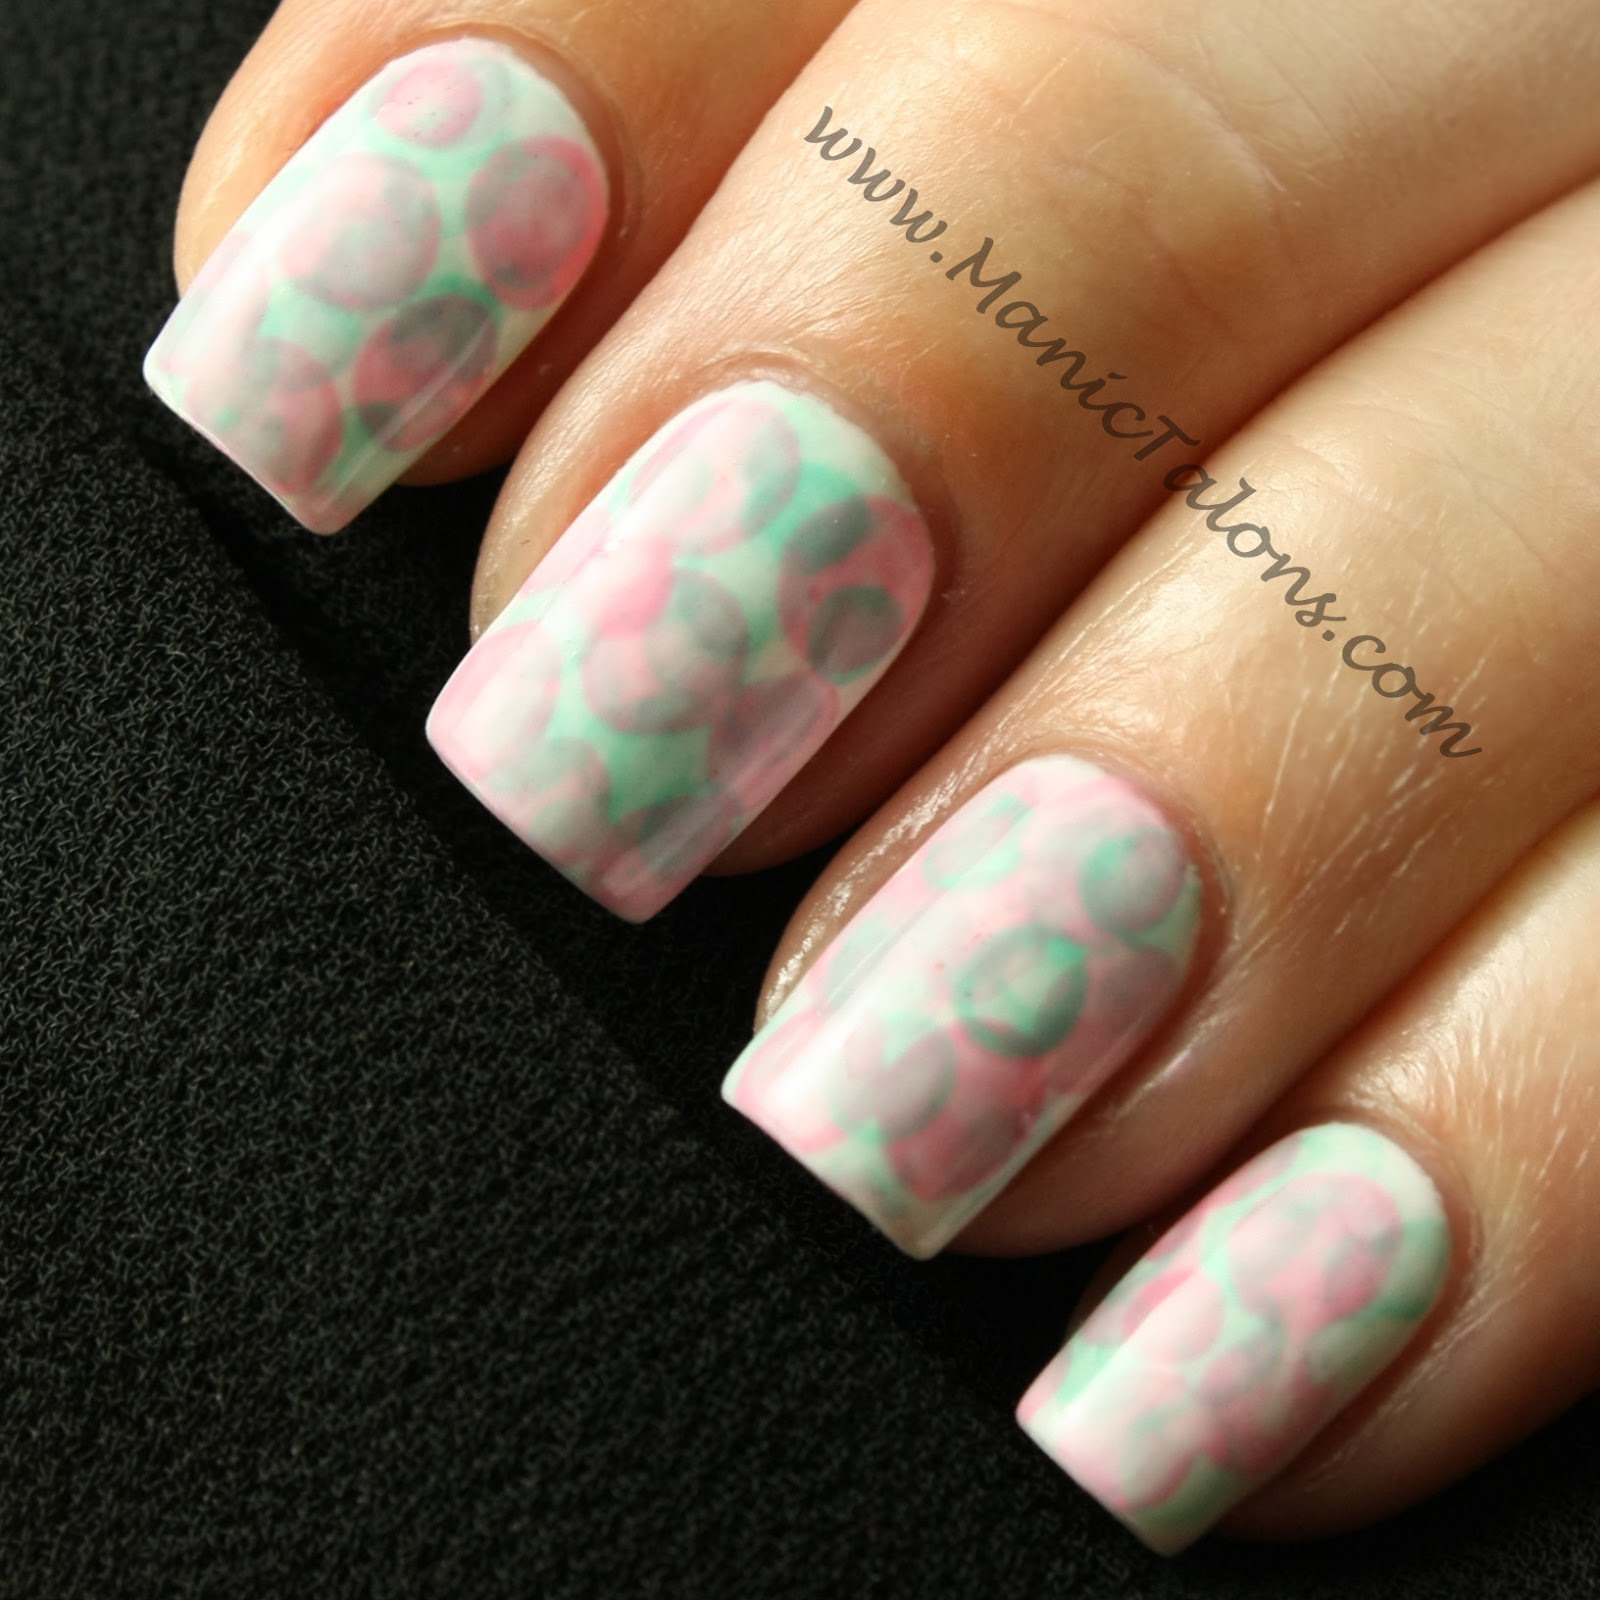
Hello loves!  As I mention in my last post, I put together a quick tutorial on how I did this dry marble base for my Mani Using Three Purples. I hope you enjoy the tutorial.  As always, if there is anything I need to clarify, leave your questions in the comments and I will do my best to answer them.  :)


~Michelle


Read more ...

Sunday, January 12, 2014

Tips and Tricks: Gradient Stamped Hearts

Purchased by Me Affiliate Links

Hello loves.  I decided to try a new stamping technique this evening called gradient stamping.  I don't know who came up with this technique, but I seriously love it!  I have been wanting to try it for a while now and just got around to it tonight.
I'm pretty sure this exact design has been done before - same image and all, but I don't remember where I saw it.  If you recognize it, please let me know in the comments so I can give credit. :)  I am completely head over heels for the finished look, although it does remind me of those crazy laser photo backgrounds that were so popular in school pictures in the 80s.

I started out with a base of Ink Blackout.  I didn't do a swatch picture of this one because my bottle is one of the manufacturer flaws floating around.  Blackout should be a pure black creme.  Mine has silver shimmer.  I love that I have one of the flawed bottles, though.  It makes it unique to my other blacks.

I then chose three of my pastel Mundo de Unas stamping polishes for the gradient and the interlocking hearts image from Pueen 41.  The polish colors are Pink, Lilac and Pastel Blue.  Mundo de Unas polishes are amazing.  When I ordered, I chose only colors that stamp well over black and I don't regret that decision one bit.  Not only are they super opaque, but I also love that they are slower to dry than many other stamping polishes so I have a little more time to position the stamp.

I then applied stripes of each color to the image.  I usually only paint half of the image with stamping polish to reduce waste, but in this case painting the entire image gives you more control of where each color ends up.
http://www.amazon.com/gp/product/B00CDGR29G/ref=as_li_tf_tl?ie=UTF8&camp=1789&creative=9325&creativeASIN=B00CDGR29G&linkCode=as2&tag=manic0a-20

Scrape in the same direction you applied the stripes to keep the colors from mixing too much.

I used my XL Squishy stamper for this manicure, but it was really hard to see the colors on the white pad.  So I picked up the image with the darker pad on my Magno stamper to show you how it looks before being placed on the nail.  Please excuse the skips in the image as I haven't prepped this pad yet.  But you can see the subtle gradient between each of the colors. 

Here's another shot of the finished mani.  This is a technique I will definitely try again, and hopefully I can move a bit quicker next time.  You can see a few blank spots in the lines in this shot.  This is the result of waiting a little too long between scraping, picking up the image, and transferring it to the nail.

What do you think of gradient stamping?  Do you love it as much as I do?

~Michelle
Read more ...

Monday, December 16, 2013

Holiday Glitter Ruffian Tutorial: How to manipulate loose glitter


Hello Loves.  A few people asked how I applied the loose glitter without getting it all over the nail in the Glittery Ruffian Holiday Mani that I shared earlier this week.  I am a HUGE fan of using loose with soak off gel, especially around the holidays.  I usually scrub the glitter into the tacky layer and top coat over it, but that method is a bit difficult when trying to apply glitter to one specific area of the nail.  Since I used a different technique for this one, I threw together a quick video tutorial to show you how I did it.

Please feel free to ask questions if there is anything I need to clarify.  Also, since this is my first video tutorial, I am certain there is room for improvement.  I appreciate and welcome any feedback that I can apply to future tutorials.  :)

Update: To clarify based on a question from one of my readers, the top coat used in this tutorial is soak off gel top coat. :)


~Michelle
Read more ...

Friday, November 22, 2013

Nimbus Nail Art using Couture Soak Off Gel

Purchased by Me

Hello lovely readers.  If you follow The Nailasaurus, you are likely familiar with her awesome nail art technique called Nimbus Nail Art.  If you don't follow her, now is a great time to start!  Her creativity is amazing.  Her Nimbus style has spread like wildfire throughout the DIY nail art community, and it's easy to see why.  I was asked by a reader if this style can be done with soak off gel.  I honestly didn't have an answer, but I'm always up for a challenge so I came home and tried it out.  Great news!  With a slight, gel-friendly modification, the Nimbus CAN be done with soak off gel! And I'm going to show you how, but first you should follow that link above and review her tutorial as much of it is the same with gel.  It should open in a new window, so you can easily come back to see the modified technique.

 
Ok, now that you've read The Nailasaurus's tutorial, here's all you need to know to modify it for gel. 

What you'll need (in addition to your usual SOG supplies:
  • White soak off gel or other light colored SOG
  • A paint pallet, piece of foil, or other surface for mixing
  • Cotton swabs
  • Isopropyl Alcohol (or your gel cleanser)
  • A pair of tweezers
  • Your chosen colors
First things first, apply your base color.  I did three coats of Ooh La La French as my base.  Do not top coat yet.
Excuse my dry skin and cuticles.  I didn't moisturize before taking the picture to avoid causing lifting from the oils.

Now, place a generous drop of your first color on your pallet.  I'm using Couture Spa Day.

Add a drop or two of alcohol.  I added two for this size drop of polish, but start with one and see if you need more.  You can always add more alcohol, but you can't take it out. ;)

Choose a cotton swab with tight fibers to reduce the amount of cotton that might transfer to your nails.  Dip the cotton swab in alcohol so it is nice and wet, then mix the drop of gel with the drop of alcohol on your pallet.  It should become watery, almost like watercolors.

Using the cotton swab, dab a few times on the side of your pallet.  As the alcohol evaporates, it should leave a nice halo (or nimbus).  Add more polish or alcohol if needed to reach the right consistency.

Once you've reached the consistency you want, dab the color onto your nails.  Note, you'll want to work fast as the alcohol will evaporate quickly.  Dab all of the nails on one hand (or four fingers if you use a four finger lamp).  Be sure to clean up any excess that gets on your skin, and check for cotton fibers.  If you see any, remove them with your tweezers.  Then cure as usual.

Repeat this process with your other colors.  I chose to do only two colors for this tutorial.  My second color is Couture Off The Shoulder.  Once you have completed and cured the additional colors, finish off with your top coat and you're done. Unless, of course, you're like me and can't resist the urge to stamp almost every mani!  This was the perfect base for this reverse image from MoYou London XL Pro Collection 13.  I stamped with Konad Black. 


If you try this modified version of the Nimbus for soak off gel, please share your results with me by linking to your picture in the comments here, tagging me on instagram or pinterest, or sharing to my facebook page.  I would love to see it!  And a huge thank you to The Nailasaurus for this incredibly fun and easy nail art technique. 

~Michelle
Read more ...

Thursday, October 3, 2013

Tips and Tricks: Expanding your Stash with DIY Toppers

Purchased by Me

If you use soak off gel polish, you have likely discovered that building a polish stash isn't cheap.  So today I'm going to show you a fun way to expand your collection without spending a lot of cash by making your own toppers out of pure pigments.  There are several places online where you can find pure pigments for frankening nail polish and making cosmetics.  My personal favorite is Coastal Scents.  Coastal Scents has a large selection of mica powders that are perfect for mixing with top coat to create amazing toppers.  And they offer sample sizes that are more than you will ever need for nail art for $1 to $2.50.

I swatched a few custom toppers to show you out of my pigment collection.  I painted half of each of the swatch sticks with Couture Little Black Dress and left the other half clear to give you a better idea of how each topper will look over light and dark colors.  When selecting pigments, look for the ones that appear white(ish) in powder form.  Those make the best toppers. 

First, the mirage powders.  I love these for the chunkier finish and the fact that they don't change the base color as much.

Next, I swatched a few of the crystals and other super fines.  These are finer powders that do alter the colors when applied over a base.

Now that you've seen how gorgeous these are, onto the "How To".

I mix my toppers on a piece of foil as I go so I don't have to buy extra bottles of top coat.  4-6 drops of top coat is usually more than enough to do all 10 nails once mixed with the pigment depending on the length of your nails.  You can use a little pigment or a lot to get varying effects.  However, as a general rule, you should never mix more than 1/3 pigment to 2/3 gel to avoid curing issues.  :)

I use an orangewood stick to place a small amount of pigment (half a grain of rice) on the foil.

Add 4-6 drops of topcoat.  The picture below shows the size of one drop of topcoat on the foil.

Mix well and you're ready to paint it on like you would a store-bought topper.  I use the topcoat brush and simply clean it well with alcohol when I'm finished to avoid transferring pigment back into the topcoat bottle. You can use a gel brush if you don't want to risk contaminating your top coat bottle with shimmer. 

Add a layer of pure top coat and you're done.  There you have it, DIY toppers for less than $1 per mani.  :)

~Michelle
Read more ...

Friday, September 20, 2013

Tips and Tricks: XL Squishy Stamper - Prepping the Pad

As I mentioned in a previous post, stamping completely escaped me before discovering the XL Squishy Stamper.  Smaller, harder stampers simply do not work well for my nails.  With that said, the XL Squishy comes with its own challenges.  For one, the stamping head constantly falls out of the holder.  Check out this post for my solution to that issue.  The even more frustrating issue is that it doesn’t pick up the image right out of the package.  I have seven of them, 2 from Wistonia and 5 from Ali Express.  None of them have worked without a little prep. 

So, enough talk and more tutorial, right?  Here’s how I prep my XL Squishy Stamper head to get it to pick up the images. 

This is an AliExpress XL Squishy stamper that is straight out of the package.  You’ll notice that the head is shiny and may feel a little slick. 

That’s a problem.   So go ahead and pop the head out of the holder and give that baby a bath.  I reach for my trusty Dawn dish detergent.  If it will cut grease, it will easily remove the substance the manufacturer used to grease the mold when making the heads.  Any soap that is made to cut grease and is void of added moisturizers will work. 

Once the head is dry again, you’ll notice it feels stickier, but still has a shine.  It may pick up some of the image, but the polish beads up.  We’re getting closer, but still not there. 

Now, let’s rough up the surface of the pad.  Starting at the center of the pad, lightly run a 400 grit file over the surface toward the edge.  Turn the head and repeat until the entire surface looks dull.  You may see a small amount of dust forming on the top of the stamper head.  Remember, the key word here is “lightly”.  If you file too hard, you might rip the stamper pad. 

Even filing lightly, you’ll have to smoosh the pad a little. 

Remove the dust by “stamping” the head onto a lint roller or piece of tape several times. 

Test the stamper head again and see if how it picks up.  If you notice bald spots in your stamped image, you may need to file a little more in that area.  Getting better, but not quite there yet. 

Finally, a shine free, ready to use stamper.

There are several factors that may impact how well the stamper picks up the image.  After the stamper has been prepped and the shine is completely removed from the stamper head, technique is the next biggest pitfall.  I have the best results when I roll the stamper onto the image using a light touch.  Since the head “squishes” easily, too much pressure will cause the stamping head to force the polish out of the etched image and cause bald spots.

The rolling technique picks up a clean image. 
The plate I used for this tutorial is MJ XX.  I love this plate and often use it to test polishes and stampers because I know the plate is excellent.  You can purchase this and other MJ plates at MyOnline Shop or at Ninja Polish.


I hope this helps!  Please let me know in the comments if this helps you.  And if it doesn't, please let me know that too.  I may have a few more suggestions you can try. ;)

~Michelle


Read more ...

Tuesday, September 17, 2013

Tips and Tricks: Wear Undies

You know that polish that you opened the bottle and fell in love with the color inside, only to be horribly disappointed once you put it on?  That polish that is absolutely gorgeous until you realize that it just isn't opaque?  I have quite a few like that.  Heart breakers. 

For example, Ink Sultry Sailor.  These pictures don't do it justice.  I tried but just couldn't capture the shimmer.  Sultry Sailor is a light navy jelly base with a very dense green and gold shimmer.  This is three coats.  See the visible nail line?  I hate that!

Rather than toss this one into a box of disappointments, there is a simple solution.  Wear Undies!  Layer your disappointingly sheer but gorgeous colors over a cream in a matching color.  One coat of Ink Blue Ice is all it takes to make Sultry Sailor lovable once again. This is one coat of Blue Ice and two coats of Sultry Sailor.  See the difference?  

To really make lighter colors and brights pop, try using a bright white as Undies.  Ink Glacier is my personal favorite.  :)

Since I'm in love with this color and my swatch above didn't fully capture the amazing shimmer, check out this close up.  Gorgeous!


~Michelle


Read more ...

Thursday, September 12, 2013

Tips and Tricks: Preventing Lifting and Chipping

It seems that most people encounter one of two issues with Soak Off Gel.  Either it doesn’t bond to the nail and they experience premature chipping and/or lifting, or it bonds so well that removal becomes a nightmare.  Thankfully, there are tricks to combat both of these issues!  I’ll tackle soak off issues in another blog post.  Today, let’s focus on preventing lifting and chipping. 

What causes lifting and chipping?  If you have not completely removed the cuticle from the nail, you are more likely to experience lifting.  If you have oily to normal nail beds, you are more likely to experience lifting.  If there are flaws in your application process, you are more likely to experience lifting.  If you are using the wrong base gel for your nail type, you are more likely to experience lifting.  There are a lot of factors that can lead to lifting and chipping. 
 
Cuticle Removal
If you haven’t been doing cuticle work, the cuticle can extend down the nail plate, and it often blends into the nail so that you can’t really tell it is there.  When you apply gel polish over the cuticle, it can’t bond and results in lifting.  There is a common misconception about where the cuticle is located on the nail.  The cuticle is NOT the skin around the base of the nail.  That is the eponychium.  The cuticle is dead skin tissue that grows down onto the nail.  Rather than try to recreate the wheel and go into the “how to” of cuticle removal, I’ll direct you to the pro.  Check out this FingerNailFixer Cuticule Work Video.

I prefer Sally Hansen Instant Cuticle Remover and a spoon style cuticle pusher. 

Oily Nail Beds
Natural oils on the nail will create bonding issues for any base gel.  Most systems come with a bottle of prep, cleanser or dehydrator that is designed to remove oils from the nail.  However, for those with oily skin and nails, these products alone simply don’t get the job done.  It is crucial that you remove all oils from the nail before applying your base gel.  My secret weapon?  A grease fighting dish detergent.  Not one of the formulas that has moisturizers built in.  Simply one of the original formulas that is made for dishes, not hands.  I use the classic blue Dawn.  This is a trick I stumbled upon by accident by doing a manicure shortly after washing dishes.  It was the first time I got more than a week of wear!  So now it has become a part of my manicure routine.  After completing my cuticle work and shaping my nails, I grab my Dawn dish detergent and a nail brush and give my nails a quick wash and scrub to remove any residual oil. Which reminds me, I need to pick up another bottle of Dawn. 

You can also use an oil fighting soap, but I have found most of those leave behind added moisturizers that can interfere with the gel’s bond to the nail.  Be sure to keep it quick, though.  You don’t want your nails to absorb too much moisture from the wash.  I scrub and rinse both hands in less than 1 minute.  Give your hands time to dry completely before proceeding with your manicure, being careful not to touch your skin and pick up additional oils. If you use this trick, be sure to moisturize well when you're finished with your manicure.  If you've ever washed a sink full of dishes by hand, you know that dish detergent can cause dry skin.
 
Application
There are two application mistakes that generally lead to lifting.  Polish on the skin around the nail and failure to properly cap the free edge of the nail. 

1) Neat and tidy application isn’t just about the look of the final result.  When gel polish overlaps the skin around the nail, it will cause lifting.  Stop your polish just shy of the skin around the nail.  And if you mess up, clean it up before you cure.  I use a stiff concealer brush and 91% isopropyl alcohol to clean up any mistakes before curing. 

The brush I prefer is the Elf Concealer Brush that can be found at Target for $1.  Elf makes two concealer brushes.  This white one, and a black one.  I love the black one for pigment work, but it's not as good for clean up.  This is what the white one looks like in the package:

You can use any stiff, short bristled brush.  You can also use the cleanser that came with your gel starter kit instead of isopropyl alcohol, but the isopropyl alcohol is cheaper and works great.  Just be sure you get 91% or higher.  Dip your brush in the alcohol, blot any excess on a lint-free wipe or paper towel, and carefully run it along the edge of the nail near the skin.  Be sure to frequently wipe and redip the brush as you clean to avoid spreading the polish around. 

Clean up every coat of gel before you cure.  Base coat, color coats, and top coat. 

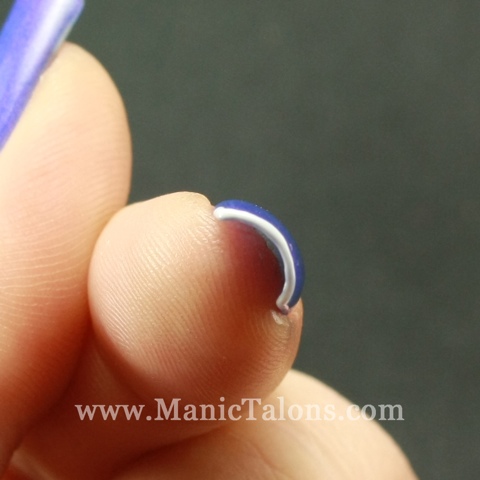
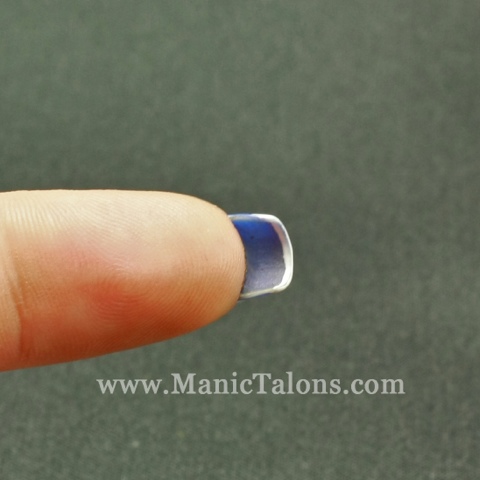
2) You must cap the free edge of the nail with every coat of gel you apply, from your base coat to your color coats and finally your top coat.  Think about how you use your hands on a daily basis.  When you have an itch, you scratch with the free edge of your nail.  When you turn a page in a book, the free edge of your nail may drag along the page.  When you pull on your pants, the free edge rubs against the fabric.  When you type, the free edge of your nails may hit the keys.  If you stop the gel at the top of the free edge, all of the friction from day to day life will peel the gel back.  So cap that free edge with every coat!  When looking straight down on the tips of your nails, you should not be able to see natural nail. I'm using Ink Glacier on top of my current mani to demonstrate in the following pictures.

By the way, there is NO way to take a flattering picture of the tips of your nails.  Hello fat fingers!

I’ve had a few people ask how to cap the free edge without getting polish all over the skin under the nail.  When you hear people say to “cap the free edge”, what they really mean is apply gel to the very edge of the tip of the nail so that it overflows very slightly onto the underside of the nail.  If you look at the underside of my nails, you will see approximately 1 mm of polish overflow along the tip. 

I always cap the free edge before applying the gel to the surface of the nail rather than capping at the end.  This prevents pooling at the tip of the nail.  Here’s how I do it:
  1. Wipe the brush against the inside of the bottle neck to remove excess polish.  Your brush should not have a drop of polish at the end like you will when you polish the surface of the nail.  The bristles will hold enough to effectively cap the tip when the polish has been wiped from both sides of the brush.  If you have just finished applying color to a previous nail, you can use what is left on the brush to cap the next nail before you reload the brush to polish the nail surface. 
  2. Holding the brush perpendicular to the tip of the nail, place the side of the brush on the outside corner (for square nails) or outside edge (for round nails).  Use the side of the brush and run it along the tip from the edge to the center.  Repeat from the opposite corner/side of the nail.  If you have shorter nails, use your thumb (or finger if you're polishing your thumb) to gently pull back the skin on the tip of the finger.
  3. Polish the top of the nail as usual.
  4. If you had too much polish on the brush when you capped the nail, it may have pooled on the underside or touched the skin.  Use your clean up brush to take care of that before you cure the layer. 
Base Gel and Bonder
If you have tried the above tips and are still seeing lifting or chipping, you may be using a base gel that is not formulated for your nail type.  Of the seven that I have tried, I found that some work better for oily nails and some work better for dry nails.  For example, Gelish Foundation and Red Carpet Manicure Structure Base Gel tend to work very well with oily nails but will bond so well with dry nails that removal becomes extremely difficult.  Ink Base and Couture Base tend be more likely to lift on oily nails but work very well with normal to dry nails.  I personally use Kiss Base Gel.  It is the perfect balance of staying power and easy removal for my nail type.  So if you are still experiencing lifting after correcting the issues I mentioned above, one option is to try a different base. 

Another option is to use a bonder.  Bonder is a thin liquid that is applied to the very tip and free edge of the nail before applying your base gel.  It leaves behind a sticky layer that allows the gel to really grab the nail.  There are several bonders for soak off gel polish on the market, but this becomes very tricky territory.  For example, Gelish PH Bond is not a bonder.  It is a dehydrator and pH balancer.  OPI BondAid is also a dehydrator and pH balancer.  Sensationail kits come with “Gel Primer”.  This is a bonder.  FingerPaints Gel Polish Chip-Free Bonder is also bonder.   Then there are also products labeled as bonders that are intended for use with hard gel or acrylics.  Those will make soak off difficult.  See, confusing.  So be careful ordering a bonder online.  I have personally used both the Sensationail Gel Primer (available as part of the essentials kit at several drugs stores and large retail stores) and Fingerpaints Chip-Free Bonder (available at Sally Beauty Supply) with great results.

I hope this helps!

~Michelle
Read more ...

Tips and Tricks: XL Squishy Stamper - How to keep the head in the holder


The XL Squishy stamper is awesome for longer nails with deep curves.  I couldn't stamp full nail images to save my life before I bought one.  But, if you have an XL Squishy you have likely already discovered that the head pops out, making it a complete pain to stamp with.  The diameter of the opening in the holder is simply too large for the stamping head.  I've tried a few things to fix this problem, and I've destroyed a few stampers in the process.  

There are some great solutions to this problem floating around the internet, including gluing the head into the holder or cramming the stamping head into a smaller konad or fauxnad holder.  Neither of these solutions really worked for me.  I need to be able to remove the stamping head so that I can stretch smaller images to fit my nails, so gluing it in isn't a good option.  And I found that cramming it into a smaller holder caused tears along the side of the head over time.  Not to mention all the extra holders I had laying around.  So, I became obsessed with finding a solution.  And I finally found it.  Woo Hoo!

Items you'll need:
  • Your XL Squishy Stamper
  • A pair of old scissors or other sharp instrument
  • A hot glue gun

Step 1: Take the stamping head out of the holder.  That's easy, right?  It won't stay in anyway. 

Step 2: Use the scissors to score or scratch the inside of the holder.  The scratches allow the hot glue to adhere to the inside surface of the holder. 

Step 3: Run a line of hot glue all the way around the inside of the holder.
It should look like this the image below.  Now allow the glue to cool slightly so you don't burn your finger on the next step. 

Step 4: When the glue has cooled but is still pliable, use your finger to smooth it by pressing it against the inside edge of the holder.  It should only take about 30 seconds to cool to this point.  This step prevents the glue itself from ripping your stamping head. 

Step 5:  Once the glue has completely cooled and hardened, put the stamping head back in the stamper and  you're ready to start stamping. :)
As you can see, the hot glue decreased the diameter of the opening in the holder so that the head fits a little tighter and stays put :)
If you try it, let me know how it works for you!  I've been using my "fixed" stamper for about a week now and the head stays put even when I stamp the excess onto my super sticky lint roller.  :)

~Michelle
Read more ...