Showing posts with label Tips and Tricks. Show all posts

Tuesday, January 28, 2014

Tutorial: Simple Dry Marble Technique

Purchased by Me


Hello loves!  As I mention in my last post, I put together a quick tutorial on how I did this dry marble base for my Mani Using Three Purples. I hope you enjoy the tutorial.  As always, if there is anything I need to clarify, leave your questions in the comments and I will do my best to answer them.  :)


~Michelle


Read more ...

Sunday, January 12, 2014

Tips and Tricks: Gradient Stamped Hearts

Purchased by Me Affiliate Links

Hello loves.  I decided to try a new stamping technique this evening called gradient stamping.  I don't know who came up with this technique, but I seriously love it!  I have been wanting to try it for a while now and just got around to it tonight.
I'm pretty sure this exact design has been done before - same image and all, but I don't remember where I saw it.  If you recognize it, please let me know in the comments so I can give credit. :)  I am completely head over heels for the finished look, although it does remind me of those crazy laser photo backgrounds that were so popular in school pictures in the 80s.

I started out with a base of Ink Blackout.  I didn't do a swatch picture of this one because my bottle is one of the manufacturer flaws floating around.  Blackout should be a pure black creme.  Mine has silver shimmer.  I love that I have one of the flawed bottles, though.  It makes it unique to my other blacks.

I then chose three of my pastel Mundo de Unas stamping polishes for the gradient and the interlocking hearts image from Pueen 41.  The polish colors are Pink, Lilac and Pastel Blue.  Mundo de Unas polishes are amazing.  When I ordered, I chose only colors that stamp well over black and I don't regret that decision one bit.  Not only are they super opaque, but I also love that they are slower to dry than many other stamping polishes so I have a little more time to position the stamp.

I then applied stripes of each color to the image.  I usually only paint half of the image with stamping polish to reduce waste, but in this case painting the entire image gives you more control of where each color ends up.
http://www.amazon.com/gp/product/B00CDGR29G/ref=as_li_tf_tl?ie=UTF8&camp=1789&creative=9325&creativeASIN=B00CDGR29G&linkCode=as2&tag=manic0a-20

Scrape in the same direction you applied the stripes to keep the colors from mixing too much.

I used my XL Squishy stamper for this manicure, but it was really hard to see the colors on the white pad.  So I picked up the image with the darker pad on my Magno stamper to show you how it looks before being placed on the nail.  Please excuse the skips in the image as I haven't prepped this pad yet.  But you can see the subtle gradient between each of the colors. 

Here's another shot of the finished mani.  This is a technique I will definitely try again, and hopefully I can move a bit quicker next time.  You can see a few blank spots in the lines in this shot.  This is the result of waiting a little too long between scraping, picking up the image, and transferring it to the nail.

What do you think of gradient stamping?  Do you love it as much as I do?

~Michelle
Read more ...

Wednesday, December 4, 2013

Tips and Tricks: Using Regular Polish with Soak Off Gel

Purchased by Me

When people ask me about soak off gel, there are several reasons I am given most as to why more people don't make the switch from regular polish.  1) "I have a large collection of nail polish.  I would hate for it to go to waste."  2) "I can't commit to a color for that long.  I like to change it up." 3) "I like to wear bold colors on the weekends, but I have to keep it conservative for work."

My answer to all of these reasons is usually something along the lines of "Ok, but why is that stopping you?"  One thing many people don't realize is that there are several ways to use RNP with SOG.  I'll list them now and elaborate on each in a few moments.  1) You can apply RNP over a SOG manicure.  2) You can sandwich RNP between layers of gel.  3) You can use RNP for nail art.

1) If you have a dress code for work or simply can't commit to a color for longer than a few days, you can still get the strength and protection of SOG without giving up your ability to change your nail color.  I wear RNP over my gel on a regular basis.  And the best part is you can apply and remove RNP without damaging the gel underneath!  Simply use non-acetone remover and you're good to go.  Plus there are added benefits to layering SOG under your RNP.  First, the RNP dries much faster over gel.  Second, the gel hides any ridges or imperfections.  This is awesome for metallic polishes that tend to show every flaw in the nail.  Third, the gel adds strength and protection to your nails to help reduce the risk of breaks.  Last but not least, RNP tends to wear longer without chips over SOG. 

I'm wearing this complete SOG manicure at the moment.  The color is OPI GelColor Bubble Bath.  It's a great, office friendly nude. 
OPI GelColor Soak Off Gel
But what fun is that?  So I've applied Sally Hansen Insta-dri in Jet Set Jade on top of my SOG mani.  Excuse the poor application.  I was in a bit of a hurry so I just slapped on a few coats and ran out the door.
I took a few quick pictures as I removed the polish from my index finger to show the pristine SOG mani under the RNP even after removal. 
So, in summary, you can wear RNP over a SOG mani and remove it non-acetone remover without damaging the SOG. 

2) If you have a bottle of RNP that you simply love but can't find a SOG alternative, no problem.  There are many types of polish that simply are not offered in SOG.  For example, linear holos.  I don't know why there isn't a SOG holo on the market, but I assume it has to do with the gel being too thick of a base for the holo pigments.  Either way, I love my holos and I love that I can still wear them without giving up the strength from the SOG mani.

When I wear my holos and other special RNP, I could layer them over the gel and use a RNP top coat, but I often want them to last even longer.  So I sandwich the RNP between gel layers.  Also, I should note that I can't wear RNP by itself.  I have tried every combination of base, color and top coat I possibly can, but it always chips within 24 hours.  I am simply too rough on my hands.  SOG has been a God send for me. 

Here are the steps to doing a successful RNP sandwich.
1) Begin your gel mani as usual, following your regular prep and cure the base coat.  Be sure to cap the tips, allowing a bit of gel to overflow onto the underside of nail as I show in this post.   
2) If you're using a semi-sheer RNP that needs undies, apply a coordinating gel color and cure.  If your RNP is opaque, you can skip this step.
3) Apply your gel top coat, cure as usual, and remove the tacky layer.
4) Apply your RNP as you usually would, allowing each coat to dry before adding the next.  Cap the tips, but be careful to leave a bit of the gel showing on the underside of the nail where you allowed it to overflow when you applied your base.  Having the gel that extends past the RNP on the underside of the tip gives the top coat something to grab. 
5) Finish with a RNP fast dry top coat if desired to protect your color until it has time to dry completely.  I usually wait at least 4 hours before continuing to step 5.
6) Give your nails a quick scrub with a nail brush and an oil cutting soap without moisturizers to remove any oil that may have come in contact with your nails while your RNP was drying.
7) Swipe the nails with isopropyl alcohol or dehydrating prep (as you would before beginning your SOG mani). 
8) Apply two coats of gel top coat, curing each as directed.  Be sure to cap the tips and wrap the top coat as you did the base in step 1 so that it extends past the RNP layer and completely encapsulates the RNP in gel. 
9) Remove the tacky layer, moisturize with cuticle oil, and you're done. 

This is the same gel mani pictured above (OPI GelColor Bubble Bath), but I have added two coats of Color Club Halo Hues Cloud Nine and topped it with a coat of Gelish Top It Off.  Sadly, my photography skills didn't capture it in all it's glory.  However, you can clearly see that the SOG top coat didn't hurt the holo effect.  Another added bonus: if you wear holo polishes, you know they often don't last long.  Sandwiching a holo is the perfect solution.  And the gel hides any imperfections that holos tend to accentuate. You also don't need an aqua base when using SOG. 

3) You can use those RNPs for nail art either on top of a SOG mani or sandwiched between gel layers.  I use RNP for stamping nail art as well as dotting and striping.  Actually, I have found that you can't really stamp with SOG polish.  If you can get it to transfer, it doesn't give crisp lines.  I have a number of stamping polishes, but I also found that most of my RNP stash will stamp. 

4) If none of the uses above appeal to you, then there's always one more way to use RNP.  Pedicures.  Though I do tend to use SOG on my toes as well.  ;)

As you can see, there are many ways to combine RNP with SOG.  You can use it to spice up a boring work appropriate SOG mani (or to hide a non-work appropriate SOG mani).  You can sandwich RNP between layers of gel for lasting wear.  And you can use RNP for nail art on SOG manis.  So if you're already using SOG, break out your old RNP stash and use those babies!  Or grab that new RNP that caught your eye at the drug store but you passed up because you only wear gel.  And if you're avoiding SOG due to one of the reasons I mentioned at the beginning of this post, I hope I have helped you put your fears aside.

~Michelle
Read more ...

Tuesday, December 3, 2013

An Experiment: Can You Stamp With Gel Polish?

Purchased by Me

Hello lovely readers.  I'm going to do something a little different for today's post.  One of the questions I am asked most frequently is "Can you stamp with soak off gel polish?"  The answer is a little bit tricky.  Yes, you can combine stamping nail art and soak off gel polish, but can you use soak off gel polish as stamping polish?  THAT is the question I get most.  I could simply tell you the answer, but where is the fun in that?  Instead, let's do a little experimenting.  :)

A quick google search led me to a few videos of people stamping with Soak Off Gel.  Specifically with Shellac.  Well, I'm not really a Shellac fan as I prefer LED cure.  And since many of you also use LED brands, I decided to test out a few for stamping.

Gelish is a common brand among my readers, so I chose a highly pigmented Gelish color for my first test: Gelish My Favorite Accessory (note: pictures are not color accurate...close, but not exact).

The first problem I ran across is getting a clean scrape.  Because it doesn't dry on it's own, gel polish tends to smear instead of scraping cleanly.
Does soak off gel work for stamping

If you are accustomed to stamping with stamping polish or traditional lacquer, you know that a smear like this often won't transfer to the stamper.  Unfortunately, that is not the case with SOG.

Assuming you do get a clean scrape, you run into another issue caused by the fact that gel doesn't dry on it's own.  It tends to bead up on the stamper.  See how the lines in the image below are thin and the gel pools in places?

Let's look at the same image using Mundo de Unas stamping polish.  You can see the image on the stamper is much bolder and more defined.

Moving on, I transferred the SOG image I picked up above to a swatch stick that has been prepared with two coats of Ink Glacier and top coated with the tacky layer removed.  In my experience with sog nail art, removing the tacky layer helps keep the gel from spreading as much.  I rolled the image onto the swatch stick with a super light touch - lighter than is required for RNP or stamping polish.  Yet the image is still weak and fuzzy.
Can you stamp with gel polish

Let's compare this to the same image using the Mundo de Unas stamping polish.  (excuse the spotty transfer - I let it dry a bit too long while taking pictures of the image on the stamper)

Now, let's look that the two swatches side by side.  At this point, I have cured the Gelish stamping swatch to prevent further spreading of the image.
can you stamp with gel polish 

The conclusion:  Stamping with Gelish is a fail.  But wait, we aren't done yet.  I completed the same test with one of the thickest, most pigmented polishes I own: Ink Glacier.  My theory was that a more pigmented polish might hold it's shape better.  Here's what happened:

As you can see in the picture below, Glacier does hold it's shape a bit better on the stamper, but there is still pooling from the lack of drying.

For comparison, here's the same image with Mundo de Unas White.

And here's what happened when I transferred the Ink Glacier image to a swatch stick prepared with two coats of Couture Little Black Dress and top coated with the tacky layer removed.  Again, I used the lightest touch humanly possible and rolled the image onto the swatch.  This one smeared worse than the Gelish!

Here's the Mundo de Unas swatch for comparison.  Again, excuse the spotty transfer and the cotton fiber.

Let's look at these two side by side.  Like before, the SOG stamp in this photo has been cured to prevent further spreading.
 

So, can you stamp with gel polish?  I think the answer is pretty clear.  While you can get the image to transfer to the stamper (sort of), and you might be able to get it to transfer to the nail (somewhat), the final product is not something I would want to wear on my nails for a week or two.

How do you combine stamping with gel polish to achieve a flawless manicure that lasts for weeks?  It's unbelievably simple.
  1. Do a complete gel manicure, including removing the tacky layer.  Do not oil.
  2. Break out your favorite stamping plate, stamper and stamping polish.
  3. Stamp the image directly onto the finished SOG mani. 
  4. Allow the stamp to dry for about 5 minutes.
  5. Carefully apply another layer of top coat, being careful to cover the entire stamp.  Cure.
  6. Apply another layer of top coat just to be certain you covered the stamp completely. 
  7. Remove the tacky layer with cleanser or 90% isopropyl alcohol.
  8. Remove the overstamp with polish remover (cleanup doesn't get any easier than this).  I actually swipe over the entire nail with a cotton ball soaked in acetone.  This quick swipe will not hurt your gel mani.  But if you want to play it safe, non-acetone remover will also work.
  9. Remember to moisturize!

Note:  There are two other ways to combine stamping with gel.
  1. You can remove the tacky layer from the final color coat before top coating and stamp directly on this color coat.  This will make soak off a bit faster than stamping over the top coat.
  2. Instead of using a gel top coat in steps 5 and 6, you can use a RNP top coat and clean up as if you were stamping over RNP.  This gives you the option of changing your stamp without soaking off your gel manicure.  Simply remove the stamp with non-acetone remover and stamp again.

There you have it.  I hope you've enjoyed by little experiment.  :)

~Michelle


Read more ...

Sunday, December 1, 2013

ArtsyFartsy Crafts Glitter Review: When In Doubt, Add Glitter! (pic heavy)

Purchased by Me Affiliate Links

Hello lovely readers.  I hope everyone had a wonderful Thanksgiving.  I spent my down time swatching and photographing some of my glitters from ArtsyFartsy Crafts.  I have a lot of glitter.  A LOT of glitter.  At last count (before I stopped counting many orders ago), I was up to 200 different glitters of varying shapes and sizes.  Over half of them are from ArstyFarsty Crafts.  When it comes to glitter for SOG, AFC is the best I have found.  The owner, Sandy, also uses Soak Off Gel, so she knows what to put in a good mix.  It's pretty much guaranteed that I am going to buy the new mixes every time they are released.

Update:  Sandy just sent me a message that she is extending her Black Friday sale until December 5th, 2013!  Use code CYBERMONDAY for 20% off.  :)

With that said, I'm going to do things a little backward today.  I'm going to start this post with my final mani and work backward to a sampling of glitter swatches.  First things first, you may notice I'm rocking some serious shorties.  I broke a nail last week and had to file them all down even.  Short is not for me, so hopefully they'll grow quickly.  Anyway, here's what I'm wearing.  As usual, details to follow.
Artsy Fartsy Crafts Glitter Manicure

I'm completely in love with this mani.  It reminds me of the velvet and foil art pieces you could find in just about every truck stop in the 80s.  You know...the ones that were usually of either Unicorns or Elvis (I just dated myself, didn't I?).

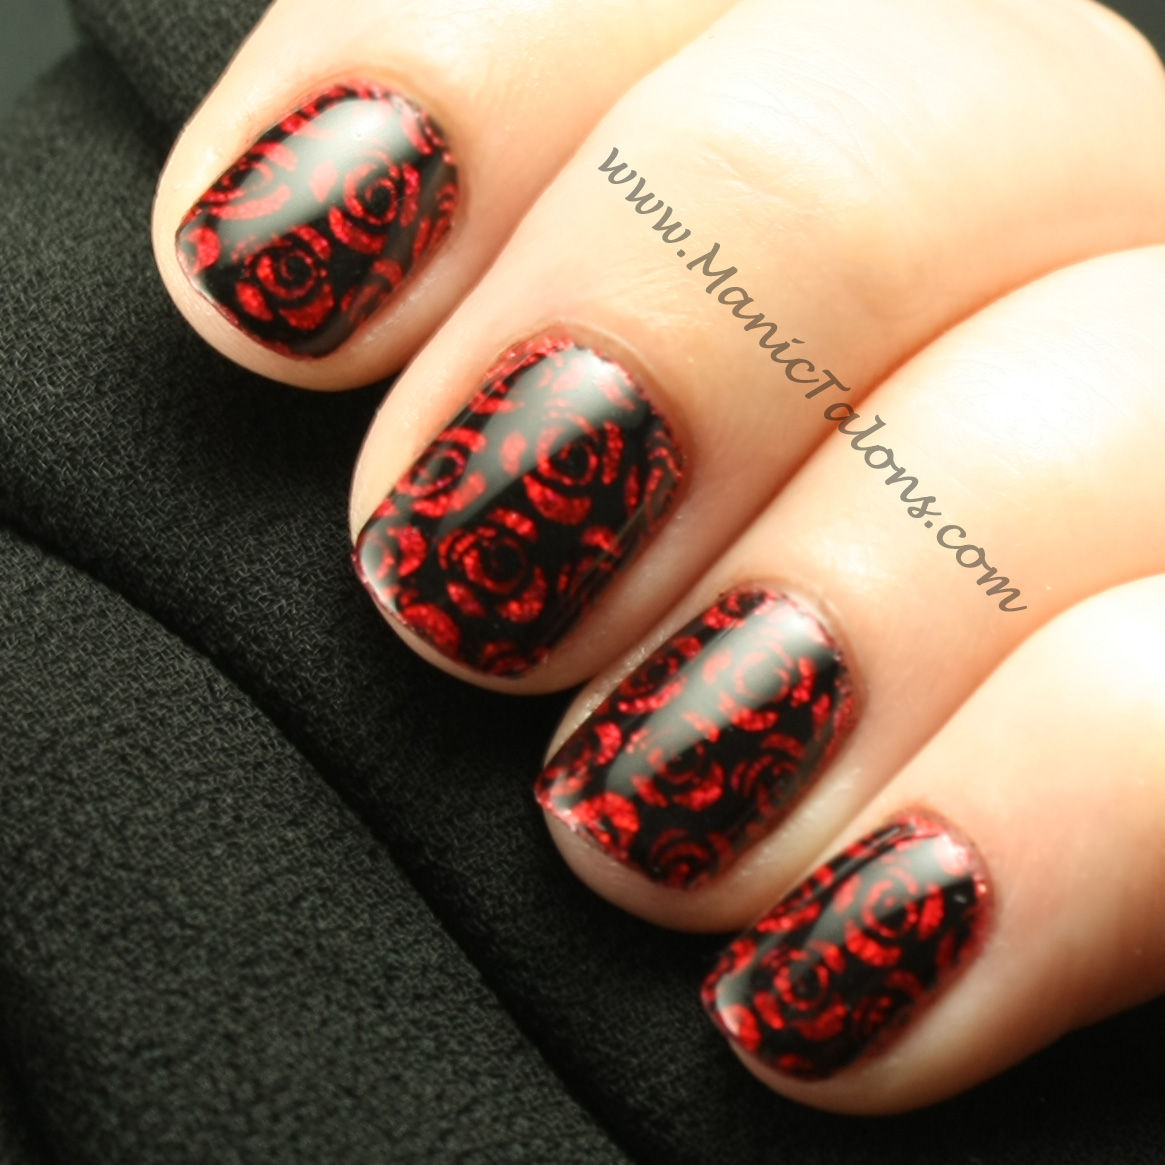
Rather than break it down as I usually do, let's break it down in pictures.  Under this gorgeous reverse rose stamp from MoYou London's Pro Collection 04 plate, is several layers of SOG and glitter.

The bottom layer is IBD Just Gel Entralled.  This is my go-to shimmery red.  Of course, my light box killed the shimmer, but if you look closely you can still see it, I think.
IBD Just Gel Entralled Swatch

I then scrubbed AFC Ultrafine Red Holographic glitter into the tacky layer of the last color coat of Entralled.  Scrubbing is a simple way to add glitter to a SOG mani.  You simply cure the last coat before the glitter, then use a brush to press the glitter into the tacky layer.  Press the glitter flat on the nail with a plastic bag for a linear effect, or simply pat it on without pressing it flat for a scattered effect.  Blow away any excess and apply your top coat over the glitter to seal it in.  You may want to keep a separate bottle of top coat for glitter, but I simply wipe the brush before putting it back in the bottle to prevent contaminating my top coat bottle with glitter. (Note: These next photos were taken under my ottlite as the light box killed the holo effect)
Red Holographic Glitter

I love Red Holo, but for this mani I wanted something a little deeper, so I added a layer of Gelish Stand Out on top.  Stand Out is a gorgeous, deep red jelly.  This is the resulting ruby red base for my stamped roses.  I added another coat of standout over the stamp in the final mani as well to create a multi-layer jelly sandwich.

I swatched one more glitter on my nails before turning to my swatch sticks for the others I'll show you in a few moments.  This is Autumn Sunset, which is an awesome mix of varying sizes of glitter in fall tones.

I scrubbed Autumn Sunset into the tacky layer of the final color coat of a base of IBD Just Gel Indian Sari.
IBD Just Gel Indian Sari Swatch

Let's keep going with the mixes.  I have a few mixes swatched to show you.  For each of the following, I scrubbed the glitter into a matching base color.

This gorgeous green holo mix is called Poison Ivy.  The holo effect from this one is much stronger than shows in this picture.  I'll show all of the holos in a quick video at the end of this post.  Swatched over Couture Aloe Very.

This next holo mix is a personal favorite.  On the AFC website, it is listed as Red-dy To Go, but my bag came labeled as "Michelle's Red-dy to Pop" as I was only a few weeks away from delivering my youngest son.  :)  Swatched over IBD Just Gel Entralled.

This next mix is not a holo, but is gorgeous none the less.  This one is called Watermelon and is a pink iridescent glitter with larger dark green hexes and black diamonds.  You can also get just the diamonds.  This one is swatched over a base of IBD Just Gel All Heart.

Red, White & Blue is another chunky glitter mix, but this one uses squares, varying sizes of hexes, and strips.  I don't know if you can really see it in the picture, but the base is an ultrafine iridescent white glitter.  Very festive.  Swatched over Ink Glacier.

If you're looking for something a little less bold, check out one of the finer mixes like Sea Urchin.  Iridescent ultrafine glitter with larger aqua and blue hexes, plus a few strips thrown in for good measure.  Swatched over a base of Ink Glacier.

These next mixes are a bit unique as they include glow powder.  Yes, they glow in the dark!  First up, Pink Glow-in-the-dark Glitter Mix.  Swatched over IBD Just Gel I'm No Damsel.
Glow in the dark glitter

If you're feeling blue, try Blue Glow-in-the-dark Glitter Mix.  Swatched over LeChat Angel From Above.
Glow-in-the-dark Glitter

Don't let this Violet Glow-in-the-dark Glitter Mix fool you, it looks white but it glows Violet.  I'll prove it in a minute. ;) Swatched over Ink Glacier.
Glow in the dark glitter

The final glowing mix I have swatched for you is called Northern Lights.  It appears to be sold out, but Sandy is constantly coming up with new mixes that are equally as gorgeous.
Glow in the Dark Glitter

Want to see them in action?  I thought you might.  Top is in full light, bottom is in the dark.  From left to right, Blue Glow-in-the-dark Mix, Northern Lights, Pink Glow-in-the-dark Mix, Violet Glow-in-the-dark mix. 
Glow in the dark glitter
(Note: I forgot to shake Violet before I scrubbed it, and the glow dust tends to settled to the bottom.  When shaken before scrubbing, it glows brighter.  However, it is not as bright as the others.  You can check out the other glowing glitters here.  I have and love them all!  They glow all night.  Seriously, all night.  The first time I wore one, it freaked me out to wake up to feed the baby at 3:00 am and see my nails still glowing.)

Want to see some more Ultrafine holos?  I think I've mentioned before that I'm a complete sucker for holos.  I have the entire set of ultrafine holos from Artsy Fartsy Crafts and was tempted to show them all, but I decided to let my son pick his favorites to show you instead.  I swatched all of these with a scattered look, but they will be much more linear if you press the glitter flat on the nail.

(swatched over Couture Gilded)

(swatched over Gelish My Favorite Accessory)

(Swatched over Couture Little Black Dress)

(swatched over Ink Blue Ice)

Ultrafine Fuchsia Holo*
(Swatched over IBD Just Gel All Heart)
*This one is currently not listed on her website for purchase.  However, she is in the middle of switching her inventory over to her new website so she'll have much more listed in a few weeks.

(Swatched over IBD Just Gel Happliy Brighter After)

(Swatched over Orly Mirror Mirror)

Let's take a blurred look at the Silver.  The picture above does not do it justice!

Want to see the holos in action?  Let's start with my final mani from the beginning of this post.  Excuse how horrible my skin looks.  I had to sacrifice my complexion for the sake of my nails in this video.  ;)


And now for all of the holos and holo mixes.


Whew!  That's all for today.  Check out the Artsy Fartsy Crafts store for a ton of other glitter options, ranging from fine to chunky and everywhere in between!

~Michelle
Read more ...

Friday, November 22, 2013

Nimbus Nail Art using Couture Soak Off Gel

Purchased by Me

Hello lovely readers.  If you follow The Nailasaurus, you are likely familiar with her awesome nail art technique called Nimbus Nail Art.  If you don't follow her, now is a great time to start!  Her creativity is amazing.  Her Nimbus style has spread like wildfire throughout the DIY nail art community, and it's easy to see why.  I was asked by a reader if this style can be done with soak off gel.  I honestly didn't have an answer, but I'm always up for a challenge so I came home and tried it out.  Great news!  With a slight, gel-friendly modification, the Nimbus CAN be done with soak off gel! And I'm going to show you how, but first you should follow that link above and review her tutorial as much of it is the same with gel.  It should open in a new window, so you can easily come back to see the modified technique.

 
Ok, now that you've read The Nailasaurus's tutorial, here's all you need to know to modify it for gel. 

What you'll need (in addition to your usual SOG supplies:
  • White soak off gel or other light colored SOG
  • A paint pallet, piece of foil, or other surface for mixing
  • Cotton swabs
  • Isopropyl Alcohol (or your gel cleanser)
  • A pair of tweezers
  • Your chosen colors
First things first, apply your base color.  I did three coats of Ooh La La French as my base.  Do not top coat yet.
Excuse my dry skin and cuticles.  I didn't moisturize before taking the picture to avoid causing lifting from the oils.

Now, place a generous drop of your first color on your pallet.  I'm using Couture Spa Day.

Add a drop or two of alcohol.  I added two for this size drop of polish, but start with one and see if you need more.  You can always add more alcohol, but you can't take it out. ;)

Choose a cotton swab with tight fibers to reduce the amount of cotton that might transfer to your nails.  Dip the cotton swab in alcohol so it is nice and wet, then mix the drop of gel with the drop of alcohol on your pallet.  It should become watery, almost like watercolors.

Using the cotton swab, dab a few times on the side of your pallet.  As the alcohol evaporates, it should leave a nice halo (or nimbus).  Add more polish or alcohol if needed to reach the right consistency.

Once you've reached the consistency you want, dab the color onto your nails.  Note, you'll want to work fast as the alcohol will evaporate quickly.  Dab all of the nails on one hand (or four fingers if you use a four finger lamp).  Be sure to clean up any excess that gets on your skin, and check for cotton fibers.  If you see any, remove them with your tweezers.  Then cure as usual.

Repeat this process with your other colors.  I chose to do only two colors for this tutorial.  My second color is Couture Off The Shoulder.  Once you have completed and cured the additional colors, finish off with your top coat and you're done. Unless, of course, you're like me and can't resist the urge to stamp almost every mani!  This was the perfect base for this reverse image from MoYou London XL Pro Collection 13.  I stamped with Konad Black. 


If you try this modified version of the Nimbus for soak off gel, please share your results with me by linking to your picture in the comments here, tagging me on instagram or pinterest, or sharing to my facebook page.  I would love to see it!  And a huge thank you to The Nailasaurus for this incredibly fun and easy nail art technique. 

~Michelle
Read more ...