Showing posts with label Review. Show all posts

Wednesday, September 10, 2014

DIY Hard Nails: Wear Test and Review

Press Sample Affiliate Links

Hello Loves!  I have a new product review for you today - DIY Hard Nails (pronounced Die Hard Nails)!  Don't let the "Hard" in the name mislead you.  These little beauties are soak off gel polish.  :)

DIY Hard Nails Gel Polish Review

DIY Hard Nails is a new brand of professional grade soak off gel polish marketed to the do it yourself gel user.  They come in a variety of colors and finishes and are free of Formaldehyde, Toluene, DBP, Lead, and Mercury.  You may have seen them recently featured on Chickettes.  Well, I had the opportunity to put them to the test.  :)  I received five of the thermal polishes and the base and top coat to try out.  I have two swatches to show you today and will show you the others soon.  I wanted to keep this post shorter since y'all know I tend to talk a lot in my review posts.  lol

For this review, I completed a two week wear testing with Coca Cola Float and the DIY Hard Nails base and top gels.  Let's take a look at Coca Cola Float, shall we?  Coca Cola Float is a beautiful thermal gel that ranges from a reddish brown when cold to a peachy sheer when warm with silver glitter scattered throughout.
 DIY Hard Nails Coca Cola Float Swatch
DIY Hard Nails Coca Cola Float Swatch
As I was completing the wear test on this one, I looked down and saw something interesting happening on my thumb.  I saw not two, but three colors!  I quickly snapped a picture.  Excuse the waterlogged skin.  I had just finished washing dishes.  This happened on all of my nails throughout the test, but this was the only time I was close enough to my camera to capture it.
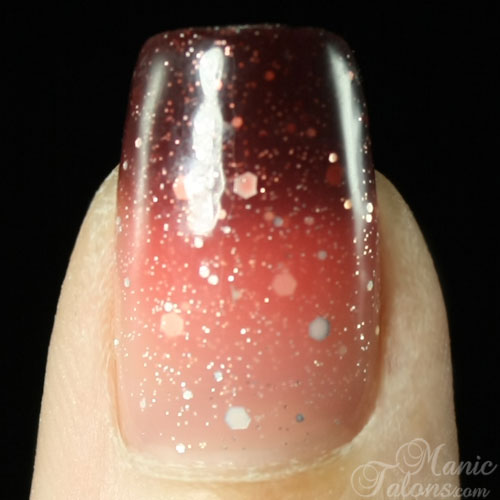
DIY Hard Nails Coca Cola Float Tricolor Effect

How so they apply?  These gels are of average consistency - not too thick and not to thin.  I found application to be quite nice.  They self level well and I didn't experience any issues with shrinking.  The glitter releases easily from the brush too.  I did have to place a few of the larger glitters, but that's common with any scattered glitter polish like these.

Let's talk about the base and top for a second.  The base gel is very thin, which I find I really like.  It was easy to apply and this bottle will last forever.  The top coat, on the other hand, is quite thick.  It applies and levels well and is surprisingly nice over stamping.  I found this one sealed my stamps completely in one coat.  I usually have to double up my top coat when I stamp, so I'm quite pleased with this.  And the shine is quite nice, as you can see in the swatch photos.

So, how do they wear?  Very, very well with the DIY Hard Nails base and top.  I haven't tested them with other brands yet, but they are advertised as playing well with other brands so I'll test that soon.  Before I show you the two week wear test photo, can we have a moment of silence for my broken pinkie nail?  lol  One week into the test, I dropped my phone and tried to catch it with the side of my way too long nail.  I knew I should have filed them down before starting the test.  :(  It snapped off clean.

I'm quite certain at this length it would have broken regardless of what brand of gel I was using, so I don't feel this is a reflection of the DIY Hard Nails.  My nails felt quite strong while wearing it.  With that said, I opted not to fix the broken nail or repair the chip.  I wanted to see if it would continue to chip over the next week.  I'm happy to report that it did not.  The gel looks exactly like it did on my pinkie the day the nail broke (I didn't get a good pic, but there's one on my IG account that was taken that day).  After two weeks, the DIY Hard Nails was still going strong with very little to no tip wear.  It didn't even start to lift on the broken nail.  I'm impressed.
DIY Hard Nails Two Week Wear Test Results

Ready to talk about removal?  I filed down my length a bit, buffed to remove the shine, then used my Nail Mates removal caps to soak off.  Soak off did take a bit longer than some of my other brands, but overall wasn't too bad.  After 10 minutes, the gel had softened but hadn't started to flake.  I put the caps back on for another 10 minutes and was able to push most of the gel off with my thumb nail.  After another 5 minutes, my nails were clean.  So I'm calling this one a 25-30 minute soak with the DIY Hard Nails Top and Base.
DIY Hard Nails Review

Overall, I'm quite pleased with the brand.  It cures nicely in my Couture lamp, wears well, and removal isn't too bad.  And you know I love my thermals.  Want to see another swatch?  Pink Galaxy is another thermal gel with silver glitter.  Pink Galaxy shifts from a deep purple when cold to a bright pink when warm.  I didn't wear this one long enough to see if it takes on a tricolor effect, but I'll update when I wear it if it does.
DIY Hard Nails Pink Galaxy Swatch
 DIY Hard Nails Pink Galaxy Swatch

Ok, so those of you who follow my blog regularly and probably looking at these swatches and noticing that they look very familiar.  The finish is very similar to the Bundle Monster Beneath It All Collection that I featured a few weeks back.  DIY Hard Nails has a few similar colors to that collection in their line.  If you're like me, you're probably wondering if they are dupes.  You may even be wondering if they are the same gels in different packaging.  I don't know if the colors are exact dupes since I don't have the gels that are similar from the DIY Hard Nail line, but I can tell you this - the formula is WAY different.  The Bundle Monster gels are much thicker than the DIY Hard Nails gels and the glitter is denser.

I snapped photos of one of the BMC gels and one of the DIY Hard Nails as I pulled the brush out of the bottle.  You can see that the DIY Hard Nails is thinner (though not too thin) than the BMC.  Please note that these are two completely different colors (DIY is the pink to purple shift, BMC is a blue to purple shift).  When the brush is pulled straight out of the bottle, the BMC gel is thick to the point of almost stringy.  The DIY Hard Nails is what I consider more of a normal consistency.  Between the two, I personally found the DIY Hard Nails easier to apply but I love them both.
BMC Gel Polish and DIY Hard Nails Comparison

I also mentioned the similar colors to Natashia from DIY Hard Nails when she contacted me to try them.  Thankfully she wasn't offended at all.  The formula is different for sure (as shown above), and Natashia pointed out that DIY Hard Nails comes with a 100% satisfaction guarantee.  :)  The similarities basically come down to this - there are only so many thermal pigments out there, so crossover between brands is bound to happen.  I have all of the BMC Thermals to date and the new DIY Hard Nails thermals, and there appear to only be three that are similar as best I can tell.  ;)

So, there you have it - my full and overly wordy review of DIY Hard Nails!  lol  As always, feel free to hit me with any questions in the comments.  :)  And stay tuned for more DIY swatches in the near future.  In the mean time, you can see other color offerings with gorgeous swatches by Andrea from Chickettes in the DIY Hard Nails Amazon listing (the only place to buy at the moment).

Don't forget to follow DIY Hard Nails on Facebook, Twitter and Pinterest for updates and new releases!

~Michelle

*The DIY Hard Nails gel polishes featured in this post were provided by DIY Hard Nails for my honest review.  This post uses Amazon Affiliate links.  Purchases through these links generate commissions that help fund this site.
Read more ...

Monday, September 1, 2014

Bio Seaweed Gel No Wipe Top Coat and Base-1 Review

Press Sample


Hello Loves.  I have another Bio Seaweed Gel wear test to share with you today, along with a swatch of Pina Colada from the 3 step line.  This time, I tested the Bio Seaweed Gel No Wipe Top Coat and the No Sanding Base-1.  This base is designed for weak or damaged nails.

Shall we start with the swatch of Pina Colada?  Pina Colada is from the 3-step line.  Unlike the Unity line, the 3-step line does require a base a top coat.  Pina Colada is a dense glitter polish with various sizes of champagne and gold holographic glitter in a clear base.  I found this one to be opaque in 2-3 coats, which is nice for a glitter!
Bio Seaweed Gel Pina Colada Swatch

Bio Seaweed Gel Pina Colada Swatch

Let's talk about the No Wipe Top Coat.  This product really impressed me!  In my experience, no wipe gels tends to lack that mirror shine that I love so much about gel polish top coats.  That is not the case with this one.  The BSG No Wipe Top Coat provided tons of shine that didn't dull out over the course of normal wear.  The top coat itself is not too thick or thin, applies easily and levels well.  Want to see it?  This is one coat over BSG Unity Gel in Celebration
Bio Seaweed Gel No Wipe Top Coat Shine Results
Look at the reflection of the light on the index finger.  You can see the swirl of the compact florescent bulb and the shade to the lamp!  That's some serious shine.  The only down side is that it does require a 1 minute cure in LED, but that's a fair trade in my opinion for not having to deal with the tacky layer.  It is especially huge for me since I go through more polish changes than the average person and alcohol is very drying to my skin.

Let's talk about the No Sanding Base-1.  This base coat is specifically designed for weak or damaged nails.  While my nails are neither weak or damaged, I think I was able to give it a fair review since my nails have been "buffed" to remove the shine for previous wear tests.  The base is average thickness and easy to apply.  There's not much more to say about application.

I gave it my standard 2 week wear test under both Pina Colada and Celebration (one from the 3-step line and one from the Unity line).  After 2 weeks, it was still perfect with almost no tip wear at all.  A+ for wear results for the base.  You may notice some dull spots on my index and middle nails.  Sadly, those are my fault.  I scuffed them against a buffing block that I had in my purse and dulled the finish.  :(
Bio Seaweed Gel No Sanding Base-1 Wear Results

So, how about removal?  This is where the No Sanding Base-1 let me down.  For a base designed for weak or damaged nails, I was expecting a gentle and easy removal.  That's not what I experienced at all.  After breaking the seal from the top coat, I soaked in pure acetone for 10 minutes.  This is what I saw when I removed the wraps.  The No Wipe Top Coat soaked off very well but the color coats and base coat are still completely intact.
Bio Seaweed Gel No Sanding Base-1 Soak Off - 10 Minutes

After soaking for another 10 minutes, the gel had softened but was not flaking off at all.  The following photo is the result after gently scraping the softened gel off of my nails.  As you can see, most of the color came off but the base is still there.
Bio Seaweed Gel No Sanding Base-1 Soak Off - 20 Minutes

I soaked for another 10 minutes (30 minutes total at this point) and was able to push the rest of the gel off of my nails with the exception of one spot on my ring finger (the lighter spot toward the center of the tip of the nail).  I ended up having to buff the gel off of that spot.
Bio Seaweed Gel No Sanding Base-1 Soak Off - 30 Minutes

To be completely honest, I'm a bit disappointed in the removal of this base.  There is way too much risk for additional damage when you have to scrape and buff to remove the product from the nail.  If my nails were weak or damaged prior to application, I can only imagine what they would have looked like after removal.

Final thoughts?  I adore the No Wipe Top Coat and will keep it in my gel polish arsenal.  This stuff rocks!  As for the No Sanding Base-1 for weak or damaged nails...I'm going to have to pass.  I honestly feel like the regular No Sanding Base that I reviewed here was easier to remove.  The colors, however, are quite beautiful and I adore Pina Colada and it's opaque glitter coverage.

That's all for today!

~Michelle

*The products featured in this post were provided by Bio Seaweed Gel for my honest review.
Read more ...

Monday, July 21, 2014

Pueen Encore Collection - Swatches and Review (pic heavy)

Affiliate Links Purchased by Me

Pueen Encore Collection Review

Hello Loves!  As you know, I'm a huge fan of Pueen stamping plates.  I have all of their collections, so it was just natural for me to get the new Encore Collection as well.  I left several of the photos in this post as very large files so that you can click on them and expand them to see the detail.  I apologize if the large photos slow down the load time of the post.

Let's start with a mani, shall we?  I started with a base of FingerPaints Gel Polish in Petite Bouquet.  Petite Bouquet is from the Spring collection and is limited edition, but I'm pretty sure my Sally Beauty Supply had them on clearance so if this is a color you like you might still be able to find it.  I then stamped with Sally Hansen Insta-Dri Grape Going and a portion of the image from SE01B.
Subtle Stamping Manicure with Pueen Encore Collection

Now onto the review.  The Encore Collection plates are different than any of the plates we have seen so far in that they are etched on both sides.  I really like this feature because it minimizes the space required to store them.  Not to mention the 8 designs compressed to 4 plates weighs half of what it would if they were only etched on one side.

The plates come in this cute accordion style holder.  Nevermind that the bow on mine is upside down, it's not a bad way to store them, I think.  The only down side I can see is that the pockets inside are a much thinner plastic than the vinyl sleeves Pueen has used in the past.
Pueen Encore Collection Case and Packaging

The actual plates come in vinyl sleeves.  This is where I have to question what the designers at Pueen were thinking.  As you can see, the sleeves have knockout style windows to expose the etched portion of the plate.  This is great in theory - it allows the sleeve to remain on the plate to protect your hands from the sharp edges. 
Pueen Encore Collection Packaging

Sadly, theory doesn't always translate to reality.  When I tried to remove the knockout window, I found that it wasn't cut very well and the vinyl started to stretch and rip.
Pueen Encore Collection Packaging

I was able to remove it carefully with scissors with only a little stretching, but then I encountered the next problem.  The plates are protected inside the vinyl cover by a blue film.
Pueen Encore Collection Packaging

I'm not sure how Pueen expected us to remove the film without destroying the vinyl sleeve.  As you can see, even after carefully removing the film, the sleeve is badly stretched.
Pueen Encore Collection Packaging

So, yeah, I'm calling the packaging on this one a fail.  As you may have noticed in the post preview picture, I ended up cutting the sleeves off of all of my plates.  They just aren't practical.  Even if they didn't stretch out of shape, I can see them collecting polish and limiting the direction you can scrape.

The great news is that the plates themselves are fabulous!  The designs are quite nice, though some elements are similar to those in the Buffet collection.  The back sides of the plates are less polished than the front, but it doesn't impact the images at all.  I only found one spot on one plate that gave me touch of trouble, but a second attempt with a different scrape direction cleared it right up.  Want to see closeups of the plates and my test stamps?  These are the photos I left a little large so you can click them to blow them up and see the details better.  The photos speak for themselves, so I'll shut up and let them.  ;)

Pueen SE01 A and B

Pueen SE01 A and B Test Stamps

Pueen SE02 A and B

Pueen SE02 A and B Test Stamps

Pueen SE03 A and B

Pueen SE03 A and B Test Stamps

Pueen SE04 A and B

Pueen SE04 A and B Test Stamps

I just realized that some of the test stamps are upside down.  Sorry about that!  But I think they still show how the images transfer so I'm going to leave them.

What do you think of the Pueen Encore Collection?  Do you need it in your stamping arsenal?

~Michelle

*This post uses Amazon Affiliate links.  Purchases through these links generate commissions that help fund this site.
All items featured in this post were purchased by me.
Read more ...

Wednesday, July 9, 2014

ASP Gel Polish Sizzlin' Summer Collection

Hello Loves!  I was poking around in Sally Beauty Supply the other day and the new ASP Gel Polish Sizzlin' Summer Collection caught my eye.  I couldn't resist picking it up to show you!
ASP Gel Polish Sizzlin Summer Collection Swatches

ASP Gel Polish is a brand that I haven't featured very much.  I have worn it in the past and like the brand, but the colors in their basic line just haven't wowed me.  This collection, on the other hand, is more my style.  The Sizzlin' Summer Collection consists of four summer shades: a blue, a purple, a coral, and a pink.

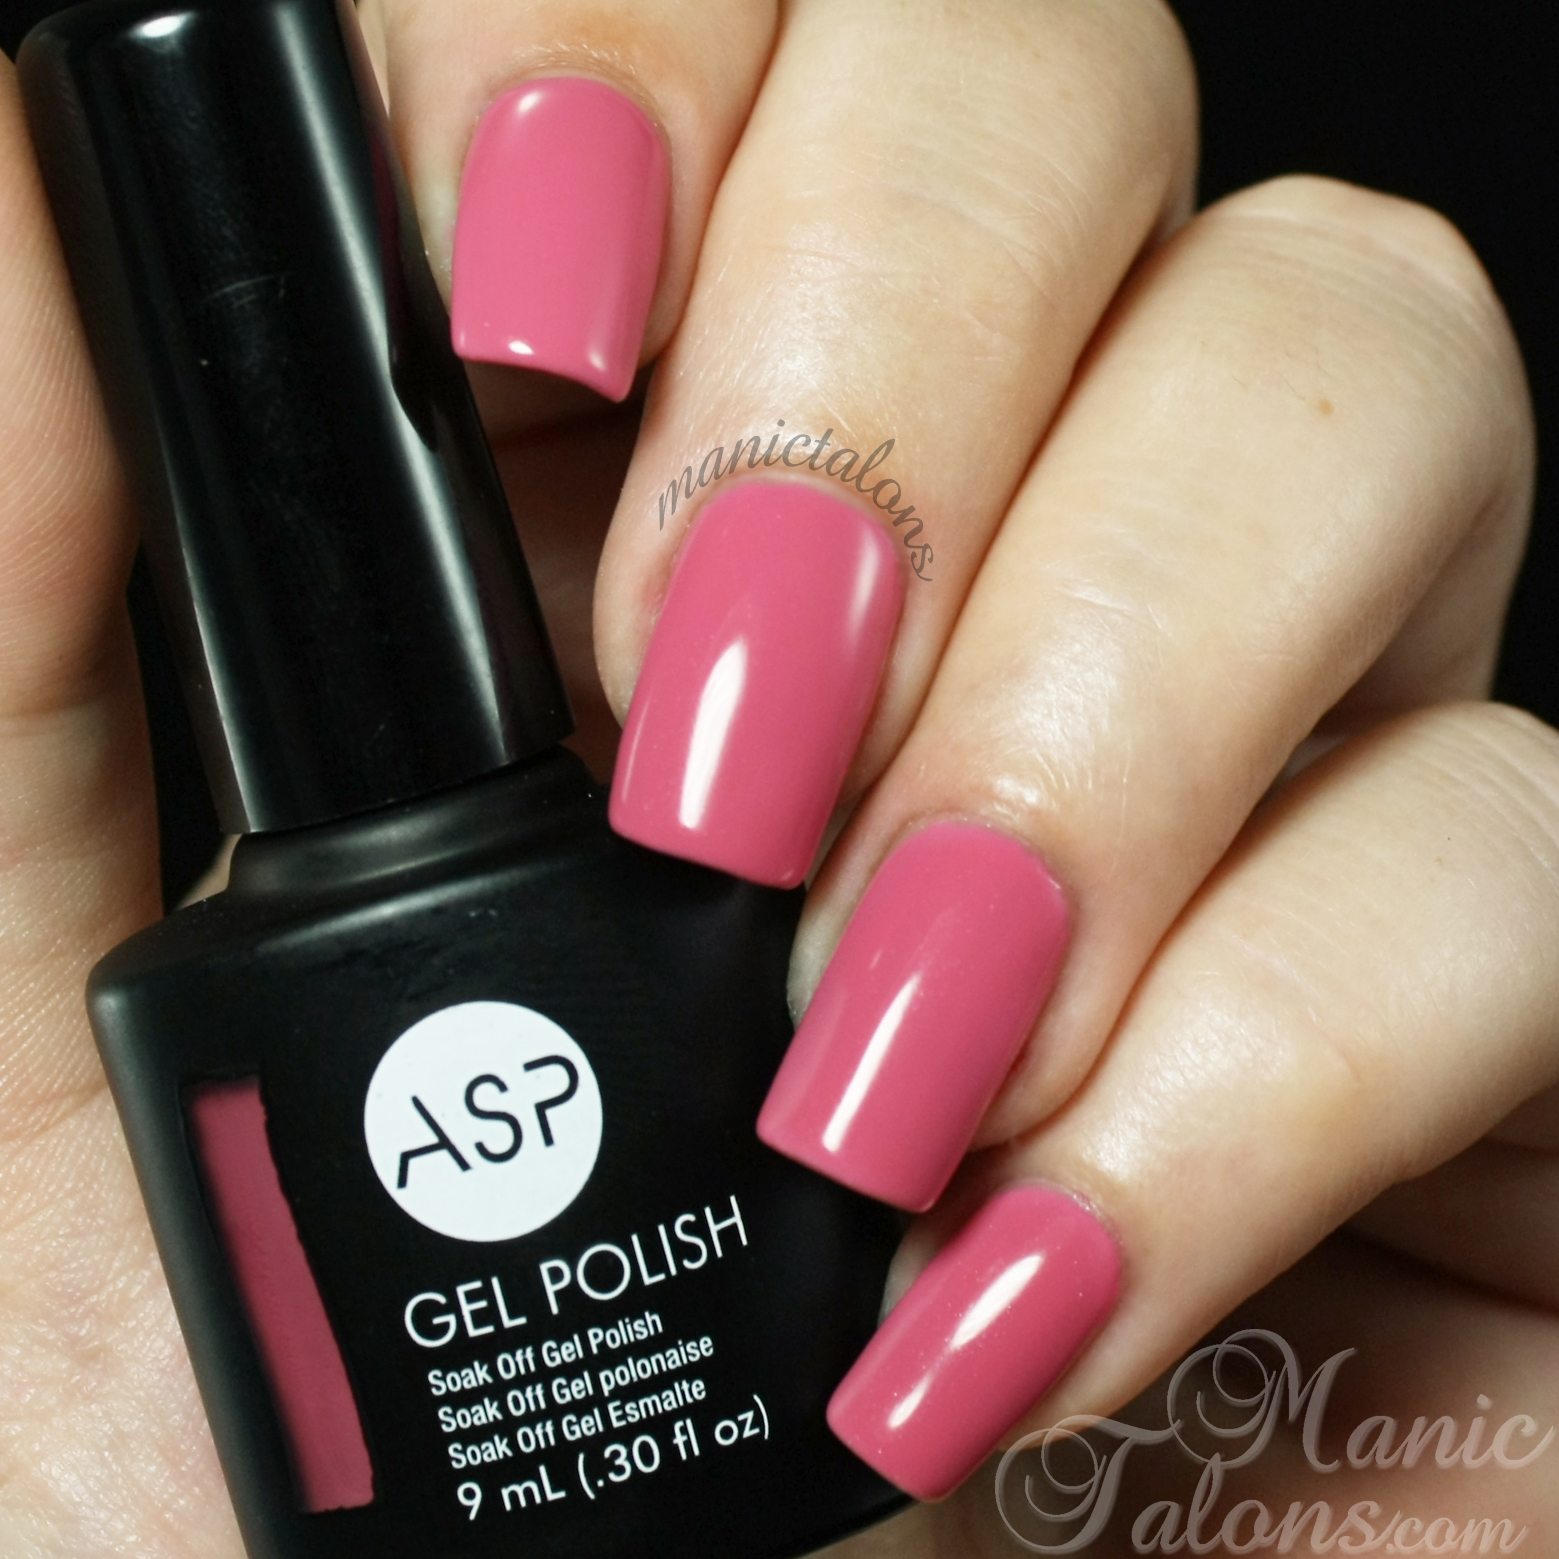
First up is Coral Cove.  The name is a bit misleading on this one.  I would consider it more of a muddy pink than a coral.  While it's not quite visible in the photo below, Coral Cove has a very subtle shimmer.  It shows most on the pinkie nail.  It applied nicely and is opaque in 2-3 coats.  I wanted this one to be a little brighter to go with the others in the collection, but it is a nice shade.
ASP Gel Polish Coral Cove Swatch

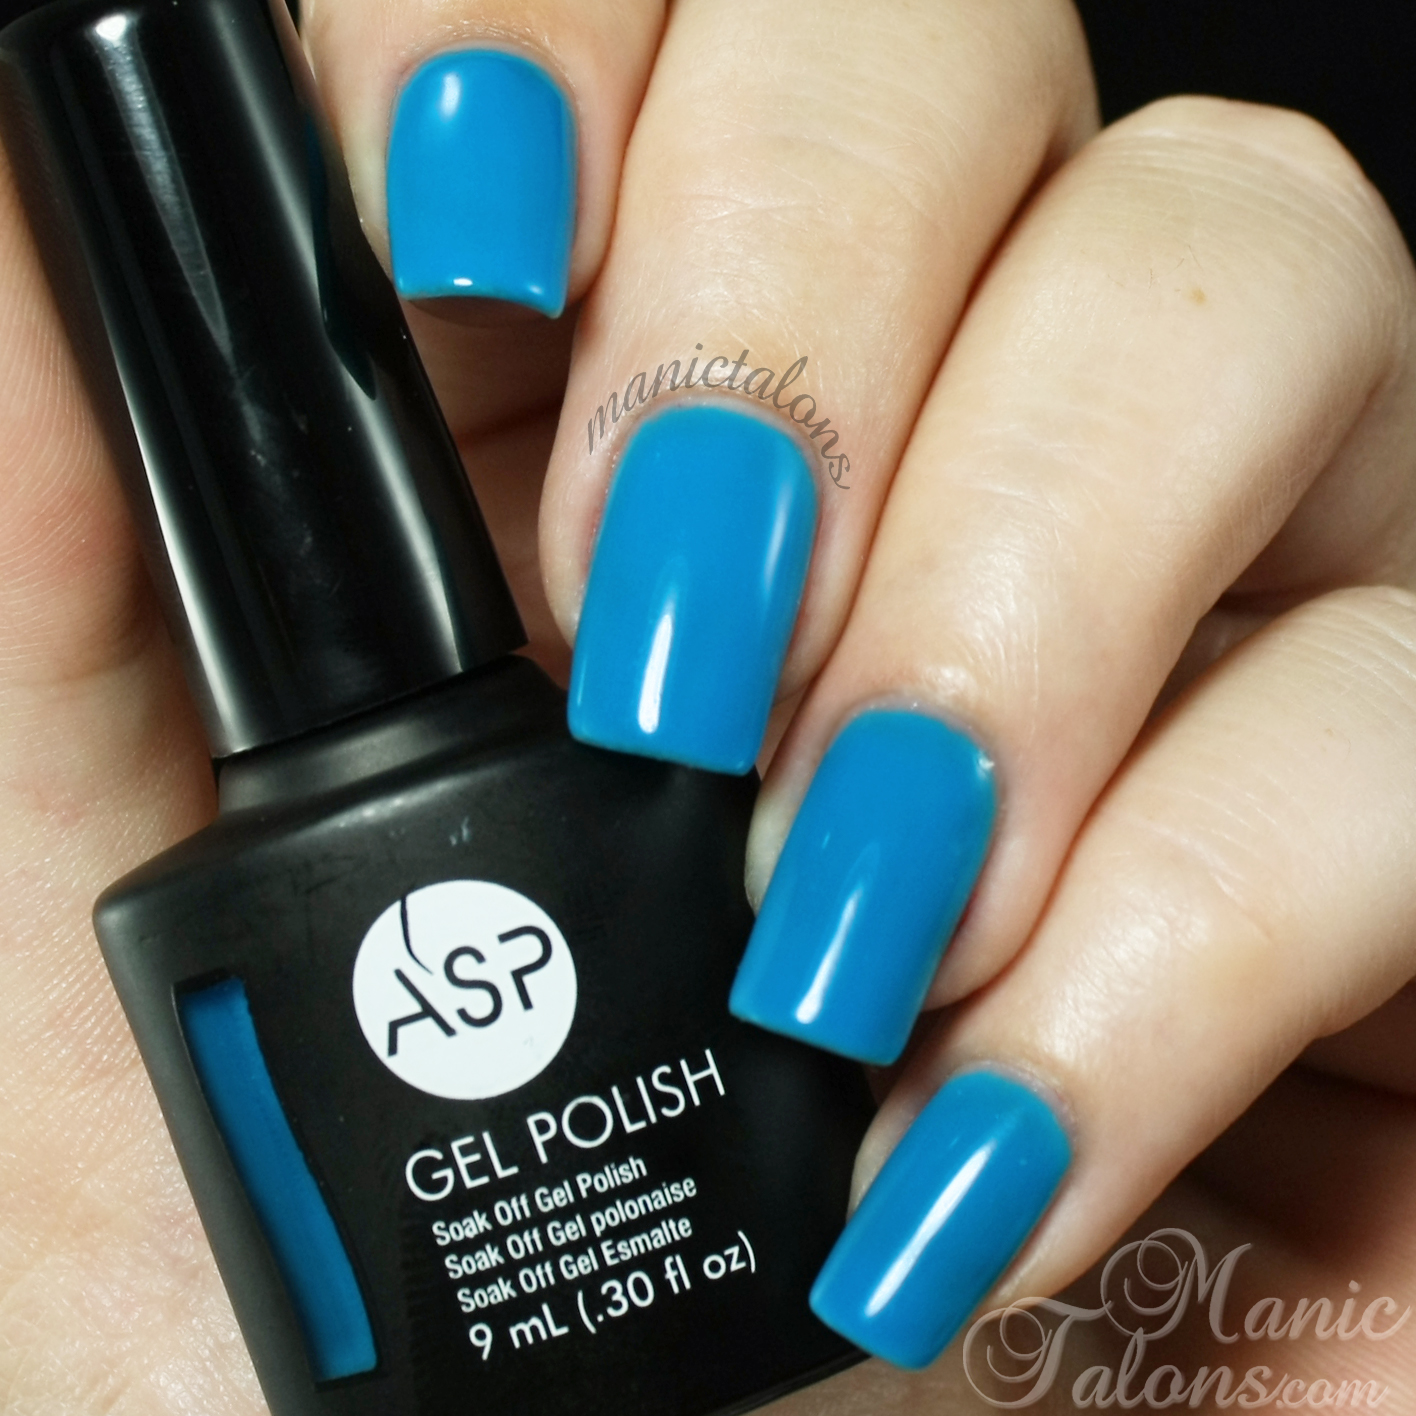
Alluring Azure is an incredible blue that instantly made me think of a swimming pool.  It has amazing depth for a pure cream.  Application was flawlessly smooth on this one.  It is opaque in two coats - two of my thin coats, which means it may be opaque in one for others.  Of course, I swatched three anyway.  This photo doesn't begin to do this color justice!  I seriously didn't want to take it off to swatch the others.
ASP Gel Polish Alluring Azure Swatch

Tangerine Burst is a very close second to Alluring Azure for being my favorite in this collection.  This is the perfect reddish orange cream.  Like Alluring Azure, it is opaque in two thin coats for me, which means it may be a one coater for others.  I swatched three here for consistency as usual.
ASP Gel Polish Tangerine Burst Swatch

The final shade in the Sizzlin' Summer collection is Berry Delicious.  Berry Delicious is a bright, red toned purple with an almost jelly finish.  Sadly, this one fell short of the others in the collection.  Application was difficult and streaky.  Even after 3 coats, there is still significant VNL.  I really, really, really wanted this one to be a creamy gel like the other three.  The color is such a lovely shade.
ASP Gel Polish Berry Delicious Swatch

What do you think of this ASP collection?  I was very happy to see that ASP finally released colors outside of their basic line.  While Berry Delicious let me down, the other three make me a very happy girl!  I hope they continue to release new collections like this one in the future.  This line is quite affordable at $8.99 each for Sally Beauty Club members, and I love having it as another option for gel that I can purchase locally.

~Michelle

Read more ...

Wednesday, June 25, 2014

Revel Nail Gel Polish - Swatches and Review

Press Sample

Revel Nail Soak Off Gel Polish Review

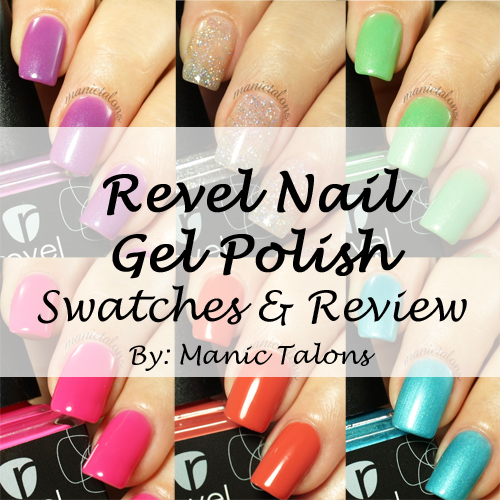
Hello Loves!  I have a new gel polish brand to show you today.  Revel Nail Gel Polish is new to the soak off gel market and was created with the goal of providing high quality, professional, salon gel polish at affordable prices.  Needless to say, I noticed a few things right off the bat that made me completely excited to try these out! As is typical for my new product reviews, this one is a bit long.  If you're short on time, there are plenty of pretty pictures and a summary at the end as usual.
Revel Nail Gel Polish Review

If you're a gel user, you likely noticed the same thing I noticed.  The gel colors come in clear bottles.  Yes, clear bottles!  This caused me to raise an eyebrow since gel polish is usually in opaque bottles to protect it from UV exposure.  I immediately assumed the bottles are coated, but the website says the gels are formulated to be "UV Stable".  Being the naturally curious person (aka skeptic) that I am, that left me with questions.  What exactly does that mean?  And will they cure in all UV and LED lamps?  Or is a specific range needed?

Of course, I emailed Keeli at Revel Nail to find out.  Her response was intriguing!
"Our gels are compatible with all UV and LED lamps. Our chemist was able to formulate the product using a special type of photo initiator that minimizes the curing in the visible light range,  which is what we see in our house or store. The photo initiator is optimized for the UV and LED absorbance level,  but minimizes the absorbance level in visible light range,  which is about 500-700 nm. UV lights typically emit about 280-350 nm range and LED typically emits 385-410 nm range." 
So, what does that mean?  It means the gels are safe in their clear bottles indoors!  They should not be used in direct sunlight, but are safe to store in a salon setting.  If exposed to a small amount of direct sunlight, a thin layer of the gel may cure to the glass walls of the bottle, but it won't hurt the gel inside.  This also means that what you see is what you get!  No relying on inaccurate dots on the label or a small window in the bottle to determine the color inside.  Clients can see exactly what shade they will get by looking through the bottle and seeing the color inside.  This is a really cool feature to me.

Needless to say, I geeked out a little bit over the bottles.  I could go on and on about it, but I have a lot more to show you.  Let's start with price, follow with application, touch on wear and customer service, and end with the swatches.

Price and Quality


When Revel Nail said they wanted to create an affordable, high quality professional gel line, they stuck to their goal.  With a price point of $6.49 per 0.5 oz bottle, these gels are certainly affordable.  The entire collection of 24 colors with base and top is only $150 with free shipping!  Not to mention the awesome trial deal that is currently available on their website.  Base + Top + 1 Color for $10.99 S/H.  It doesn't get much more affordable than that, and it would be the perfect starter set for new nail techs (or established nail techs who are looking to expand their services).  As for quality, they have you covered there too with a 3-free, vitamin E enriched formula that claims to soak off in 7 minutes.  (Don't worry, I put that to the test too).

Application


Application was what I would consider average.  The first color coat is a bit thin and streaky, like most gel polish brands.  The second coat is where this gel wowed me.  I was expecting to need 3-4 coats based on the first, but that was not the case.  The second coat really clings to the first coat and builds beautifully.  Of the 5 colors I sampled, 3 were completely opaque in 2 coats and the other two were great at 3 (keeping in mind that my coats are thinner than average).

The brush is flat but is also a bit thinner than I prefer.  That is certainly a personal preference.  I have wide nails (aka man hands) and I found that I couldn't use my typical 3 stroke application with these brushes.  I needed 4 strokes to cover most nails and 5 strokes for my thumbs.  But for those with smaller nail beds or those who prefer thinner brushes, I think you'll really like them.
Revel Nail Gel Polish Review

Wear


This is where I found a negative, but Revel Nail quickly turned it into a positive.  Before I go into that, let's talk about the Revel Nail Base Gel since the base gel seems to be the largest contributor to wear.  The base gel is a bit thinner than many of the bases on the market.  I found that I really like this - it allows a thin application without fighting to drag the base down the nail.  I had no issues with pooling.  The application of the base was a breeze.

So, how does it wear?  For me, not well.  As you know, nail chemistry/type plays a HUGE role in how gels will perform.  There's no such thing as a one size fits all base.  My nails are naturally very smooth, even with buffing.  In addition, my nails beds tend to be oily.  I often joke that my nails are like Teflon in that nothing wants to stick.  I have to use bonder with most gel brands, including my most beloved brands.  There seems to be very little balance for me.  If it is designed to remove quickly, it doesn't stick to my nails without bonder on the tips.  If it sticks, soak off is difficult.  This is also why I started using gel to begin with - regular polish simply would not stay on my nails for more than a few hours.  So I'm not surprised that the base doesn't work well for me.  I experienced a chip a few days into the wear test that led to the polish lifting off the nail in a sheet.

Knowing that my nails are extremely difficult for gels, I redid the test with bonder on just the free edge.  This time it wore perfectly.  I had to cut the test short after 8 days to move on to other products, but I'm confident that I could get 2 full weeks with bonder.  If gels typically wear well for you without bonder, this base will likely work for you as well.  If you have problem nails like I do, bonder may be necessary.  (Excuse the rough shape of my Cinderella hand.  Every time I do a wear test, I tell myself I'll take better care of her, but I never follow through.)
Reven Nail Gel Polish Wear Results

So here's where Revel Nail completely blew my mind!  I sent Keeli an email when the lifting occurred a few days into the wear test.  I was expecting the standard gel company response.  If you've never emailed a gel company about lifting or wear issues, let me break it down for you.  They will usually reply with a form letter type answer that implies you're an idiot and don't know how to use the product.  The response generally includes basic gel polish application instructions.  You know, clean the nail, remove all oils, buff the nail, thin coats, blah blah blah.  Well, that is NOT the response I received from Revel Nail.  THIS is the response I received:
Reven Nail Gel Polish Review

Ok, so what exactly are those?  Those, my friends, are prototype bases.  After discussing my Teflon nails with Keeli, she spoke with her chemist and they came up with two prototype formulas for those of us with nails that don't work well with your typical quick remove base gel.  Both of these are formulated to stick a little better but still soak off quickly.  I'm testing them now - one on my right hand and one on my left - and will report back with wear results.  Seriously, y'all, this is a company that really cares about the customer!  They took my feedback and are using it to improve their product!  I know a lot of gel companies that could learn a few things from Revel Nail on this one.

Swatches


Ok, ok, are you ready to see some swatches?  I thought you might be.  :)  But before I get to that, I would like to point out the shine from the top coat that is visible in the swatches.  The Revel Nail Top Coat is of average thickness, applies well without pooling, and has a very nice shine.

The first color I have to show you is a beautiful, squishy, purple leaning hot pink called Gala.  This one applied nicely but needed three coats to be completely opaque.  This is pretty common with crelly type finishes.  This is the color I chose for my wear tests.
Revel Nail Gel Polish Gala Swatch

Mai Tai is what I would consider a dusty orange shade.  Very Earthy.  This one is a cream finish and was opaque for me in 2 coats.  As usual, I swatched three for consistency. 
Revel Nail Gel Polish Mai Tai Swatch

Fierce is a medium purple with a slight blue shimmer.  This one needed three coats to be completely opaque, but this color is definitely worth the extra layer!  I'm currently wearing this one for my prototype base wear tests.  It's stunning in every light!
Revel Nail Gel Polish Fierce Swatch

Kodie is a gorgeous, bright frosty blue.  This one is a little thicker than the creams and shimmers and is opaque in two coats.  Again, I swatched three for consistency.
Revel Nail Gel Polish Kodie Swatch

Slainte is a beautiful, shimmer packed, medium green.  Like Kodie, Slainte is a bit thicker than the others but applies beautifully.  It is opaque in two, but I swatched three anyway.
Revel Nail Gel Polish Slainte Swatch

Finally, Disco is exactly what you might expect from the name.  This is a beautiful glitter topper that consists of a clear base loaded with holographic glitter.  I can only think to describe it as Gelish Vegas Nights or Gelaze Fairy Dust on steroids.  The swatch below is two thin coats because three would simply be too much.
Revel Nail Gel Polish Disco Swatch

I couldn't resist throwing one coat over Mai Tai as well to show you how it looks layered.  Stunning!  That's one coat.  One.  And I didn't have to leave it upside down to get this coverage.  This is my new go-to topper.
Revel Nail Gel Polish Disco Swatch over Mai Tai

Removal


So, does Revel Nail Gel Polish removal live up to the hype?  Yes and no.  The first test that failed certainly soaked off quickly.  It removed easily in 10 minutes with the foil wrap method with pure acetone.  I did not break the seal before soaking, so it may have removed in 7 minutes if I had.  I simply forgot.  10 minutes is still very quick for removal, so I'm calling that a yes.  The second test with bonder took a little longer to remove.  12 minutes with the foil wrap method and pure acetone after breaking the seal, to be exact.  This is in line with my expectations since I had to use the bonder.  Bonder always makes soak off a little longer.  I can say that both times it soaked off clean in sheets.  That makes me very happy.  I hate trying to remove gels that seem to disintegrate instead of popping off the nail.  I apologize for the absence of photos for the removals.  My son's birthday party was this weekend, so I was a little scattered.

Final Scores


Base Gel
Application:  Thinner gel but smooth application with no pooling or shrinking.  5 Stars.
Wear:  For me, not great.  With bonder on the free edge, very nice.  Since I know my nails are difficult, I'm going with 3 Stars.  It's what I consider my average experience.
Removal:  Without bonder, it soaked off in 10 minutes.  With bonder, 12 minutes.  It doesn't get much better than that.  5 Stars.
Overall4 Stars.

Colors
Application:  First coat feels very thin, but the second coat more than makes up the difference.  The thinner brush is a negative for my wide nails and makes it difficult to get a smooth coat.  I'm  deducting a point for the brush.  4 Stars.
Wear:  Base issues aside, the colors wear fabulously.  No fading or changing over time with the two I have worn so far.  5 Stars.
Removal:  Same as base above.  5 Stars.
Overall4.5 Stars.

Top Coat
Application:  Moderately thick formula applies well.  No pooling or bubbling.  5 Stars.
Wear:  Nice shine and seems to be quite durable.  No dulling over time.  Holds studs and pieces well.  5 Stars.
Removal: Break the seal for faster soak off, but otherwise the same as above.  5 Stars.
Overall5 Stars.

Final Thoughts


Revel Nail set out to provide a high quality product at a great price.  In my opinion, they nailed it.  With an overall rating of 4.5 Stars on my scale, I'm very likely to purchase more of the colors just based on that.  But, they sealed the deal with their excellent customer service and desire to use customer feedback to improve their product.  This is truly a 5 Star company and a brand I will keep in my collection.  I can't wait to see what they come out with in the future.  I expect great things. 

Follow Revel Nail on Facebook, Twitter, and Instagram for great offers and new product info!

~Michelle

*The products featured in this post were provided by Revel Nail for my honest review.

Read more ...
Monday, June 9, 2014

IBD Just Gel Social Lights Collection - Swatches and Review

Affiliate Links Purchased by Me

IBD Just Gel Social Lights Collection Swatches

Hello Loves.  I have the full IBD Just Gel Social Lights collection to show you today.  The Social Lights Collection is made up of 6 light creams and 2 glitter toppers.

You may remember that I wasn't 100% blown away with the last IBD Just Gel Collection (Haute Frosts), but I can honestly say that IBD has redeemed themselves in my opinion with the Social Lights!  I didn't have any of the application or curing issues with this collection that I experienced with the Haute Frosts.

With that said, onto the swatches!

Chic to Chic is a muted, yet still somewhat bright bubblegum pink cream.  Application was nice, though I did find this one needed three coats to be fully opaque.
IBD Just Gel Polish Chic to Chic Swatch

Cashmere Cutie is a soft, purple cream.  Application was nice with this one as well.  Two coats were sufficient, but I swatched three as usual for consistency.  Excuse the strange shadow at the top of the index nail.  I have no clue what happened there.  Photography blooper, I guess.
IBD Just Gel Polish Cashmere Cutie Swatch

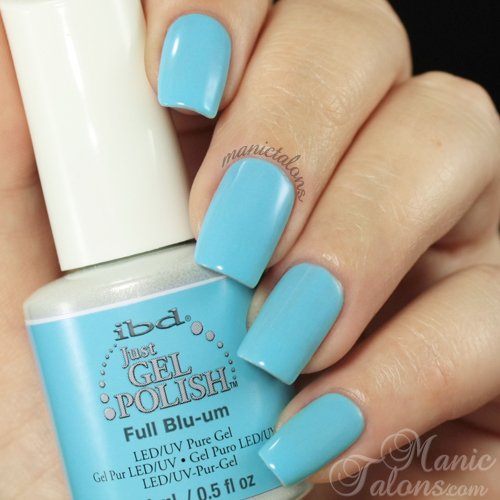
Full Blu-um is a blue cream.  This one is a bit brighter than I was expecting for this collection, but I is a gorgeous shade that I will likely wear often.  I do love my blues!  Application was nice, but I felt this one needed three coats for full opacity as well.  I should probably note that my coats are on the thin side, so if you tend to apply thicker than I do, two coats will likely suffice.
IBD Just Gel Full Blu-um Swatch

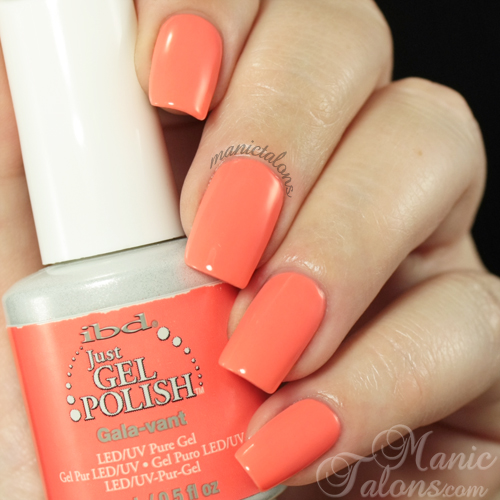
Gala-vant is a bright coral orange cream that reminds me of Gelaze Flip Flop Fantasy.  Definitely a nice color for summer - especially if your skin isn't translucent like mine.  ;)  This one was a bit tricky to apply, as I find is common with gels of this color.  The third coat was certainly needed for a streak free appearance.
IBD Just Gel Polish Gala-vant Swatch

Polo Can U Go is a muted lime green cream.  This one applied nicely and is opaque in two coats.  Again, I am showing three here for consistency.  This is my least favorite of the creams in this collection - for no reason other than it doesn't work well with my skin tone.  It is a gorgeous shade.  Shame my skin tone doesn't agree.
IBD Just Gel Polo Can U Go Swatch

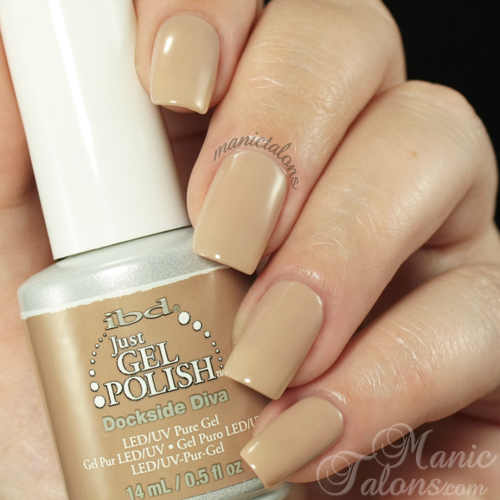
Dockside Diva is a gorgeous taupe cream.  This one surprised me most out of the entire collection.  I wasn't expecting to like it as most taupe gels do not compliment my skin tone, but I feel I can wear this one with ease.  Application was nice.  It can be worn in one or two coats for a sheer look or three coats (as I have swatched it here) for an opaque finish.
IBD Just Gel Polish Dockside Diva Swatch

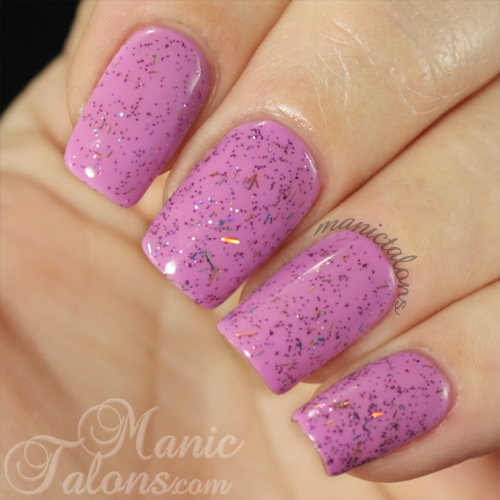
Now for the glitters.  Billion-heiress has a mix of fine pink glitter and holographic strips in a clear base.  I'm not sure why IBD is so hung up on strip glitter lately, but I'm honestly not in love with it.  I find that it is difficult to apply without all of the strips lining up.  I had to do a little bit of glitter positioning.  This is three coats.
IBD Just Gel Polish Billion-heiress Swatch
Below is one coat of Billion-heiress layered over Cashmere Cutie.  Again, I had to position those strip glitters to keep them from lining up on the nail.
IBD Just Gel Billion-heiress Swatch

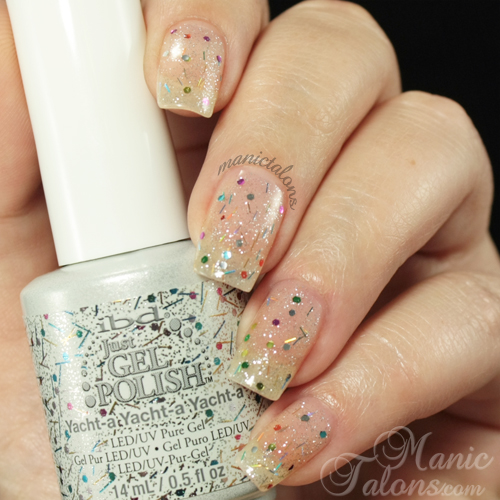
The final gel in the Social Lights collection is Yacht-a Yacht-a Yacht-a.  This is a gorgeous, silver shimmer in a clear base with multi-colored hex glitters and multicolored strips.  Of the two glitters, I like this one best because it is much more versatile.  Application was tricky with this one as well.  The shimmer in the base applied nicely, but I had a hard time getting the larger glitter pieces off of the brush.  I ended up having to dab them on.
IBD Just Gel Polish Yacht-a Yacht-a Yacht-a Swatch
Below is one coat of Yacht-a Yacht-a Yachta layered over Full Blu-um.  You can see how the strips started lining up in this photo.  Since I had to fight with the hexes, I didn't bother to rearrange the strips.
IBD Just Gel Polish Yacht-a Yacht-a Yacht-a Swatch

Do you have a favorite from this collection?  I'm personally torn between Dockside Diva and Gala-vant!

~Michelle

*This post uses Amazon and Ebay Affiliate links.  Purchases through these links generate commissions that help fund this site.

Read more ...