Hello Loves! As promised last Monday, I have the full Bundle Monster Red Carpet Collection to show you today. This collection is made up of six very unique gel polishes. They are true metallic finishes! Of course, I have swatches to show. But I also have some tips for application. You know how it goes - anything this awesome is going to have some quirks. ;)
I'll start with the swatches first. Then we'll talk about application.
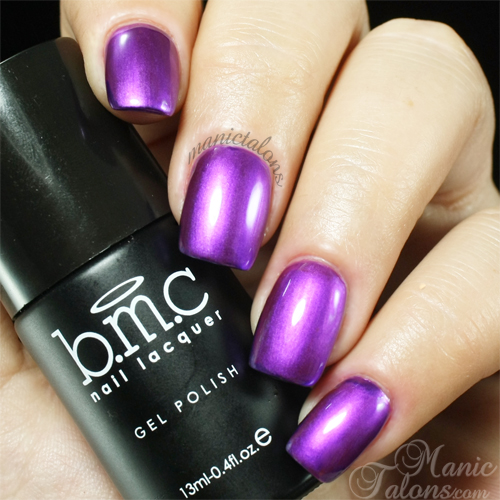
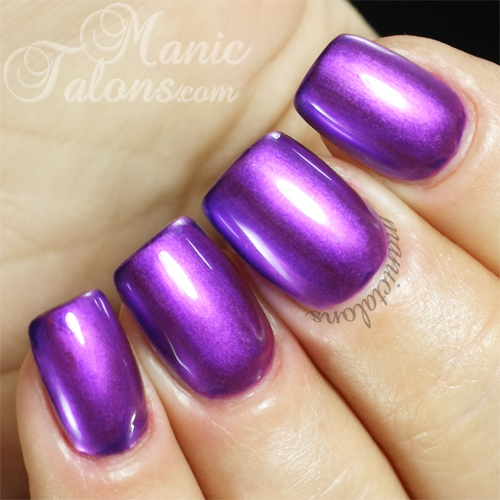
First up, Photo Op is a medium purple with a chrome finish. I'm actually at a loss for words with this one. Something about it just blows my mind.
Rising Starlet is a hot pink chrome. There is definite depth going on here.
Paparazzi is a stunning gold metallic. This one may be the most mind-blowing of the bunch. How many times have you wished for a gold that actually looks like gold? Ok, maybe you haven't, but I have a hundred times or more!
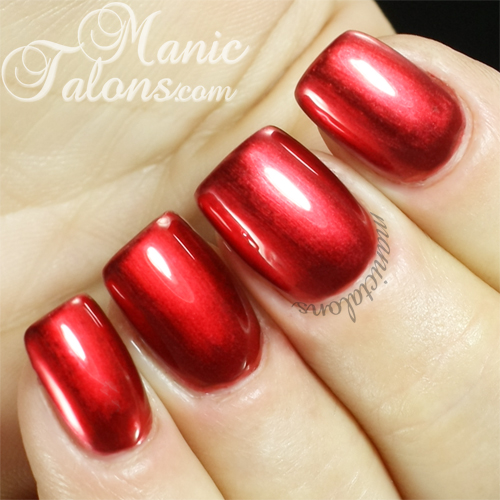
Miles in Louboutins is your classic red with a metallic twist. This is the least unique for me. I have a lot of glowy reds in my collection. None of them are true metallics, but some come close. Either way, it's beautiful and I'm happy to have it.
The New LBD is my personal favorite. Hello fabulous metallic royal blue! Y'all know how much I love my blues. :)
Finally, Hollywood & Ivy is the stunning green metallic that I showed you on Monday. I'm super drawn to this one.
Ok, so now that you've seen how amazing they are, let's talk about formula and application. These gels are unlike anything you have in your collection. They are very different, but they have to be to get the desired finish. For starters, they are super thin. Barely thicker than water, honestly. They are also a bit quirky and require very precise application. Trust me, I tried several different techniques on these, and only one worked to my satisfaction. To save you the trouble of trial and error, here are the steps I used. I'll follow up with notes. The steps and notes may seem like a lot, but it is really simple once you "get" it. And the final result is totally worth the extra application effort! :)
Application Steps:
- Apply your base gel and cure (after prepping the nail, of course)
- Apply a top coat directly over the base gel.
- Remove the tacky layer.
- Shake the Metallic Gel of your choice.
- Wipe both sides of the brush against the neck of the bottle before applying the product to the nail.
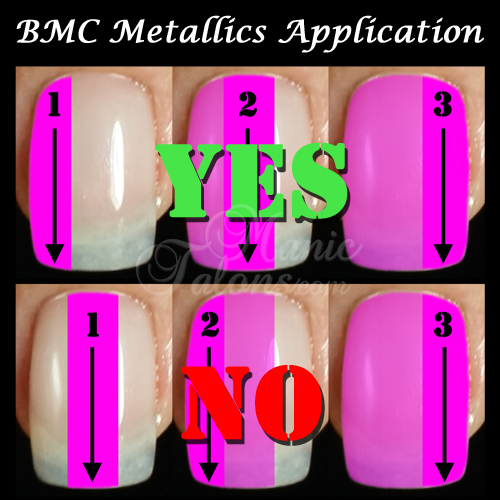
- Apply using side, middle, side application strokes, being careful not to allow each stroke to overlap the next. Do NOT cap the free edge.
- Allow each coat to rest for about a minute before curing. It will appear to dry on it's own.
- Cure.
- Repeat steps 5-8.
- Apply your top coat, being careful not to let the brush drag into the metallic layer below.
Notes:
- As I mentioned above, these are unlike any gel polish you have worked with in the past. Forget everything you know about applying gel polish and follow these instructions and notes. If you don't, the result will be an uneven, pitted mess. Trust me on this one.
- If you have a no-wipe top coat, I recommend using it for both top coat steps. If not, a regular top coat will work. But do remove the tacky layer! While you technically could skip this step, I found the gel easier to control when I removed it vs when I did not. Remember, these bad boys are a thin consistency so they are more likely to run than your typical gel polish.
- Don't skip the layer of top coat over the base gel. It is 100% necessary. It not only provides a smoother surface for the metallic gel, but it also gives the metallic particles something to grab.
- When I say to shake them, I mean really shake them. Shake it like your life depends on it. The metallic particles are heavy and will settle to the bottom of the bottle.
- The layers have to be thin, thin, thin. Do not leave a bead of gel polish on the end of the brush like you normally would. What is trapped in the brush is more than enough for a full coat. Too much product will produce a pool at the tip of the nail that will swirl and mess up the finish. It is better to not have enough product in the brush for three full strokes and have to re-dip than to have too much on the first stroke.
- It is crucial that you do not allow the strokes to overlap as you apply. This is why I recommend side middle side application instead of the traditional middle side side application. If they overlap, the metallic particles will separate and you'll get pits. Its like they run from each other. This is also why you shouldn't cap the free edge. That cap stroke will overlap your three basic strokes and cause separation. But don't worry, the basic strokes will flow over the edge of the nail and cap it for you naturally.
- Apply carefully to avoid letting the gel touch your skin. It will stain. Trying to clean up with alcohol before curing just makes it worse. If you do have an oops, it will clean up with soap, water and a scrub brush after you complete the manicure and seal the color with the top coat. Just be super careful not to lock in any mistakes when you top coat. Oh, and if soap and water don't remove the stains, denture cleaner will.
- Let it rest before you cure. Patience is key here. The polish will actually appear to dry and may even feel dry to the touch (not that I recommend touching it). But you still need to cure it to lock it in place. Fair warning, if you rush this step you will get pits when you apply the next layer. I cured each layer for 30 seconds in my Harmony Gelish 18G. You may need 45 seconds in a weaker LED lamp. Two minutes should do the trick in a CFL UV lamp.
- When applying the top coat, be really careful to avoid dragging the brush. If the brush drags on this step, you'll get streaks in the finish. Don't believe me? Look at my index nail in the Paparazzi swatch. I let the brush drag on that one on accident.
Moving on to wear and removal. I haven't had a chance to put these through a full wear test due to class, but I did wear one for a few days without issues so I could report on removal. Soak off was average for me, but I did note some staining from the pigments on my skin and my nails. You can prevent the stains on your skin by applying cuticle oil or a balm as a barrier before soaking off. As for the stains on my nails, they were not true stains. Left over pigment, maybe? I was able to remove them by wiping over each nail with a cotton ball soaked in acetone after I soaked the gel off.
I had so much fun playing with these! Believe me, you'll see them again soon. I have way too many ideas swirling around in my head right now! lol
What do you think? Is the different application worth the effort for the end results? I think so! Is there a color in this collection that screams your name? I love them all and hope that Bundle Monster releases more colors soon. I would love to have a silver and a bronze. Maybe even a coppery pink. :)
If you would like to pick up the BMC Red Carpet Collection for yourself, or even just a color or two, you can get them from Bundle Monster's website here or from BMC on Amazon here.
~Michelle
*The Red Carpet Metallic Gel Polish Collection featured in this post was provided by Bundle Monster for my honest review. This post uses Amazon Affiliate links. Purchases through these links generate commissions that help fund this site. All other links are courtesy links that do not benefit ManicTalons.com.


I didn't even know Bundle Monster made polishes, geez where have I been. These metallic polishes are insane, they almost looked like CGI effects haha. I agree The New LBD is my favorite too!
ReplyDeleteWow! Those colors!
ReplyDeleteThose are great. Thanks for the application tips.
ReplyDeleteNice metallics and love the nail art. How many coats for opacity?
ReplyDeleteTwo for full coverage. I only used one for the nail art, though.
DeleteWow these are just mind blowing! Love what you did with the nail art
ReplyDeleteI bought these when they first came out and I had alot of problems with them. After contacting bundle monster a couple times we finally figured out that the tacky layer had to be removed for them to adhere. Since then I have had success but still have to apply 2 coats of top coat to the cure metallic polish to avoid the color coming off in spots. I finally figured out they best way for me. I now apply a base case then 2 coat of ASP White Out and remove the tacky layer before applying my metallic polish. It works way better than the top coat and gives my nails more of the normal thickness that you don't get from the metallic polishes since they are so thin. I loved seeing the nail art with the metallic polishes! Awesome job!!
ReplyDeletePhoto Op is my favorite, and I adore your nail art !
ReplyDeleteThose black frames are just mind blowing!! I'm no free-hand nail artist, but any tips on how to create those frames Michelle?
ReplyDeleteI used a very small, thin nail art brush and started at the edges and worked my way in. Not sure if that helps. lol. Also, a thicker black gel polosh will work better than a thin one.
DeletePaparazzi! Just wow on that one! On all of them, really! Gorgeous nail art :)
ReplyDelete