Hello Loves! I recently joined an awesome professionals only nail tech group on facebook called Nail Tips for Nail Techs, and they were talking about these NFC Nail Lights. Wait...what? Lights for nails? Yes please! You know I had to order some. After about 3 weeks of waiting, they arrived this past Friday. Needless to say, I didn't waste any time ripping open that little envelope and putting them into and onto my nails. I also quickly learned that it is insanely difficult to capture blinking lights with a camera. I did manage to snag a few pictures, but a video shows them so much better. So let's take a look at a quick video before I go into the details.
Ok, so what exactly are NFC Nail Lights? They're these little (sorta) stickers that include a copper conductive coil that is attached to a tiny LED light. They were originally developed in Japan and were seen first in Japanese nail art as many awesome nail techniques are. They pick up Near Field Communication (NFC) signals from electronic devices that are equipped with NFC functions and use those signals to power the LED light (to put it simply). For example, those quick pass scanners where you simply wave a card in front of them or some android phones have NFC capabilities. My phone is a Galaxy S5, so I'm set. :) Depending on the NFC source, the lights might blink like they do with my phone or turn on and stay on as long as the NFC source is close. Key card readers make the lights stay on. And believe me, I wish I had one for taking photos, but the guy at the gas station was giving me funny looks when I kept putting my hand up to the reader, so I don't think he would have understood if I broke out my camera for a photo session. lol
The little stickers/chips are on a larger piece of sticky backing and look like this when they arrive.
Once you trim away the excess sticky backing, you end up with a smaller but still kinda large, intelligent sticker. This is the trimmed sticker compared to my index nail. I wanted to give you the actual dimensions, but my kids ran off with my measuring tape and it is no where to be found. lol I ordered mine from Ebay and the listing doesn't give the size either. (I should note that the listing I just linked is the exact listing I used to purchase my lights. The lights I received don't look exactly like the ones in the listing, but they work and I'm very happy with the purchase. Shipping was fast considering it came from overseas too.) So here's that photo. The small yellow rectangle is the actual light. The rest makes it work. They are approximately 0.5mm thick. Oh, and the film on the top is removed before encasing the light. I didn't remove this one yet since I'm not ready to use it.
I ordered 10 of the lights to start with and wish I had ordered more. I destroyed three of them trying to find the best way to apply them. lol But after a few tries, I learned a few tricks. First, they can be embedded under clear acrylic or hard gel. Since I'm still wearing enhancements on my left hand, I decided to embed them under my hard gel. In this case, I used two stickers on one nail and overlapped them slightly. However, I don't recommend this. The resulting nail is a bit too thick for my liking in order to conceal the overlap of the stickers. Let's take a look at the mani, shall we?
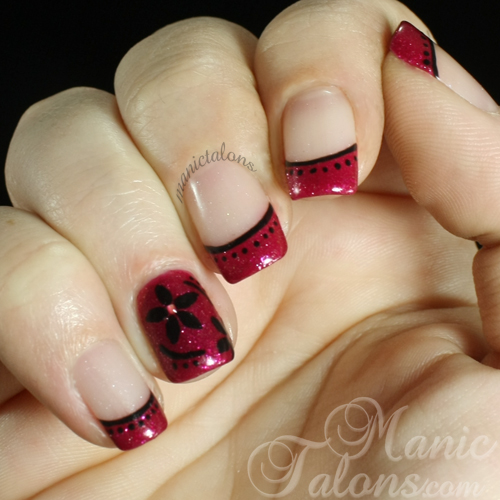
Ok, so here's what I have going on in this one. I started with sculpted nails using Akzentz UV/LED Proformance hard gel. Love this stuff! On the accent nail with the lights, I started with a thin sculpt, added the stickers, then built the apex and bulk of the nail over them. The stickers are staggered and overlapping. I wish I had thought to get a picture before I added the color. The base for the french is Pink Gellac Pearl No Wipe Top coat. The french and base color for the accent nail is Madam Glam Glittery Berry. The black details are Akzentz Gel Play in black. I adore this funky french design. Can you believe this is my first ever true funky french? Insane! As you can see in the photo above, the accent nail is pretty thick. You might also notice the domes over the lights. I'll explain that in a moment. First, let's take a look at a tip view of that accent nail to show you exactly how thick it is.
Pretty thick, right. There's no way I could pick up a quarter from a flat surface with that nail! If I had only used one light, I could have achieved a much more natural thickness, I think. The good news is that these lights also work well with SOG. My Cinderella hand (right hand) is 100% soak off gel with one light embedded in the gel on my ring finger. Wanna see it? It looks sooo much more natural. And look, proof that I actually do wear matching manicures on both hands from time to time. ;)
Here's a side view of Cinderella. One light and SOG is definitely the way to go if you're not wearing enhancements or can't stand the bulk. The nail is still a little thicker than your average SOG, but tolerable, I think.
So how do you apply them with SOG? It's pretty easy. Trim the sticker down, but make sure you don't cut into the copper coil. Apply your base gel and remove the tacky layer. Stick the sticker on the nail and press firmly to be sure it adheres without gaps or bubbles. At this point, I applied a small bit of Gelish Structure Gel around the sticker to hide the edges. If you don't have Structure, you can use a thicker top coat or even your color gel polish and get the same result, though it might take a few layers. Once the gel is built up around the sticker and appears smooth, apply your color over the nail including the sticker but not over the light portion. I actually applied the color over the whole nail and then carved out the area over the light. Cure the first layer, then repeat with a second layer. At this point, you can add your art and finish with top coat over the entire nail. Or...
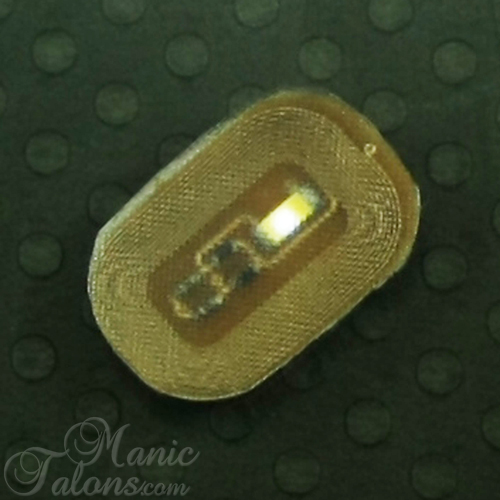
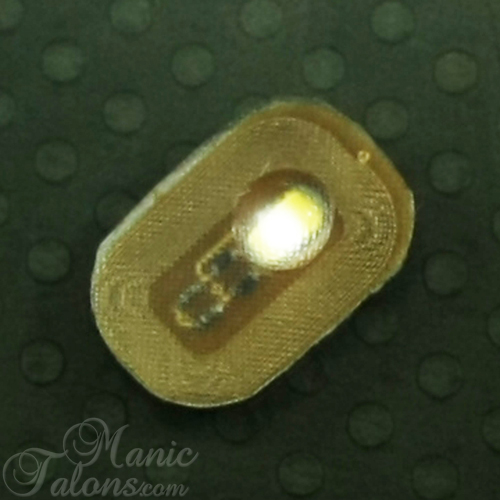
About those domes I mentioned earlier...It occurred to me when I was playing with my stickers that the lights don't seem as bright as they do in photos and videos I saw online. Then I realized the photos and videos all showed the lights under cabochons. It was a duh moment. Putting them under a dome will magnify the light! So I added a few self-made cabochons over the lights. It made a huge difference. Of course, I didn't think to snap before and after photos, so let me show you on a separate sticker. Check out Kim's tutorial on Ten Little Canvases to learn how to make the cabochon. Remember to skip the first part of the tutorial since you want it to be completely clear over the light. ;)
I made a quick cabochon with Akzentz hard gel for this, but Gelish Structure definitely works. If you're quick enough, you can also make them with SOG top coat and a dotting tool but it takes a few layers to build them up. Here's the cabochon I'm using in the next photos.
This is a picture of the light without the cabochon. Remember, this still has the protective film over the light, so it is actually a little brighter when the film is removed.
And here's the same light with the cabochon over it. Huge difference, right?
I added small, 1.5 mm cabochons over the lights in my mani. Next time I'll plan for much larger ones, but this was the best I could do as an afterthought without messing up the design. The result is a much rounder and brighter light. :) Here's another shot of my nail with the light activated. I had to take it dark and brighten it up in photoshop a bit, which is why it is a bit noisy. Oh, and I removed the cover from my phone to see if it made a difference. It doesn't.
What do you think? These little NFC lights are pretty awesome, right? They are, but there are some negatives too. First, they only work when I'm touching the NFC area on my phone, which is about the size of a US half dollar on the back side of my phone. Since I'm constantly texting or checking facebook, that section of my phone sees a lot of action. Which means my lights also see a lot of action. But I don't see the lights. They're on the wrong side of the screen. lol The other down side is that the NFC function on my phone drains my battery really fast. Another downer is that they are single use only. Finally, they are NOT compatible with Iphone. Iphone 6 has NFC capabilities built in, but Apple has it locked for the time being.
The NFC lights are still fun as a novelty thing, though. You'll see them on this blog again for sure. Actually, I ordered another 40 from Aliexpress this past weekend. This time, I ordered different colors. They're also coming from China, so it will be a while before I get them. I'm hoping to have them before Valentine's Day, but I'm not going to hold my breath. lol
~Michelle
*Note: This posts uses Ebay and Amazon affiliate links. Purchases through these links generate commissions that help fund this site. Several of the products used in this post were press samples that have been reviewed previously. Those items link to the previous review posts. All other items were purchased by me.


This is awesome!
ReplyDeleteThis is so freaking cool! Awesome photos, btw!
ReplyDeleteIt's something I'm looking forward to in the future--I'll ask my guys in the house about NFC lights and my iPhone, and they'll understand better than me--and know what the future holds, probably! Your nails look extreme, and the video is exciting!
ReplyDeleteJust amazing!! Thanks for keeping us in the know MIchelle - as always! Wowwww!
ReplyDeleteexcellent
ReplyDeletehttp://www.nfcbusinesscards.us/nfc-keyfobs/