Showing posts with label Artsy Fartsy Crafts. Show all posts

Wednesday, December 31, 2014

Happy New Year!

Hello Loves!  I'm back!  What better way to come back from a short holiday break than with glitter?  Of course, I have to show you my bling-tastic New Year's mani.
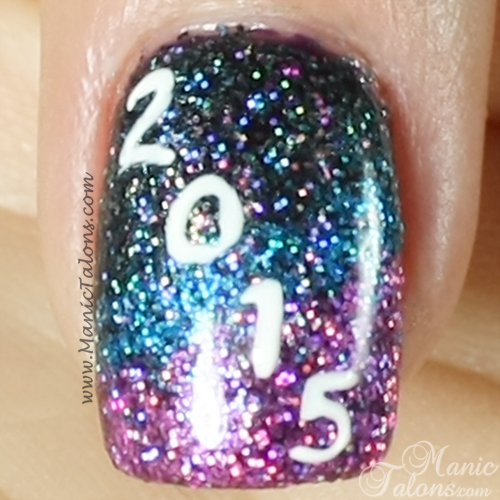
Rock Star Glitter Manicure with ArtsyFartsy Crafts Glitter

I just couldn't help myself.  I need something sparkly to bring in the new year.  So I broke out my ArtsyFartsy Crafts holographic glitters and went to work.  As I'm sure you know by now, ArtsyFartsy glitters are my glitter of choice.  Sandy makes sure that all of her products are top quality and they are absolutely perfect for nail art.  Plus I love that she offers them in small quantities that are just right for the DIYer.  If you haven't tried them yet, what are you waiting for?!?!?  You're not going to find higher quality glitter or even the same quality at a better price.  $0.99 for a teaspoon that is more than you'll need in your lifetime is a steal!  Try one, or two, or a dozen.  You'll thank me later.

I started with a base of Madam Glam Deep Dark Purple.  I had planned to place the glitter directly into the tacky layer of the 2nd color coat, but Deep Dark Purple isn't quite as tacky as I had hoped.  So I added a layer of top coat and started by pressing random lines of AFC Ultrafine Sky Blue Holographic Glitter onto each nail.  I then came in on one side of the Sky Blue with AFC Ultrafine Purple Holographic Glitter and AFC Ultrafine Black Holographic Glitter on the other.  This definitely satisfied my need for bling!  I topped the glitter with a thick layer of gel top coat for a smooth finish.
Rock Star Glitter Manicure with ArtsyFartsy Crafts Glitter

Of course, to make it more New Years themed, I freehanded "2015" on the ring finger nail with Akzentz Gel Play in white.
Rock Star Glitter Manicure with ArtsyFartsy Crafts Glitter

I am super in love with this mani!  The pictures really don't do it justice, but here's a slightly blurred shot to show the holographic effect of the glitter a little better.
Rock Star Glitter Manicure with ArtsyFartsy Crafts Glitter

I apologize for the thickness.  Apparently adding four layers of gel polish plus glitter on top of acrylic equals super thick nails.  I'll be so glad when my natural nails grow out again.  I miss them so bad!  Acrylic is fun and all, but it's just not the same.  :(

Any who, I'm back and ready for action.  I wish I could say that my little break left me refreshed with a ton of content ready to post, but instead it left me exhausted with a cold.  But I do have a fun gel polish to show you on Friday.  Here's a hint:  it's from Bundle Monster, and it's a tricolor thermal! 

I hope you have a wonderful and safe New Years Eve!  How do you plan to celebrate this year?  I suspect my rock star nails and I will be wrapped up and snoring in a NyQuil induced coma.  ;)

~Michelle

Read more ...

Tuesday, September 2, 2014

Blogiversary Giveaway #1: Win an ArtsyFartsy Crafts Giftcard!

Hello Loves!  Ready to get this giveaway party started?  In Celebration of my 1 Year Blogiversary, I'm spreading some glitter around via ArtsyFartsy Crafts!


I have partnered with Sandy at ArtsyFartsy Crafts to offer 5 chances to add a little sparkle to your life.  ;)

The Prizes:
  • One (1) winner will receive a $30 gift card to ArtsyFartsyCrafts.com plus a code for free shipping!
  • Four (4) winners will each receive a sample set of 4 ArtsyFartsy Crafts Ultrafine holographic glitters (randomly chosen colors).
The Details:
  • Contest begins September 2, 2014 at 12:00 am EDT and will end on September 9, 2014 at 12:00 am EDT.  
  • Contest is open Internationally.
  • Winners will be contacted via email within 48 hours of the end of the giveaway.  The winners will then have 48 hours to respond and accept the prize.  If the winner does not respond to claim the prize by 48 hours after notification, a new winner will be selected for that prize.
  • The grand prize of the $30 gift card will be awarded as a discount code to be used at www.ArtsyFartsyCrafts.com.  A free shipping code will be included.  The codes will be emailed to the winner.
  • The additional four prizes will be shipped by me to the respective winners via USPS.
  • Only entries through the Rafflecopter widget below will be counted.
  • All entries will be verified.  Invalid entries will be thrown out.
  • Additional contest rules and legal stuff may be read via the Rafflecopter widget below.
Good Luck!

a Rafflecopter giveaway


~Michelle

*The contest prizes offered in this giveaway were supplied in part by ArtsyFartsy Crafts.

Read more ...

Wednesday, August 20, 2014

Glitter Placement with ArtsyFartsy Crafts Diamonds

Hello Loves.  I've wanted to do a glitter placement manicure for a while now and finally found the time to give it a try.  Whew!  I think I'll leave these to the pros like Laura at Polish All The Nails.  (Seriously, Laura has amazing glitter placement skills.  If you aren't familiar with her nail art, go check it out!)  This type of manicure takes some serious patience!  Here's mine.
Glitter Placement Manicure with ArtsyFartsy Crafts Diamond Glitter and Couture Gel Polish

For this mani, I started with a base of Couture Little Black Dress.  You know, my go-to black.  I then added a thin layer of top coat but did not cure it.  This layer of top coat is used to lock the glitter in place later.  The glitters I used are ArtsyFartsy Crafts 2x4mm Blue Holographic Diamonds and ArtsyFartsy Craffts 2x4mm Fuchsia Holographic Diamonds.  After placing the glitters in the uncured layer of top coat, I cured to lock them in place.  I then added a few more layers of top coat to seal the glitter to the nail.

I adore these holographic diamond glitters.  They really shift as the light catches them and create a very fun effect.  Excuse the bubbles in the top coat.  I didn't notice them until it was too late to fix it.
Glitter Placement Manicure with ArtsyFartsy Crafts Diamond Glitter and Couture Gel Polish

I absolutely adore the final result, but this is not exactly what I had planned.  I set out to do a full manicure with full coverage glitter like the pinkie nail.  However, when I added the gel top coat, I found that it really didn't want to stick to the slick surface of the glitter.  I ended up with pits in the top coat from where it pulled away in some areas.  After two more layers of top coat, I finally got good enough coverage, but there were still a few gaps around the cuticle line.  At this point, I decided to switch up the design and skip the full coverage glitter on the other nails.  These worked much better and I achieved full coverage of the glitter with two layers of top coat.
Glitter Placement Manicure with ArtsyFartsy Crafts Diamond Glitter and Couture Gel Polish

What do you think?  Would you rock this mani?  It was super fun in full sunlight.  I tried to take a short video, but every time I stepped outside with my camera, the sun ducked behind a cloud.  Isn't that how it usually goes?  ;)

If these diamond glitters interest you, check out the selection on ArtsyFartsy Crafts.  Sandy has a wide variety of glitter shapes and her prices are great!  I especially love that she offers small quantities that are more than I'll ever need for nail art.  Oh, and her ultrafine holo glitters, glitter mixes and glow glitters are fabulous too.  I swatched and reviewed a few of those in this post.

~Michelle

Read more ...

Monday, May 26, 2014

Memorial Day 2014: Some Gave All

Press Sample
Memorial Day Nail Art

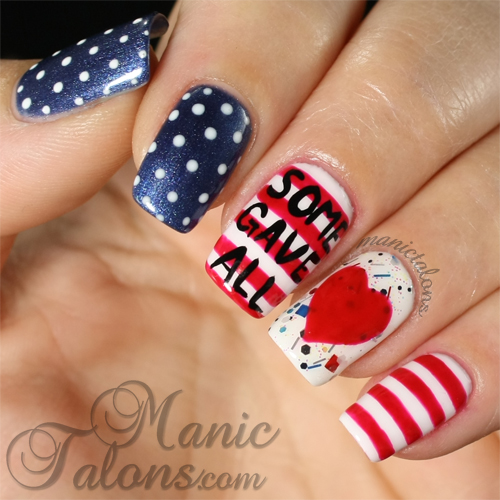
Happy Memorial Day, Loves!  As those of us in the US are preparing to fire up the barbeque and spend time with family and friends, I want to take a moment to reflect on the true meaning of the day.  Today is a day of celebration but also a day to remember the fallen soldiers who gave their lives fighting for our freedom.

I tend to relate life to music, and on this day every year these lyrics come to mind:

“All gave some, and some gave all 
Some stood through for the red, white and blue
And some had to fall.
And if you ever think of me
Think of all your liberties and recall
Some gave all”
~Some Gave All, Billy Ray Cyrus

To all of the mothers and fathers, husbands and wives, son and daughters, brothers and sisters, relatives, friends and soldiers who have lost a loved one while fighting for our freedom, please know that we have not forgotten their sacrifice.  Today, we celebrate those honorable men and women who gave their lives so that we may be free.

My manicure today is in their honor.

Memorial Day Nails

I started with a base of Couture After Midnight (swatched here) and Couture Ooh La La French (swatched here).  I then dotted the After Midnight nails with Ooh La La French. 

I scrubbed ArstyFartsy Crafts Red White and Blue glitter onto the ring finger and freehanded stripes of Couture Haute Pink on the middle and pinkie nails.  The heart on the ring finger is also Couture Haute Pink, and the words “Some Gave All” are painted in Mundo de Unas Black.

I don’t think I’ve shown you Couture Haute Pink before.  The name is a bit misleading.  This is not a pink, but rather a classic red cream.  It applies beautifully and is opaque in two coats.
Couture Gel Polish Haute Pink Swatch

I hope everyone has a fun and safe Memorial Day!

~Michelle

*The gel polishes used in this post were provided by Couture Gel Nail Polish for my honest review.  All other products were purchased by me.

Read more ...

Monday, April 7, 2014

Blue on Blue for Autism Awareness

Press Sample

Hello Loves.  April is Autism Awareness Month, and this is a cause very near to my heart.  Naturally, I had to do a little nail art to show my support.
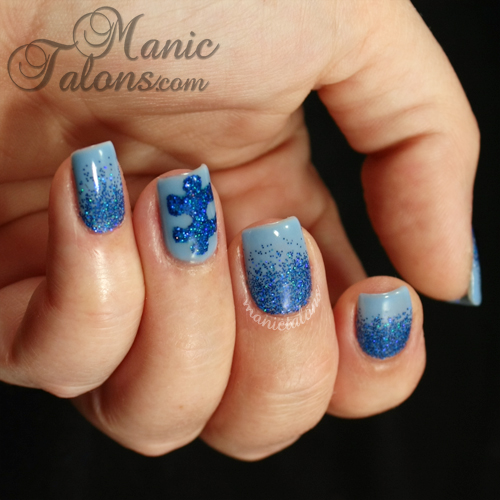
blue autism awareness manicure couture gel polish

Before we get to the details of the nails, I want to tell you a little about why Autism Awareness is important to me.  Her name is Leanne and she is a vital part of every holiday memory I cherish.  Leanne is my cousin and she is autistic.  As a grown woman, she has the mental capacity of a young child.  Leanne is a very affectionate woman with fondness for necklaces, purses, baby dolls.  Any time you see her, you can almost bet she'll be wearing at least one string of beads, a pocket book thrown over her shoulder, and a baby doll hanging out of the pocket of her shorts. 

Life for Leanne is challenging.  Not only does she struggle with communicating her thoughts and feelings, but others who are not familiar with the various levels of autism are often unsure how to act around her.  Some even forget their manners completely.  Oh the times I have wanted to punch people for their rude comments in public, but I digress.  Autism impacts people in varying degrees.  You can take one look at Leanne and see that she has a disability.  For others, it is not so obvious.  Yet every form of autism has challenges, both for the autistic people and those who love them. 

You may be wondering what you could possibly do to help the lives of those impacted by autism.  There are a tons of ideas in the link below, but there is one thing you can do that is powerful and won't cost a single dime.  When you encounter an autistic person in public, take a moment to catch her eye or her caregiver's eye and smile.  Just a simple smile from one person can easily outweigh any negative remarks or actions from another.  Everyone can afford to spare a warm smile, right?  I encourage you to take a few moments to learn more about autism and how you can help.

I could go on and on about Leanne, and believe me, I am tempted!  But you're here for the nails, so let's get back to that.  Here's a closer shot.
blue autism awareness manicure couture gel polish

I started with a base of Couture Naughty-Cal.  I then scrubbed Artsy Fartsy Crafts Ultrafine Blue Holographic glitter into the tacky layer at the cuticle and used a nail art brush to drag the glitter down the nail to create the fade. I should have pulled the glitter down a little farther on the index nail, but no one is perfect. For the accent nail, I mixed the blue holo glitter in with a drop of top coat to make a semi-thick paste. I then dotted it onto the nail in the shape of the puzzle piece. Once I had the general shape, I used a cleanup brush to push any stray glitter into place and cured for 30 seconds in my LED lamp. This is the same technique I showed in my Holiday Glitter Ruffian tutorial

Here's the swatch picture of Couture Naughty-Cal.  This is one of my favorite light blue creams.
Couture gel polish Naughty-cal swatch

Be sure to check out some of these other amazing blue manicures for Autism Awareness


Finally, I have a few discount codes to share with you.  Couture Gel Polish has graciously given me a discount code for 10% to pass along to you!  Enter "ManicTalons" at checkout to claim your discount.

Additionally, ArtsyFartsy Crafts also has given me a discount code to share.  Enter "MANICTALONS" at checkout for 10% off.  Oh, and stay tuned for an ArtsyFartsy Crafts glitter giveaway later this month!

~Michelle

*The polishes featured in this post were provided by Couture Gel Nail Polish for my honest review.
Read more ...

Sunday, February 2, 2014

I wrote a guest post for Chickettes.com :)

Hi loves!  I am honored to have written a guest post for Andrea at Chickettes for today.  Head on over to Chickettes to see my how I created this Key To My Heart design with loose glitter and gel polish  :)

Key To My Heart Manicure with Couture Gel Polish and ArtsyFartsy Crafts loose glitter

~Michelle
Read more ...

Sunday, December 15, 2013

Glittery Ruffian Holiday Nails

Contest Prize

Hello Loves.  Wow it has been a busy weekend!  Between work, parties and Christmas shopping, I didn't have much time to dedicate to my nails.  I did manage to squeak out a mani to compliment my outfit for our annual Christmas party at work.  Yes, I have a day job.  I am the marketing database analyst for a financial industry training firm.  In other words, I'm a data dork.  I love what I do, and I especially love that being so far behind the scenes allows me to wear outlandish designs on my nails without anyone caring that I constantly violate the dress code.  ;) 

But I digress.  Onto the nails.  I picked up two lovely Couture Gel Nail Polish shades as my prize for third place in their Halloween nail art contest.  I will swatch the other as soon as possible, but I decided to wear one of them last night.  As usual, I couldn't leave it alone.  So I added a little bling.  Details below.
Couture Gel Nail Polish Red Carpet

The base for this mani is Couture Gel Nail Polish Red Carpet.  This gorgeous, traditional orange leaning red has a subtle pink shimmer that gives it a touch of surprise.  The shimmer is great, but it wasn't quite enough pop for my tastes.  So I added ArstyFartsy Crafts Ultrafine Silver Holographic Glitter at the cuticle to create this fun Ruffian mani.  Because, well, nothing says the holidays like a little bit of glitter.  ;)  Sadly, I forgot to take a picture of this one before I added the glitter.
Glittery Ruffian Mani

I'm not usually a fan of ruffian manicures.  To me, it looks like I got lazy and just filled the grow out of a previous mani with a different color.  Not to mention they tend to make nails look shorter by breaking up the length.  However, I think the glitter in this one is just the right touch.  Want to see it again?  How about a crappy outdoor shot from my iphone?  I tried to get a good outdoor shot with my Canon, but it simply refuses to capture the holo of the glitter.  My phone makes the base color appear pinkish, but it does show the glitter much better.  Please note that Red Carpet is a true red with a subtle pink shimmer. 
Soak Off Gel Ruffian

That's all for today.  How do you feel about Ruffian manicures?  Love them?  Hate them?  No preference?

~Michelle

*Red Carpet was provided to me free of charge by Couture as a contest prize.  ArtsyFarsty Crafts Ultrafine Silver Holographic glitter was purchased by me. 
Read more ...

Sunday, December 8, 2013

Wintery Blue Snowflakes

Purchased by Me

Hello lovely readers.  The stamping group challenge for this week is a mani using three blues.  My first thought was that this one would be so easy!  Well, I was wrong.  It certainly isn't easy when you have so many blues to choose from!

You see, I started buying every blue I could find when I was pregnant with my second son.  My oldest son came 5 weeks early due to growth restriction and weighed only 4 lbs and 4 oz.  Since the doctors couldn't say what caused him to stop growing, I was considered high risk and was monitored closely during my second pregnancy.  When I started nearing the third trimester, my second started slowing down on his growth too and I convinced myself that I had to wear blue polish at all times.  Because, well, if I wore any other color I would go into labor and my nails would be the wrong color for his birth.  I know, it was a crazy way to think.  But I guess there's a part of me that is a tad bit superstitious and another part that simply knows I have that kind of luck.  As long as my nails were blue, he would keep growing and developing.  Needless to say, I came up with a lot of different ways to wear blue.  And when his doctors did decide it was time to take him (3 weeks early at 5 lbs 4 oz), I was already wearing the perfect blue polka-dot mani.  :)

But enough about why I have so many blues and onto my current mani.  It took a while, but I finally decided my three blues should be a base, a glitter, and a stamp.  As usual, details below.
I started with a base of Red Carpet Manicure Country Club Chic.  I then topped that with a glitter fade from the cuticle edge using ArtsyFartsy Crafts Ultrafine Light Blue Holographic glitter.  I finished it off with snowflake stamps from Bundle Monster BM-319 and Gals GA-41 in Mundo de Unas Pastel Blue.

Once again, my light box killed the glitter.  Below is a short video to show all it's glittery holo goodness.


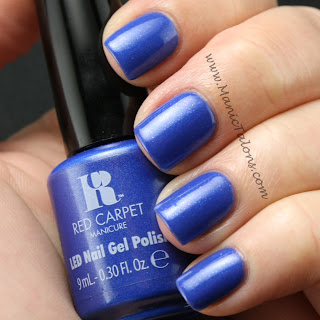
Here's the swatch of Country Club Chic on it's own.  This gorgeous blue shimmer is from the limited edition Hamptons collection.  I personally think RCM should bring this one back as a permanent shade.  It is such a great blue!
Country Club Chic Swatch

Oh, and one more thing...I entered my glittery roses manicure from last week in the MoYou-London December Pinterest Contest (ends December 31, 2013).  Each like counts as one point and each repin counts as two points.  The top three pins win some of the incredible new Fairy Tale plates.  I will be ever so grateful if you will click here to see my entry and like and/or repin it.  Thanks!


~Michelle
Read more ...
Sunday, December 1, 2013

ArtsyFartsy Crafts Glitter Review: When In Doubt, Add Glitter! (pic heavy)

Purchased by Me Affiliate Links

Hello lovely readers.  I hope everyone had a wonderful Thanksgiving.  I spent my down time swatching and photographing some of my glitters from ArtsyFartsy Crafts.  I have a lot of glitter.  A LOT of glitter.  At last count (before I stopped counting many orders ago), I was up to 200 different glitters of varying shapes and sizes.  Over half of them are from ArstyFarsty Crafts.  When it comes to glitter for SOG, AFC is the best I have found.  The owner, Sandy, also uses Soak Off Gel, so she knows what to put in a good mix.  It's pretty much guaranteed that I am going to buy the new mixes every time they are released.

Update:  Sandy just sent me a message that she is extending her Black Friday sale until December 5th, 2013!  Use code CYBERMONDAY for 20% off.  :)

With that said, I'm going to do things a little backward today.  I'm going to start this post with my final mani and work backward to a sampling of glitter swatches.  First things first, you may notice I'm rocking some serious shorties.  I broke a nail last week and had to file them all down even.  Short is not for me, so hopefully they'll grow quickly.  Anyway, here's what I'm wearing.  As usual, details to follow.
Artsy Fartsy Crafts Glitter Manicure

I'm completely in love with this mani.  It reminds me of the velvet and foil art pieces you could find in just about every truck stop in the 80s.  You know...the ones that were usually of either Unicorns or Elvis (I just dated myself, didn't I?).

Rather than break it down as I usually do, let's break it down in pictures.  Under this gorgeous reverse rose stamp from MoYou London's Pro Collection 04 plate, is several layers of SOG and glitter.

The bottom layer is IBD Just Gel Entralled.  This is my go-to shimmery red.  Of course, my light box killed the shimmer, but if you look closely you can still see it, I think.
IBD Just Gel Entralled Swatch

I then scrubbed AFC Ultrafine Red Holographic glitter into the tacky layer of the last color coat of Entralled.  Scrubbing is a simple way to add glitter to a SOG mani.  You simply cure the last coat before the glitter, then use a brush to press the glitter into the tacky layer.  Press the glitter flat on the nail with a plastic bag for a linear effect, or simply pat it on without pressing it flat for a scattered effect.  Blow away any excess and apply your top coat over the glitter to seal it in.  You may want to keep a separate bottle of top coat for glitter, but I simply wipe the brush before putting it back in the bottle to prevent contaminating my top coat bottle with glitter. (Note: These next photos were taken under my ottlite as the light box killed the holo effect)
Red Holographic Glitter

I love Red Holo, but for this mani I wanted something a little deeper, so I added a layer of Gelish Stand Out on top.  Stand Out is a gorgeous, deep red jelly.  This is the resulting ruby red base for my stamped roses.  I added another coat of standout over the stamp in the final mani as well to create a multi-layer jelly sandwich.

I swatched one more glitter on my nails before turning to my swatch sticks for the others I'll show you in a few moments.  This is Autumn Sunset, which is an awesome mix of varying sizes of glitter in fall tones.

I scrubbed Autumn Sunset into the tacky layer of the final color coat of a base of IBD Just Gel Indian Sari.
IBD Just Gel Indian Sari Swatch

Let's keep going with the mixes.  I have a few mixes swatched to show you.  For each of the following, I scrubbed the glitter into a matching base color.

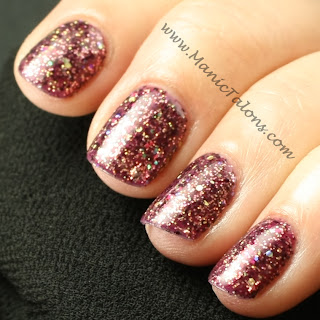
This gorgeous green holo mix is called Poison Ivy.  The holo effect from this one is much stronger than shows in this picture.  I'll show all of the holos in a quick video at the end of this post.  Swatched over Couture Aloe Very.

This next holo mix is a personal favorite.  On the AFC website, it is listed as Red-dy To Go, but my bag came labeled as "Michelle's Red-dy to Pop" as I was only a few weeks away from delivering my youngest son.  :)  Swatched over IBD Just Gel Entralled.

This next mix is not a holo, but is gorgeous none the less.  This one is called Watermelon and is a pink iridescent glitter with larger dark green hexes and black diamonds.  You can also get just the diamonds.  This one is swatched over a base of IBD Just Gel All Heart.

Red, White & Blue is another chunky glitter mix, but this one uses squares, varying sizes of hexes, and strips.  I don't know if you can really see it in the picture, but the base is an ultrafine iridescent white glitter.  Very festive.  Swatched over Ink Glacier.

If you're looking for something a little less bold, check out one of the finer mixes like Sea Urchin.  Iridescent ultrafine glitter with larger aqua and blue hexes, plus a few strips thrown in for good measure.  Swatched over a base of Ink Glacier.

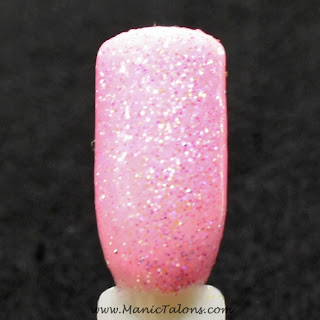
These next mixes are a bit unique as they include glow powder.  Yes, they glow in the dark!  First up, Pink Glow-in-the-dark Glitter Mix.  Swatched over IBD Just Gel I'm No Damsel.
Glow in the dark glitter

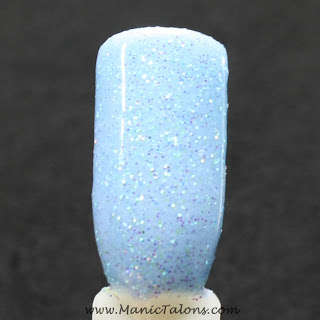
If you're feeling blue, try Blue Glow-in-the-dark Glitter Mix.  Swatched over LeChat Angel From Above.
Glow-in-the-dark Glitter

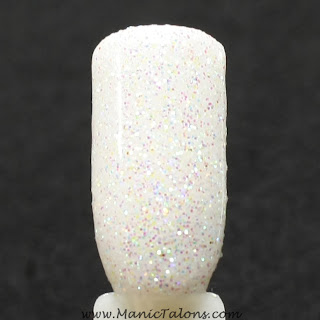
Don't let this Violet Glow-in-the-dark Glitter Mix fool you, it looks white but it glows Violet.  I'll prove it in a minute. ;) Swatched over Ink Glacier.
Glow in the dark glitter

The final glowing mix I have swatched for you is called Northern Lights.  It appears to be sold out, but Sandy is constantly coming up with new mixes that are equally as gorgeous.
Glow in the Dark Glitter

Want to see them in action?  I thought you might.  Top is in full light, bottom is in the dark.  From left to right, Blue Glow-in-the-dark Mix, Northern Lights, Pink Glow-in-the-dark Mix, Violet Glow-in-the-dark mix. 
Glow in the dark glitter
(Note: I forgot to shake Violet before I scrubbed it, and the glow dust tends to settled to the bottom.  When shaken before scrubbing, it glows brighter.  However, it is not as bright as the others.  You can check out the other glowing glitters here.  I have and love them all!  They glow all night.  Seriously, all night.  The first time I wore one, it freaked me out to wake up to feed the baby at 3:00 am and see my nails still glowing.)

Want to see some more Ultrafine holos?  I think I've mentioned before that I'm a complete sucker for holos.  I have the entire set of ultrafine holos from Artsy Fartsy Crafts and was tempted to show them all, but I decided to let my son pick his favorites to show you instead.  I swatched all of these with a scattered look, but they will be much more linear if you press the glitter flat on the nail.

(swatched over Couture Gilded)

(swatched over Gelish My Favorite Accessory)

(Swatched over Couture Little Black Dress)

(swatched over Ink Blue Ice)

Ultrafine Fuchsia Holo*
(Swatched over IBD Just Gel All Heart)
*This one is currently not listed on her website for purchase.  However, she is in the middle of switching her inventory over to her new website so she'll have much more listed in a few weeks.

(Swatched over IBD Just Gel Happliy Brighter After)

(Swatched over Orly Mirror Mirror)

Let's take a blurred look at the Silver.  The picture above does not do it justice!

Want to see the holos in action?  Let's start with my final mani from the beginning of this post.  Excuse how horrible my skin looks.  I had to sacrifice my complexion for the sake of my nails in this video.  ;)


And now for all of the holos and holo mixes.


Whew!  That's all for today.  Check out the Artsy Fartsy Crafts store for a ton of other glitter options, ranging from fine to chunky and everywhere in between!

~Michelle
Read more ...